View by category
How do I upload and organize my submission files in Editorial Manager?
Last updated on May 18, 2026
Watch this short video to see the steps: Video Guide: Uploading submission files in Editorial Manager
On the Attach Files pages of the submission process you will:
- For new submissions: upload a primary submission file for metadata extraction (unless disabled for the journal)
- For revisions: review previous files and determine which should be kept or removed.
- Upload all other submission files either as a compressed file to be unpacked, drag and drop of one or more files, or browsing your computer for individual files.
- Designate an Item Type for each file, from the list defined by the journal
- Check that all required files are present, and that all file details are complete and correct.
- Order the files as they should appear in the PDF
How?
For new submissions, upload the primary file for metadata extraction
When Metadata Extraction is enabled, you will be asked to upload one file the first time you begin the submission process. EM will attempt to extract the metadata such as Title, Author Names, Abstract, etc. from this file. For the extraction process this must be a doc, .docx, or PDF file; you may upload alternative file types as mentioned in the journal's Guide for Authors but the extraction will only be possible for those types.
For tips on preparing this file for the best extraction results, see How do I prepare my files for submission in Editorial Manager? or Video Guide: Manuscript submission with Xtract in Editorial Manager
- After beginning a New submission, select an article type and then proceed to the Attach Files step. The first time you arrive at Attach files you will be prompted to upload a single file. In later visits you will skip this screen and go straight to the full list of files.
- Select the file that contains the metadata of your submission
- For double-anonymized journals, use the title page. For specifics, see What are the requirements for double-anonymized peer review?
- For single anonymized journals, use the full manuscript.
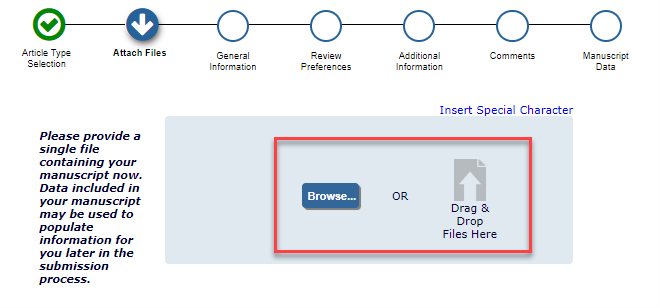
- To upload the file see this screenshot:
- Either drag and drop the file anywhere on the blue shaded box, or use the Browse button to locate the file.
- The page will automatically refresh when the file has uploaded, to show the standard file upload screen. Your uploaded file will be listed at the bottom.
This step appears only the first time you go to the Attach Files step for a new submission. If the journal has not enabled Metadata Extraction for your article type, this step will be skipped; the step is always skipped for revisions.
For revisions, select which previous files to keep
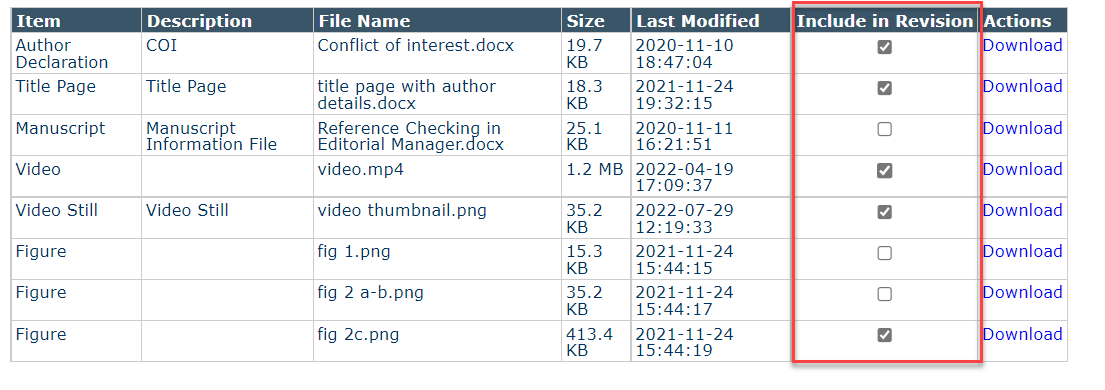
When you first arrive at Attach files for a revision, a table lists all the files of the previous version,. Tickboxes determine which files to will be carried forward into this revision.
In this example, the author is planning to upload a revised manuscript and replace two figures and so has unticked those files. The title page and other files remain ticked because the author has no changes to those files.
Tips:
- Include in Revision may be ticked or unticked by default, depending on journal configuration.
- You should always untick the previous manuscript file. Your revision should only include the new version of the manuscript.
- When other files such as figures or supplemental files need to be updated, untick the previous versions here.
- It is possible that a file from your previous version is not displayed, if the settings for the article type have changed to exclude that file type, or if that file type is enabled for new submissions but not revisions.
When done, click Proceed at the bottom of the page.
When uploading Archives (zip, tar, etc.): In general, an archive file will be unpacked as soon as you upload it. The files will be added to the list without any Item Type or Description and you will need to complete that information in the list. Some journals may have a specific Item Type configured to not unpack archive files, for example LaTeX source files, or Supplemental Files.
Selecting the correct item type before upload is required for files that need special handling such as archive files (zip, tar) that should not be unpacked, or for data repository links.
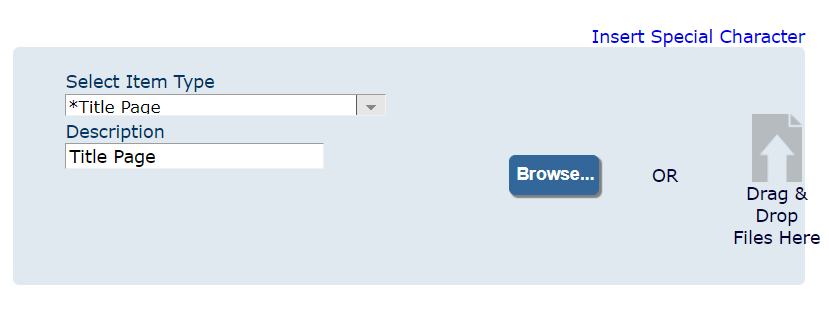
- Select an Item Type from the drop down menu.
- Required types are indicated by *asterisk.
- Item types appear in an order defined by the journal.
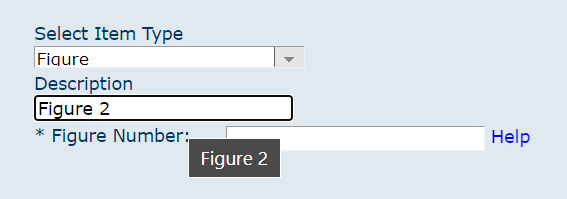
- Optionally update the Description to appear at the top left of the PDF page. This text will auto-populate with the Item Type, you can optionally update the text as in this screenshot.
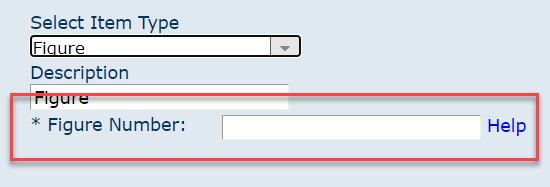
- Additional fields may appear beneath the description after you select an Item Type, for metadata defined by the journal. If these fields are labeled with an *asterisk, that means they are required. There may be a Help link next to these custom fields with more details.
- If you select the Research Data type, the file will be linked instead of uploaded:
- Enter the required details such as Repository Name, Source of the data, and Title of the Dataset. These will be used to link your dataset if the article is published.
- Select the prefix (http, https, etc.) and paste the rest of the link to your research data, following the onscreen instructions.
- Use the Preview button to check that the link brings up the correct file.
- When ready, click Attach This Information
- After entering the Item Type and any required details, upload the file via:
- Drag and drop – drag the file from another window onto the blue shaded area on the screen. Watch a video Drag and Drop Upload
- Browse – click the button to navigate through your computer's file folders to locate the file.
Repeat these steps for each file. Your uploaded files will be listed at the bottom of the screen.
To upload multiple files in a batch
When uploading more than one file, any pre-selected Item Type, Description, and or custom fields will not be applied to the individual files. These details must be updated after the files are uploaded, in the File List.
If you have any Research Data to link, or an archive file that should not be unpacked, then do not use the multiple file upload.
- First make sure all the files are in one folder on your computer for easy selection.
- Upload via one of these options:
- Compress all the files into one archive file (.zip or .tar). Upload this file via drag and drop or browse, and wait for the system to unpack the files.
- In your file explorer, select all the files, drag them over to your browser window, and drop them onto the Drag & Drop target area.
- Click browse and locate the folder with your files. Use the standard multi-select method for your operating system, e.g. hold down CTRL and click each file for Windows.
- Wait for the system to upload (or unpack) all the files.
The files will be uploaded and appear on the file list on the bottom half of the page.
To upload an Archive file (zip, tar, etc.)
By default, if you upload an archive file (zip, tar, etc.) that contains other files, EM will unpack it and handle all the files separately, just as in the 'Upload multiple files in a batch' method.
Journals can define certain Item Types as "do not unpack". That is the only exception, if you select a Type before uploading that has been configured with this option, the file will remain compressed and not be separated out into individual files.
Generally the on-screen instructions, or the name of the Item Type, should make it clear when this option is available. For example, there may be a type called "Supplemental file archive (not unpacked)'. Common uses would be for supplemental files, or for LaTeX source files.
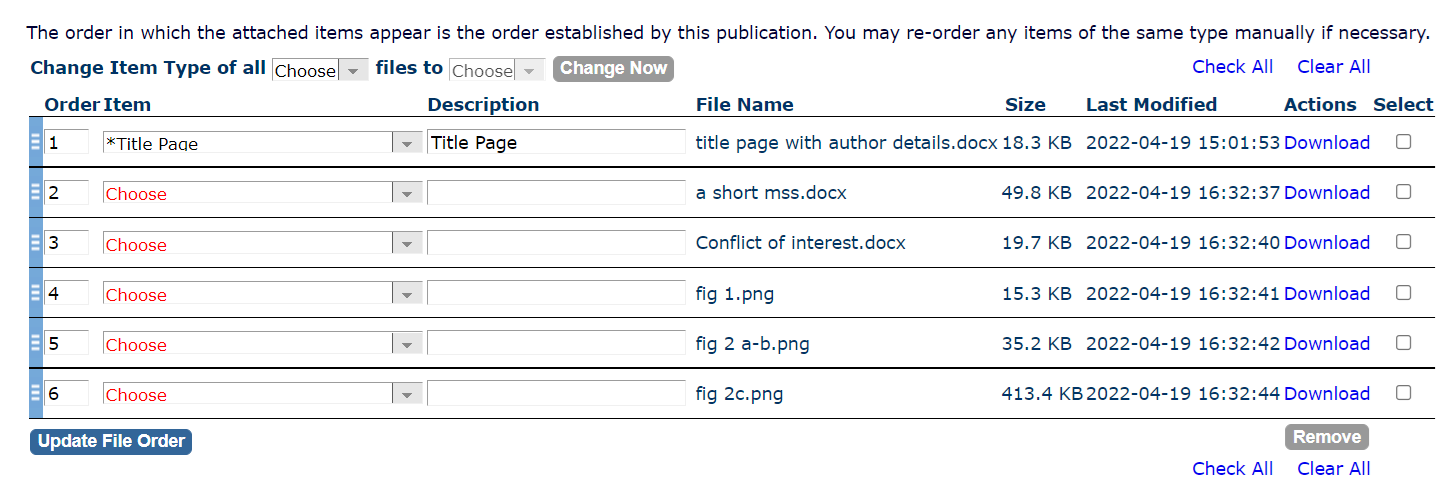
Each journal defines their own list of types; common examples include Manuscript, Figure, and Author Declaration. The PDF cannot be built until all files have been classified with an Item Type.
- Items without an Item Type will show "Choose" in red in the Item column, and must be corrected before proceeding.
- Depending on the file extension you may be restricted as to which of the item types are available to select. For example a journal may set "Figure" to allow only common image file extensions.
- If you select a file type before uploading but that type is not configured to allow the file extension, then the Type will be set to "Choose" and you will need to pick another.
- To change all files with a specific file extension to the same Item Type, use the "Change Item Type of all " tool at the top of the list. For example after unpacking an archive of figures you can change all ".png" files to type "Figure" in a single action.
Reviewers will see the Description text; do not use any author names or other identifiers here.
If the journal has defined a set order for the file types, then your choice of order may be overridden. In that case files will be ordered first by type in the order set by the journal, and only when there are multiples of one type will you be able to set an order. For example, a journal may define the order as Manuscript, Figures, Author Declaration. You may order the figures in any way you choose, but they will always appear after the Manuscript, and before the Declaration.
- Prepare your files as in How do I prepare my files for submission in Editorial Manager?
- Log into the submission site as an author and on the main menu select the appropriate option:
- My New Invitations or Submit Invited Manuscript if you have received an invitation to submit.
- Submit New Manuscript to start a new submission.
- Submit Revision if the editor requested a revision.
- Sent Back to Author if you have been asked to update an existing submission.
- Incomplete Submissions or Incomplete Revisions if you already started the submission.
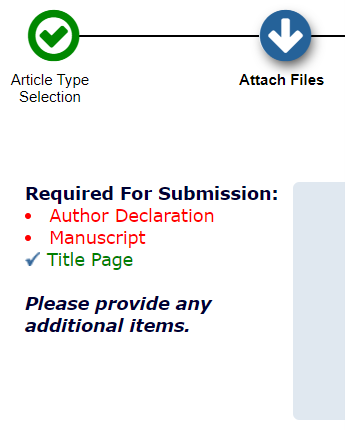
- Select an Article Type, then proceed to the Attach Files step. Depending on whether this is new or revised you will see:
- After the primary file is uploaded for new submissions, or you have reviewed the previous files for revisions, the screen refreshes to allow you to attach the remaining files.
At the left, a list of all required file types appears, with missing files in red. Under that list, the journal may have custom instructions.
- Upload all your remaining files now.
- Complete the Item selection column: specify what type of file this is, from the list of types defined by the journal. Refer to onscreen instructions or the Guide for Authors for clarification.
- Check the Description column for each file. When the PDF is built, this text is displayed in the top left corner of the page.
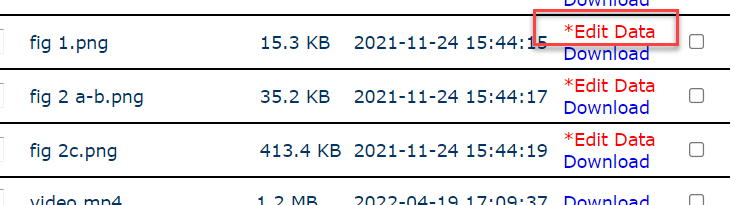
- Check the Action column: if the selected Item Type requires information from you, such as figure numbers, there will be an "Edit Data" link in this column. The link will be red if required information is missing. Click Edit Data to view and edit the details.
- Check and adjust the file list as needed:
- Look for any red text in the Item or Action columns.
- Check the list of required file types at the left, above the file list. Any missing required items will be flagged in red.
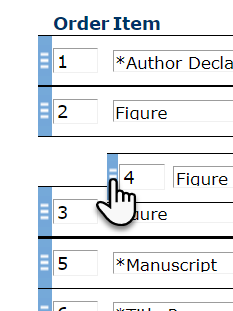
- To reorder items, there are two options:
- Click the blue handle to the left of the row, and drag it to a new position.
- Or adjust the numbering in the Order column and click Update File Order.
- When finished with the files, click 'Proceed' to continue to the next submission step.
When you have fulfilled all requirements there will be no red text in the upper left list of required filetypes, or within the file list itself.
Additional Questions
If you do not see an appropriate Item type for a file, this means either:
- The journal has a different name for the Item Type than you expect.
- The journal is not expecting this Item Type for this Article Type. This might be either because it is unusual, or because they do not allow it.
- The journal expects this to be part of the manuscript (or some other file), rather than a separate file.
Check the journal's Guide for Authors for the name and description of the files expected and/or required for submission, as well as what components should be included in the manuscript rather than separate files.
Some names that can be used for the same types by different journals:
- Supplemental Files can be alternately called e-components, multimedia files, or defined as different individual types such as Video, Audio, etc.
- All journals should require an item type for an Author Statement, this can be called many different names or acronyms such as Conflicts of Interest, COI, Competing Interests, Declaration of Interest Statements, Funding Source Declaration, Author Agreement, Author Declaration or Permission Note.
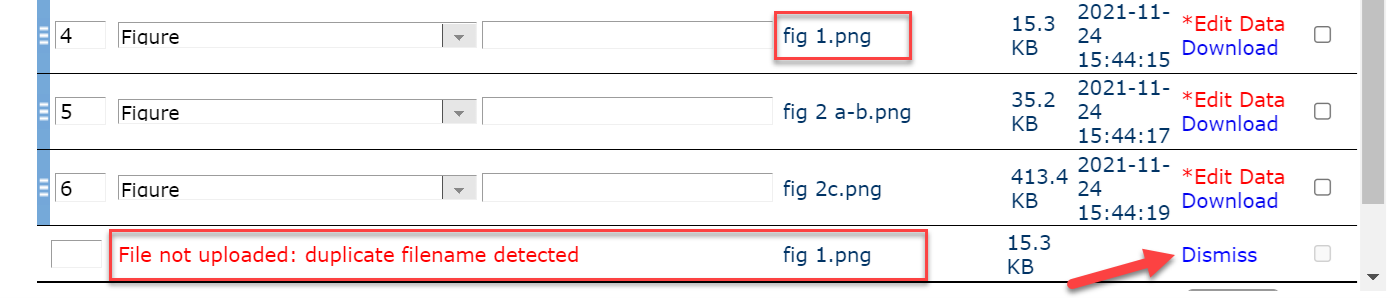
Errors that prevent file upload, such as duplicate filenames, are shown by an error message in red instead of the Item Type and Description. Read the error, and click Dismiss to clear it away. If you leave the page without dismissing these errors, they will be gone when you return.
- Files that were uploaded but are missing some required information are marked in red. Common examples include:
- Item type to be selected: select the appropriate type
- Missing Details: click the Edit Data link to open a popup and enter the missing information. Then click Save Changes
- It is possible that a file can be uploaded without problems but cause errors in the PDF, see What should I do if my file upload fails? For more help.
When you have completed uploading files and addressed any warnings and errors in the file list, you may click Proceed at the bottom to go to the next submission step.
Did we answer your question?
Related answers
Recently viewed answers
Functionality disabled due to your cookie preferences