How do I import a Word document?
Last updated on November 06, 2025
If you've created content offline, you can import a Word .docx file into Elsa to take advantage of tools like Publishing Assistant and easily share work with collaborators.
Before You Begin
- File format: Only .docx files are supported.
- Figures: Can be embedded directly into the Word file (no need to upload separately).
- Supported image types: JPEG, PNG, TIFF, EPS, CDX (max size: 100 MB).
- EndNote field codes: Turn off content control or export to plain text before importing.
- Review Formatting Requirements and Troubleshooting a Failed Import section below
Best Practice:
Contributors should import their Word files directly into Elsa rather than sending them to editors or Elsevier staff. This ensures better control and accuracy of the imported content.
Important Notes
- Imported content is added to the bottom of the page (to avoid overwriting collaborators’ work).
- Make edits directly in Elsa after import.
- To delete old/duplicate content:
- Select and delete it, or
- Create a new chapter, import your content there, and delete the old one.
Authors are encouraged to remove content themselves in Elsa for clarity and accuracy.
Troubleshooting
- If the import fails or the formatting is incorrect, refer to the section “Formatting Requirements and Troubleshooting a Failed Import.”
- Still stuck? Contact the Elsa Support Team via the contact options at the bottom of this page for help.
Tip for Previous Editions
For previous edition content, we recommend making your edits directly to the content that has already been imported to Elsa rather than working offline.
- Open your chapter:
From the Home page, click on your project name, then select the chapter you want to import your Word file into. - Go to the Home tab of the toolbar:
Once inside the chapter, click the “Home” tab on the toolbar. Click the “Word Import” icon:
You'll find this at the far right of the toolbar.
Tip: If you don’t see the icon, try zooming out in your browser window.
Select your file:
In the Word Import modal window, click “Browse” to choose your .docx file, then click “Next.”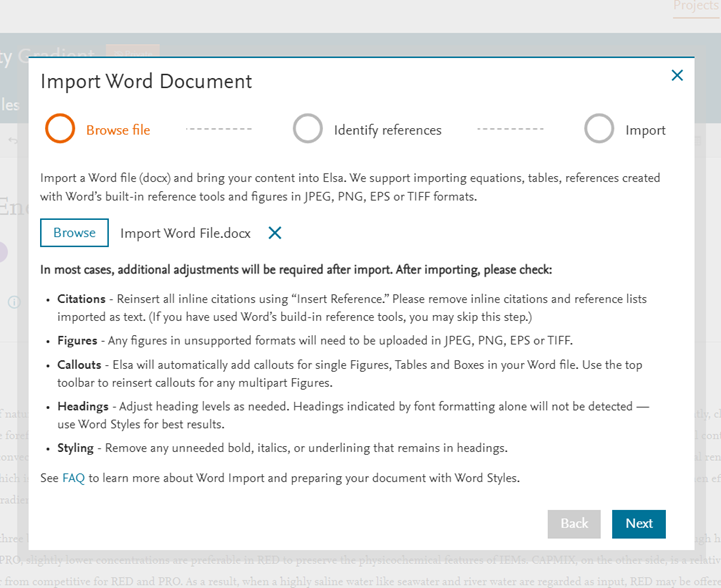
Choose your reference style:
Select the appropriate reference style for your content, then click “Start Import.”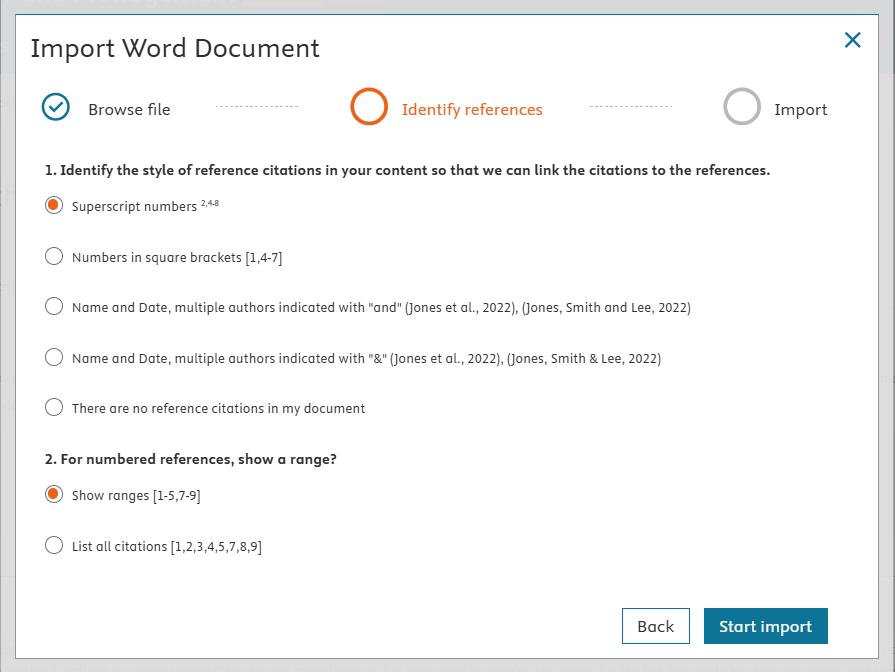
Note: When importing numbered references from Word into Elsa, you can choose to display them either as a continuous range or as individual entries listed separately.
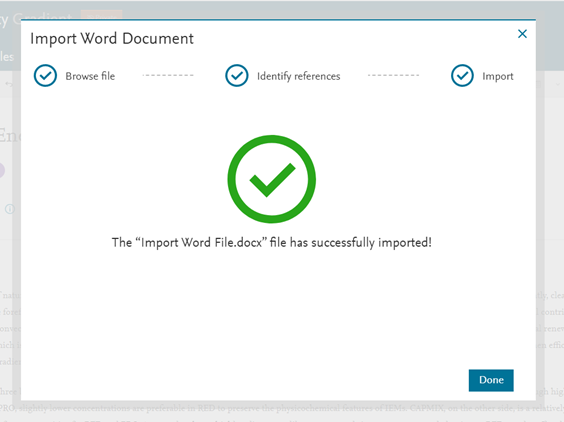
You'll see a success message. Click “Done” to view your content in the Write Space.
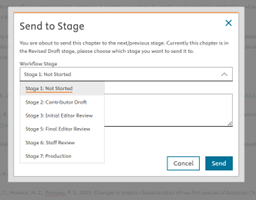
- To move forward:
Use “Exit & Send” under the “Exit Chapter” icon.
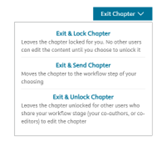
Only editors/authors should send to the Staff Review stage.
Each project has a master reference style. If your Word file uses a different one:
- Elsa will try to reformat references to match the project style.
- If any references aren't recognized, they'll remain unchanged. You’ll need to link them manually within Elsa.
See: “Link your references/create in-text citations” in FAQ "How do I work with References in Elsa?"
For questions about your project’s style, contact your Content Manager or Editor.
Elsa does not recognize ShapeArt or Text boxes. We recommend either importing your content and then adding the content to boxes after import or structuring your Word file in a format where Elsa can recognize boxes:
Create a series of underscores above and below the content ensuring Word does not create an auto-line when inserting a series of underscores (you will know if this has occurred because you will receive an alert in Word and a widget will appear where the line is created). See the same Word file document for an example.
____________________________
Unnumbered Box 1.1
Alice was beginning to get very tired of sitting by her sister on the bank, and of having nothing to do: once or twice she had peeped into the book her sister was reading, but it had no pictures or conversations in it, “and what is the use of a book,” thought Alice “without pictures or conversations?”
So she was considering in her own mind (as well as she could, for the hot day made her feel very sleepy and stupid), whether the pleasure of making a daisy-chain would be worth the trouble of getting up and picking the daisies, when suddenly a White Rabbit with pink eyes ran close by her.
______________________________
Figures should be named as Figure including the chapter and asset number i.e. Figure 1.1
If you created a multi-part figure inside of a table, Elsa will import this as a figure inside of a table or as individual figures. We recommend building multi-part images directly in Elsa using the Figures icon on the toolbar. By building your figure directly inside Elsa, you can also more easily include the relevant permissions information.
Elsa does not currently have the option to create numbered sub-headings so these will not be recognized upon import (see How do I insert headings?). If you would like to create numbered sub-headings, we recommend adding numbering beside the imported headings.
Elsa should recognize tables on import but please be aware that Elsa does not support tables inside tables/nested tables.
Elsa uses a MathType equation-builder and most equations should be recognized automatically upon import. If your equations did not import check the below items:
- Elsa does not support LaTeX in the Write space and they will not appear on import. LaTeX should be uploaded to the LaTeX files tab.
- The equations may have been created in an old or outdated file type. Right-click on the equation in your Word file to confirm that it is editable and not saved as an image. Please contact our support team or your content manager if you notice the equation is an image.
- You may need to adjust your settings in Word
Standalone/numbered equations: Elsa currently only recognizes equations as inline during Word import. To show an imported equation as standalone/numbered either clearly label the equation with the correct numbering if needed i.e. Equation 2.1 or copy and paste the equations into Elsa's equation-builder as numbered equations (see How do I add Formulas/Equations?)
Elsa uses Elsevier’s referencing service used by other products such as ScienceDirect, Scopus and more to link your references and complete any missing information. It is important for references to be linked for publication as well as to generate a reference list vs. general bibliography. Bibliographic entries can be added as “Further Reading” entries.
Elsa supports Elsevier’s 9 standard reference style. Any other reference style will not import successfully. Elsa does not support IEEE reference style.
Elsa does not support EndNote field codes. These should be switched off by exporting a plain text version of your document and then importing. Instructions can be found here.
Similarly, Elsa does not support references created as end or footnotes. If you Word file contains references as foot or endnotes, contact our Support team for a workaround.
Word files must Include in-text citations in order for Elsa to recognize references and there should be a corresponding in-text citation for every reference list entry. Bibliographic entries will appear as unlinked and should be added to a Further Reading List.
In-text citations should be styled in a standard style i.e.
- For name/date style, a comma in between the name and date
- Bracketed number style references should be included in brackets not parentheses
- Have a space between the prior word and the start of the citation unless using a superscript style
Reference lists should be titled as References in order for them to successfully import.
We understand many authors like to structure their Word files in outline format but the Reference list should not include a number before the title i.e. 6. Reference List. This will cause the list to fail to import.
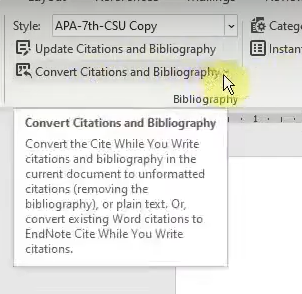
Only the creator of a document containing EndNote field codes can turn them off/create a new plain text version.
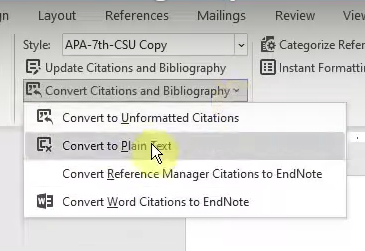
Select Convert Citations and Bibliography in the Bibliography section of the toolbar
Select Convert to Plain Text from the dropdown menu
Select Ok to Create a new version of your document
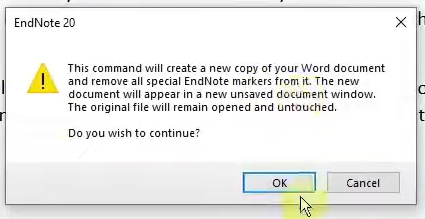
- Select Save As to save the new plain text copy of your document without writing over the previous version.
We recommend checking your references after import to ensure that they are linked. Check the Formatting Requirements section as a first step before trying the options below.
Option 1: Link Citations Icon
Steps:
- Go to the Home tab in the toolbar.
- Click the “Link Citations” icon.
- Select the reference style used in your original Word file.
- Click “Start Identification.”
Important Note:
Elsa looks for unlinked references at the bottom of the Write Space. Check the Fo
- If you uploaded only an RIS file without embedded references, paste your full reference list at the bottom of the Write Space so Elsa can match in-text citations to your references.
Option 2: Manually Link Citations
Use this method if the Link Citations tool doesn’t identify all references or if you need finer control.
Step-by-step:
- Find unlinked references:
Scroll to the bottom of your imported text. Unlinked references will appear before the Elsa-generated reference list (which is marked with a purple heading). - Check the reference library:
- Go to the Insert tab in the toolbar.
- Click the “References” icon.
- In the “Library” tab, confirm the unlinked references are present.
- If any are missing, paste them into the library using the “Paste” button.
- Insert the reference manually:
- In the Write Space, locate the unlinked in-text citation (search for the author’s last name or reference number).
- In the Reference Library, select the correct reference and click “Insert as Reference.”
- Delete the old unlinked citation once the linked one is in place.
Did we answer your question?
Related answers
Recently viewed answers
Functionality disabled due to your cookie preferences