View by category
How can an Editor manage groups of linked submissions?
Last updated on June 02, 2026
Submissions can be linked together in Editorial Manager (EM), to allow Editors to view and manage related submissions. Editors can view the status of a group of linked submissions in one screen and move between linked submissions quickly.
Adding submissions to a group means that any editor who has permission to view Linked Groups, and has been assigned to one submission within the group, will be able to see the basic information about all of them, including title, author names, and status as well as the PDF. Editors with permission to 'View all submissions' would already be able to see that much detail and more, but a Linked Groups allows editors with restricted permission to view the status of a group of submissions even when they could not otherwise view those submissions at all. The only exception is when an editor is restricted from seeing a specific submission.
Additional functionality is available to share reviews between submissions, and to tag submissions to be linked when published online.
How
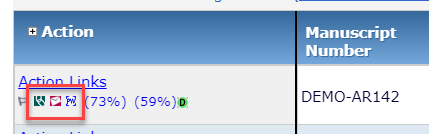
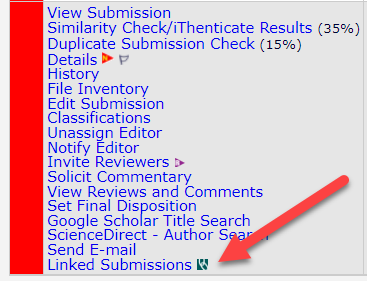
In Editorial Manager, Linked Submission icons are displayed next to the action for Linked Submissions in the Editor folders, providing immediate visibility to the fact that the Submission belongs to a Linked Submission Group.
There are three possible Linked Submission flags:
 Standard Linked Submission Group.
 Letter to the Editor Linked Submission Group.
 Linked Submission Group with a "Publish With" tag.
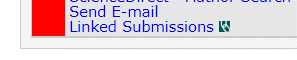
When the action menu is collapsed, any Linked Submission Group flags display just below, along with any other submission flags. In this example , the submission is a member of at least one regular group, a Letter to the Editor group, and it has a Publish With tag.
To view Linked Submission Group details from a submission
- In any editor folder or search results, look for a Linked Submissions link in the action menu , this appears for any submission that is a member of one or more groups.
- Editors with permission to manage groups always see the link. Editors with view-only permission for groups will see the link only when the submission is part of a group.
- Submissions already in a group will display one or more flags after the link.
- The link will never appear for submissions that do not yet have a manuscript number.
- Click the Linked Submissions action link for that submission.
- The Linked Submission Group page appears; the manuscript number is at the top to confirm which submission you came from.
- If you have permission to manage groups there are three buttons at the top of the page:)
- Add to Group button with a drop-down list to select a group.
- Assign Publish With ID button , if the submission has not already been assigned to a Publish With tag.
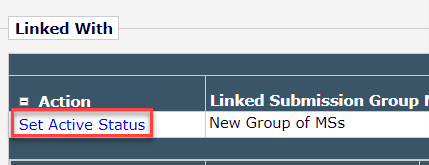
- A 'Linked With' table appears for every group this submission is part of.
- At the top of each 'Linked With' table you may see action links for the group , depending on your permissions:
- Add Submission to search for and add additional submissions.
- Edit Linked Group to edit the name and settings of the group. This leads to the same Edit Submission Group screen as if you reached the submission group directly from the main menu.
- Set Inactive/Active status to toggle the status of the group.
- Clear Group to remove all submissions from the group in one action.
- Each 'Linked With' table shows all the submissions in the group (except for any submission you have been forbidden to view).
- For each submission in the group, you will see a few action links, depending on your permissions and whether you are assigned to that submission.
- View Submission always appears, and opens or downloads the submission PDF depending on your browser.
- Details appears only for assigned editors, or for editors with View All Submission permission, and opens the usual details popup window.
- Go to Submission appears only for assigned editors, or for editors with View All Submission permission. It brings you to a folder containing only that one submission, with the full menu of all actions possible based on submission status and your permissions.
- Remove Submission appears only for editors who have permission to manage Linked Submission Groups.
To search for submissions that are in any Linked Submissions Group
- In search submissions, enter the following :
- Linked Submission Group Name
- Is not Equal to
- (Leave the Value blank)
- Then click Search.
- All submissions that have a Publish With tag, and that you have permission to view, will appear.
Alternatively, if you know part of the group name you can search by 'contains' with a key word for the value.
- Select Active Linked Submission Groups . From your Editor Main Menu, or alternatively the Inactive Linked Submission Groups.
- If you do not have these links at all on your main menu, it means you do not have permission to view Linked Submission Groups.
- If the folders appear but are not hyperlinked, it means there are no current groups that you can view.
- Editors who are restricted to view only their own assignments, will only be able to discover a group where they were assigned to at least one of the submissions.
- For the group you want to view, click on View Linked Group .
- For editors with permission to edit group settings, the link will be "Edit and View Linked Group".)
- You will only see groups where you have permission to view at least one submission in the group.
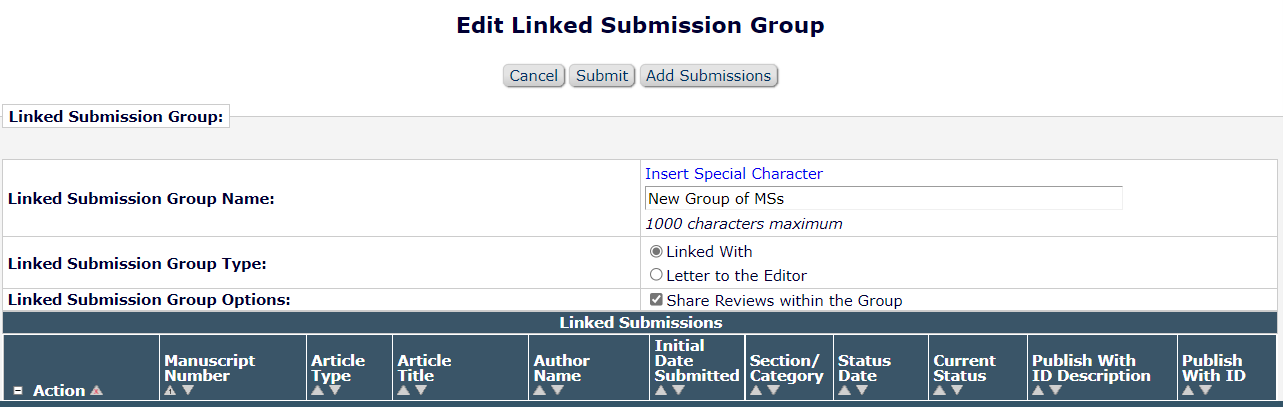
- For Editors with permission to manage Linked Submission Groups, the top part of the scree n will have:
- Submit button to commit any changes
- Add Submissions button to search and select additional submissions for the group.
- Linked Submission Group Name to update the name of the group.
- Linked Submission Group Type to toggle between Regular and Letter to the Editor types.
- Linked Submission Group Options: to enable or disable Review Sharing.
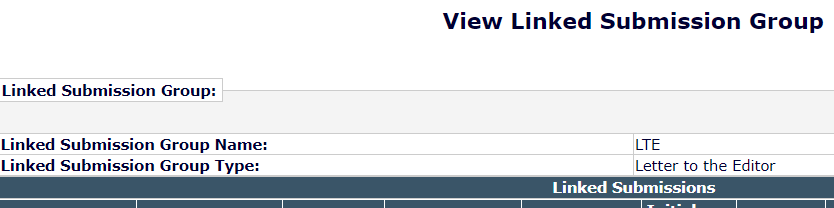
- For editors who can only View Linked Groups, the top part of the screen will show the name and type, with no way to edit.
- Under that is the table of submissions in the group, with action links for each
- View Submission always appears, and opens or downloads the submission PDF depending on your browser.
- Details appears only for assigned editors, or for editors with View All Submission permission, and opens the usual details popup window.
- Go to Submission appears only for assigned editors, or for editors with View All Submission permission. It brings you to a folder containing only that one submission, with the full menu of all actions possible based on submission status and your permissions.
- Remove Submission appears only for editors who have permission to manage Linked Submission Groups.
Note that any submissions you have been explicitly restricted from seeing will be hidden.
Editors who have 'View All Submissions' permission already can see details about any submission they have not been explicitly restricted from seeing. The Linked Submission Group function gives no additional information to these editors. It only gives an easy way to locate replated submissions.
Editors who normally can only view their own assigned submissions, and are then given permission to View Linked Submission Groups will find information in the group they could not get any other way:
- Submissions in the group that the editor has not been assigned to, and therefore usually could have no way of discovering, are listed with basic information:
- Manuscript Number
- Article Type
- Article Title
- Corresponding Author Name
- Initial Date Submitted
- Section/ Category
- Status Date
- Current Status
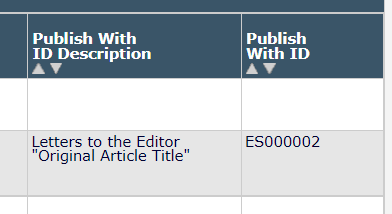
- Publish With ID Description
- Publish With ID
- The Editor can view the PDF of all the submissions in the group, and depending on what details are configured to appear on the PDF Cover Page may see additional information about the submission.
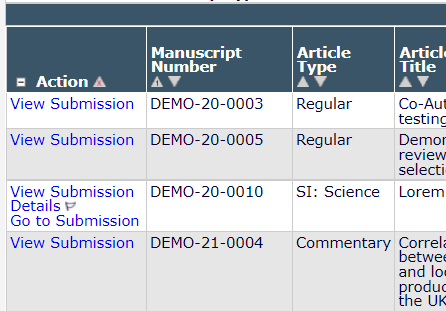
In this example , the editor is assigned to only one of the submissions in the group, DEMO-20-0010.
- Because the editor is restricted to view only their own assignments, the other submissions have only the 'View Submission' action available:
- Because the editor has view-only permissions for Linked Submission Groups, there are no 'Remove from Group'
If the information available through Linked Submission Groups needs to be hidden from a certain editor there are two options:
- The editor could be explicitly restricted from seeing individual submissions. This must be done one-by-one, but prevents the editor seeing that submission in any view or search result.
The editor role could be updated to remove the permission to view submission groups altogether. This would affect all editors with the same role, and all groups. Contact your Journal Manager or other Support contact for assistance.
A new Linked Submission Group must be started from an existing submission.
- Locate the starting submission, either in a Main Menu folder or via 'Search submissions'.
- From the Action links select 'Linked Submissions' .
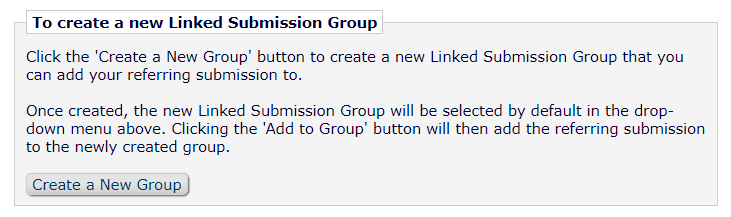
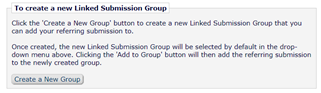
- Click on the 'Create a New Group' button to set up a new group.
- Enter a 'Linked Submission Group Name' . Note that journals may customize the character limit.
- Select the appropriate 'Linked Submission Group Type'>.
- Choose 'Linked With' in most cases.
- Letter to Editor: when working with Solicit Commentary to invite authors to respond to other submissions.
- Optionally enable Shared Reviews as described below. This allows editors to include completed reviews from grouped submissions when inviting reviewers for any submission in the group.
- Click 'Submit' to create the group.
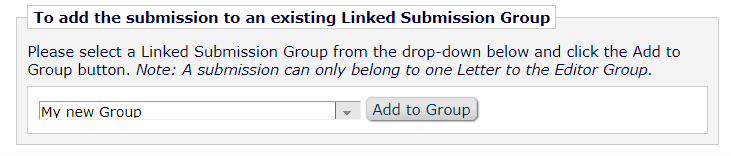
- You will return to the submission's Add to Linked Submission Groups page, with your newly created group selected .
- Click the 'Add to Group' button to complete the action.
- Click OK to confirm.
Just creating the group does not add the submission, you do need to click Add to Group after the new group has been created and saved.
Once the Group has been created, additional Submissions can be added to the group at any time (until the group is inactivated).
Each submission can be in any number of regular Linked Submission Groups, but only one 'Letters to the Editor' type of group.
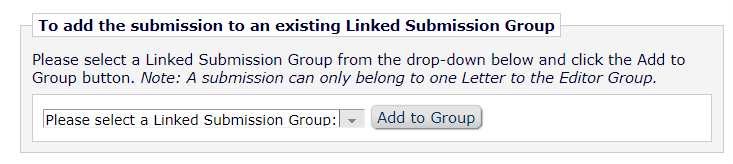
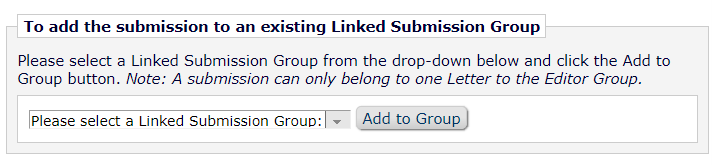
A single Submission can be added to an existing group:
- Click on the 'Linked Submission' Action link for the submission to be added.
- Click the 'Add to Group' button.
- Click OK to confirm.
Once a Submission has been added to a group, it is displayed on the 'Linked Submissions' page, and a Linked Submissions icon is displayed in search results and system folders.
To add multiple submissions to a group
Multiple submissions can be searched and added to an existing group by editors with permission to manage Linked Submission Groups:
- Get to the 'Linked Submissions' page for the group in one of these ways:
- From any submission in the group, click the 'Linked Submissions' action.
- From the 'Active Linked Submission Groups' folder on the Editor Main Menu, click 'Edit and View Linked Group'.
- Click on the 'Add Submission' link or button, and a Search Submissions selection criteria screen appears.
- Enter your Criteria and click 'Search'.
- In the search results, select the appropriate submissions to be added to the group. (The 'Select' checkbox is suppressed for Submissions that already belong to the group).
- Click 'Add to Group'.
- Clock OK to confirm.
To keep the list of Groups manageable over time, Linked Submissions Groups can be inactivated. An Inactive group can still be viewed from the member submissions or in the 'Inactive Linked Submissions Groups' folder, but has no edit functions and is not listed as an option when linking submissions. Submissions can be removed from an inactive group, but not added.
Editors with permission can toggle Linked Submission Groups between Active and Inactive: If the links to do so are missing, it means you do not have permissions. Your Managing Editor, Journal Manager, or other contact can make the update for you.
To toggle the Active/Inactive Status starting from a submission in the group
- From a submission within the group, click the Linked Submission action link.
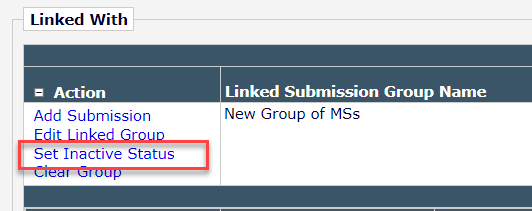
- On the page " Linked Submissions for Manuscript Number …" locate the group you want to update.
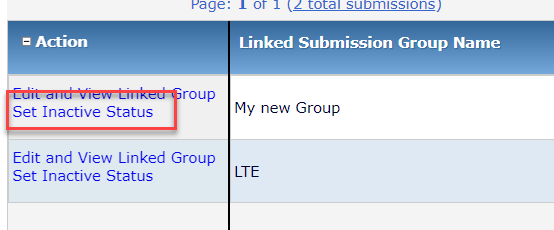
- If the group is currently active, select Set Inactive Status then click OK to confirm.
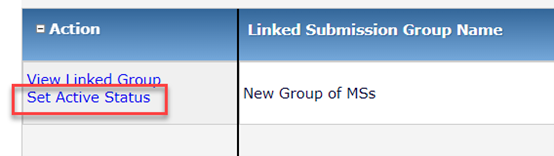
- If the group is currently Inactive, click Set Active Status then click OK to confirm.
- The screen will refresh to show the changed status of the group.
To toggle the Active/Inactive of the group from your Main Menu
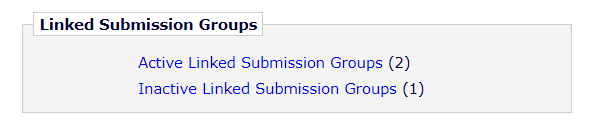
- Scroll down to the Linked Submission Groups section of your main menu.
- To inactivate a group, click Active Linked Submission Groups and then click Set Inactive Status next to the group, then click OK to confirm.
- To activate a group, click Inactive Linked Submission Groups and then click Set Inactive Status next to the group, then click OK to confirm.
Letters to the Editor Linked Submission Groups add additional functionality when used together with Solicit Commentary.
When a commentary is solicited for a submission that is part of a Letter to the Editor Linked Submission Group, the submitted commentary is automatically added to the group.
To Toggle a Linked Submission Group between regular and Letters to the Editor type:
- From the Linked Submissions page of a member submissions or from the Active/Inactive Linked Submissions folder on your main menu, click the link to Edit the group.
- Change the Linked Submission Group Type option.
- Click Submit to save the change.
Example of Letters to the Editor in use
A letter is submitted in response to a previously published article. The letter and the previous article are linked together in a Letter to the Editor group. The Editor uses Solicit Commentary on the letter to invite the Author of the previously published article to comment on points made in the letter.
When the invited Author submits the Response to that letter, the system automatically adds it to the list of submissions that make up the Letter to the Editor group.
This can be extended, the editor could now Solicit Commentary again on the Response, and invite the author of the first Letter to respond to the response. Again, when the invited response is submitted it will automatically be part of the Linked Submission Group.
Submissions within a Linked Submission Group can be tagged with ( ) 'Publish With', which includes a text label and unique ID number for those submissions. The tag details are shown when looking at a Linked Submission Group . If a submission is accepted, this 'Publish With' tag will be automatically sent to production.
- Upon publication, the grouped submissions can be linked as "Refers to" and "Referred to by" online, even if they are published in separate issues.
- Submissions tagged for Publish With are not guaranteed to publish in the same issue, especially if they are accepted at different times.
- Publish With tags are not required for Special Issues, the Special Issue Article Type will ensure those submissions remained grouped after acceptance.
- Submissions tagged for 'Publish With' are shown by a PW (
 ) flag next to 'Linked Submissions' in the action menu. Editors must have permission to view Linked Submission Groups to see this tag.
 - In some journals, the Journal Manager will administrate Publish With tags for submissions. Only editors with permission to manage Linked Submission Groups can update the Publish With information.
- A submission can only have one 'Publish With' tag, no matter how many groups the submission is linked to.
Common uses of the Publish With function
The Publish With tag is primarily used to prompt Elsevier's production team to add 'Refers-to' links between articles. These appear online so that readers can easily move between the related articles. If linked submissions are accepted at around the same time, depending on the publication speed of the journal, the articles may be able to be published in the same issue, but this is not always feasible.
Some common scenarios include:
- When a commentary is received related to some published submission, the two could be added to a Linked Submission Group and then tagged as "Published With" In this case, the Publish With Description should include the Manuscript Number and Title of the already published article. When the commentary is accepted, the tag description will be sent to production. This will flag the submission for the production team to add a "Refers to" tag that will create cross-linking between the two articles online.
- When a group of related articles are under review, they can all be added into a Linked Submission Group and tagged with a Publish With ID. When any of them are accepted, that tag will prompt the production team to watch for related submissions, and potentially keep them together in one issue (depending on the journal's policies). Whether they are published in the same issue or not, the production team can add Refers To tags to cross-link them all online.
- When authors submit related articles as Part One, Part 2, etc., or submit a follow-up for a previous submission, they can all be added to a Linked Submissions group and tagged for Publish With. As articles in the group are accepted, the Publish With tag will prompt the production team look for the related articles, either published or not, and add the Refers To tags that will form online cross-linking.
To find all submissions tagged as 'Publish With'
Tagging Publish With IDs can only be done by starting from the 'Linked submissions' action of a submission. The tag is defined for a submission, and then applied to additional submissions through Linked Submission Groups.
It is possible to search for submissions already tagged as 'Publish With', even without knowing the details of the submission or the tag.
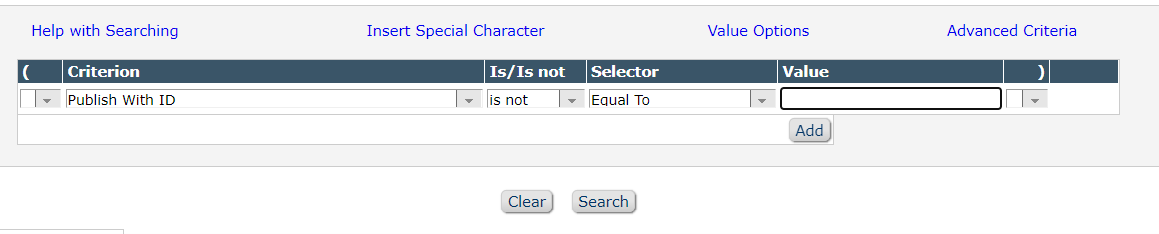
- In search submissions, enter the following criteria :
- Publish With ID
- Is not Equal to
- (Leave the value blank)
- Then click Search
- All submissions that have a Publish With tag, and that you have permission to view, will appear in search results.
- Click the Linked Submissions action for any of the submissions to see what other submissions share the tag .
If you know the text you are looking for within the 'Publish With Description', you could instead search for key words with the 'contains' selector.
To add submissions to an existing Publish With tag
If submissions being tagged are already Accepted, adding a tag after the fact will not trigger anything. The tag will only be sent to production if it is place at the moment the submission is accepted. Contact your Journal Manager to request 'Refers to' cross-linking on a group of already accepted submissions.
- Locate a submission that already has the tag. You can only apply an existing tag by starting from a submission that been tagged.
- If you know the submission, locate it in any Editor folder, or via Quick Search in the top navigation bar.
- If you don’t know the details, you can search for all submissions tagged as Publish With as described above.
- Click the Linked Submissions link for a starting submission that currently displays the PW (
 ) flag.
 - Check the Linked With table(s), and find the submission that you want to add to the tag. If you do not find the submission you want to tag:
- Click the Add Submissions link for the Linked With group:
- Search for the submission(s) to be added, and tick to Select.
- Click Add to Group
- You will return to the original Linked Submissions page, where you can proceed.
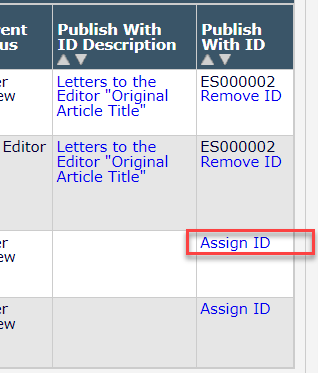
- Click the 'Assign ID' link in the Publish With ID column to add the tag to any other submission.
It can be the case that submissions within one group have different Publish With ID tags. When you click Assign ID, you will be applying the tag currently associated with the 'referring submission' (the one you started from) as indicated by the manuscript number at the very top of the screen.
If you remove a tag from all submissions at once, then then tag definition will be deleted by the system and cannot be reactivated.
The Publish With tag can be removed from a submission at any time prior to Acceptance. After acceptance, removal would not have any effect; contact your Journal Manager if you need to remove cross-linking after acceptance.
- Locate the submission that needs to have the Publish With tag removed.
- Click Linked Submissions
- Within the Linked With table, find the relevant submission and click Remove ID in the Publish With column.
If there is no "Linked With' table, the submission must have been tagged for 'Publish With' and then removed from the group without removing the ID tag. In that case the Linked submission page will display the Publish With tag details at the bottom , without any way to change or remove it. In this case the only way to remove the Publish With tag is to temporarily add the submission to any group, remove the Publish With ID, then remove the submission from the temporary group.
To define a new 'Publish With' tag
If submissions being tagged are already Accepted, adding a tag after the fact will not trigger anything. The tag will only be sent to production if it is place at the moment the submission is accepted. Contact your Journal Manager to request 'Refers to' cross-linking on a group of already accepted submissions.
- Locate the starting submission in any folder or Search results, and confirm it does not display a PW (
 ) tag next to Linked Submissions.
 - Click Linked Submissions.
- If the submission is not already part of a group, add or create one now.
- In the 'Linked With' table(s) check if any related submissions have Publish With tags already in the right-hand column.
- If so, and you want to apply an existing tag to this submission:
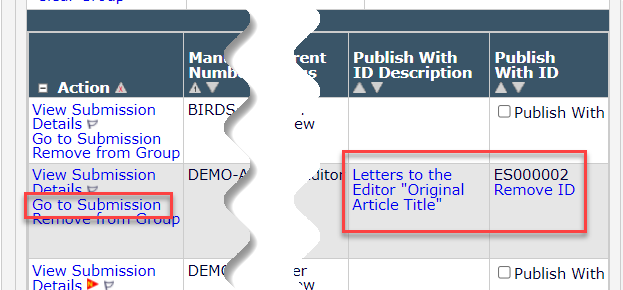
- Click the "Go to Submission" link for the relevant submission.
- Click the "Linked Submission" for this submission
- Locate your target submission and click Apply ID.
- Tick the box under Publish With ID for this submission and any related submissions you want to include in the tag.
- Remember that tagging only one submission has no effect, there must be at least two submissions to have cross-linking in the published articles.
- If needed, you can click 'Add Submission' for any of the Linked With groups now, before defining the Publish With tag.
- Check above the first Linked With table, and click the Assign Publish With ID button .
- You will get an error message if you have not ticked at least one submission; the tag must be defined in relation to one or more submissions.
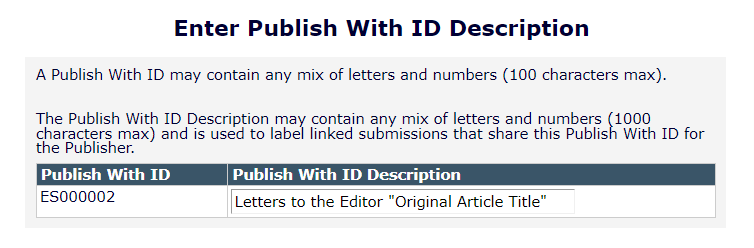
- Type in a name for the Publish With ID Description, that describes why these submissions should be linked
- Journals may customize the character limit for the description.
- The Publish With ID number should be filled in automatically and is formatted for use in Elsevier's production tracking system. If the number is blank, cancel out and contact your Journal Manager to check the configuration before proceeding.
- Click the Submit button to save the changes.
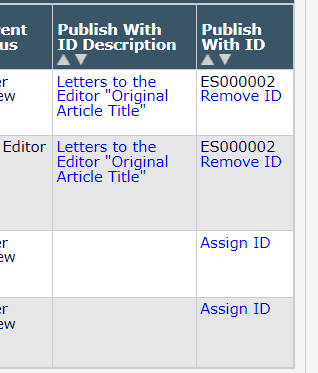
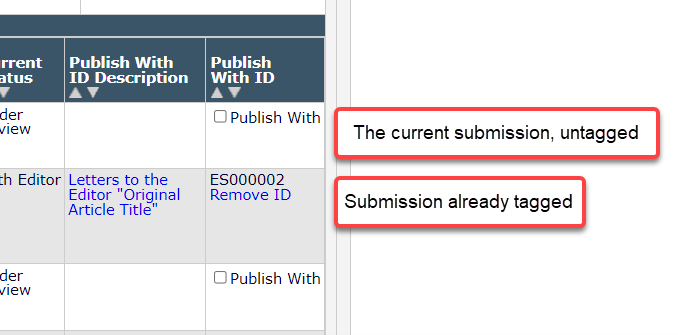
- When you return to the Linked Submissions page, you will see the Description and ID numbers for all the tagged submissions
- Remove ID will appear under the tag's code number.
- Assign ID will appear for untagged submissions.
Did we answer your question?
Related answers
Recently viewed answers
Functionality disabled due to your cookie preferences