
How do I change due dates?
Last updated on September 03, 2025
Only Elsevier Staff have permission to change due dates in Elsa. If you are an Editor, Author, or Contributor and you wish to discuss the extension of due dates or deadlines, please contact your Elsevier point of contact.
Elsa offers several ways for Elsevier staff to change due dates and deadlines. To update due dates in bulk, review the Project Settings section below. To update due dates for one or multiple chapters, review the Project Overview section.
- From the project over view page, you can click on ‘Add Date’ (if a date hasn’t been set yet) or click on the existing date to change it.
You can set or change due dates in bulk from this page by clicking on the box on the upper left corner of your screen under ‘Chapter Progress’ to select all chapters, or you can select multiple chapters by click on the boxes to the left of the chapter titles.
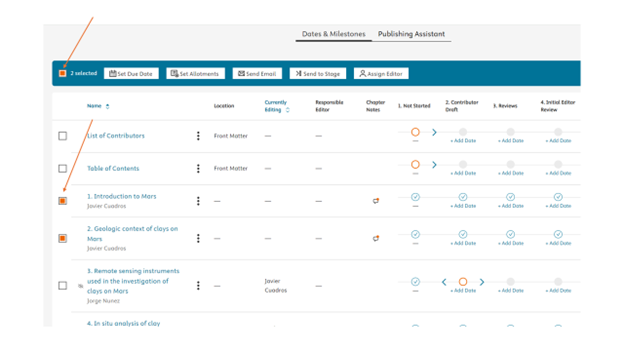
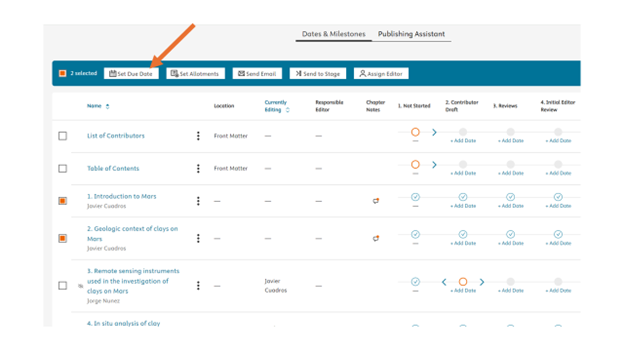
Once you have selected your chapters, click on the 'Set Due Date button'.
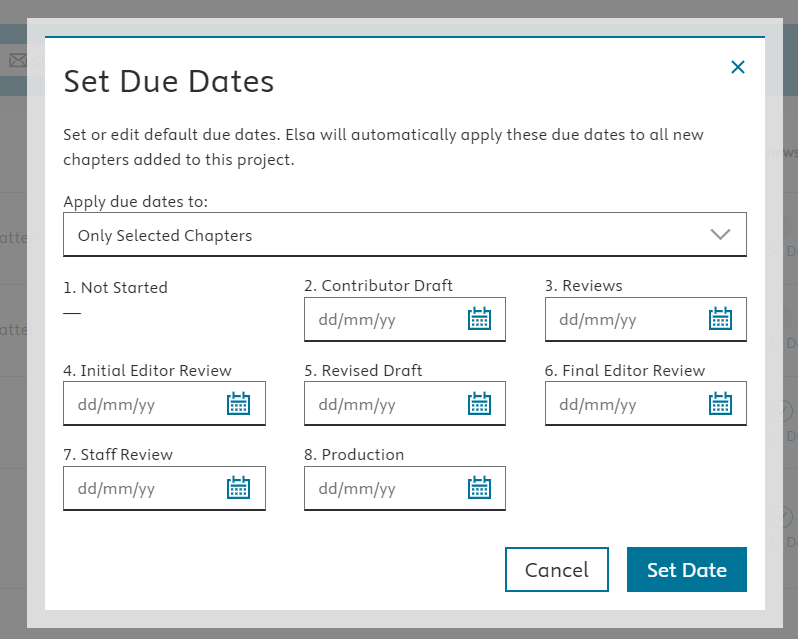
Then click 'Set Date' when you’re done.
In the Elsa project settings, there are three Due Dates fields that feed directly from CCX:
- Budgeted publication date
- Planned publication date.
- Actual publication date
These due dates display on the General Settings tab. To update or change them, the change must be made in CCX.
Other due dates can be found on the Project settings tab under Book due dates. The below due date settings can be found here:
To change the due date for these fields, select the calendar icon in the related field and select the desired date. Click Save to save your changes.
- Table of contents due date
- Sample chapter due date
- Contributor drafts completed
- Final manuscript completed
- Staff reviews completed
- Transmittal date
For some projects or content types, it may be preferable to calculate due dates by the number of days you would like to have each chapter or overview at each step in the workflow. By setting due dates according to timeline, you can set due dates to populate automatically by the number of days the chapter or overview should spend at that stage.
Elsa calculates the deadlines starting from the day the overview/chapter is moved from Not Started so if a timeline is set, the due dates will not start to calculate until the overview/chapter is moved out of Not Started stage.
To Enable and Set Timeline Due Dates:
- Navigate to the project settings
- Click on the Project Settings tab and then select the “Due Dates and Timeline” tab
Switch the Timeline toggle to the on position and then click "Save":
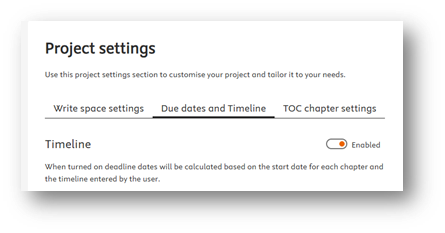
Navigate to the project overview page where you should now see a button labeled “Set timeline dates”
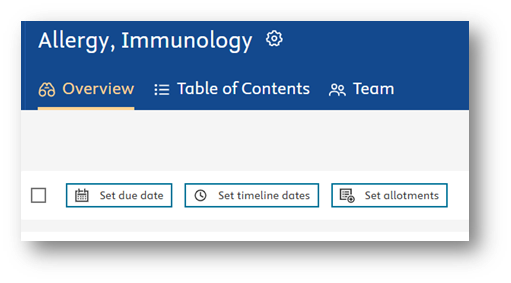
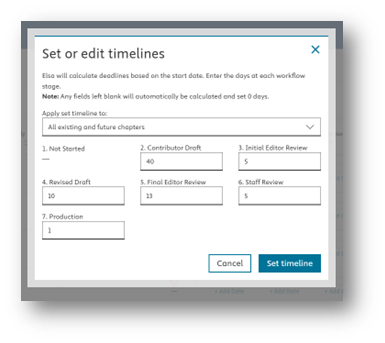
- Click on this button to open the “Set or edit timelines” window and choose from the dropdown menu whether to apply the timeline to existing and/or future chapters
Enter the number of days you would like for each chapter/overview to spend at each stage and then click “Set timeline.” You will not see any changes to the dates on the overview until a chapter or overview has been moved. The due dates will then update individually for each chapter/overview as it is moved out of Not Started stage.

Notes:
The Timeline setting is enabled by default for Clinical Overviews and "Not Enabled" by default for Books, but they can be toggled on/off on the project settings
The Content Manager (or any user with the power to edit deadlines) can still overwrite any/all and the feature can be turned off at any point if it becomes preferable to manually fill in dates.
Did we answer your question?
Related answers
Recently viewed answers
Functionality disabled due to your cookie preferences