View by category
How can an Editor act on behalf of other users in Editorial Manager?
Last updated on July 30, 2024
Watch this short video to see how to use the proxy function.
At times Editors may be required to perform tasks on behalf of an Author, Reviewer or Editor in Editorial Manager (EM). This function is referred to as Proxy. Proxy permission is usually limited to such roles as Journal Manager, Support Agent, Editorial Office, Managing Editor, or Editor-in-Chief (not an exclusive list).
How?
Quick Tip: Proxy links are highlighted in yellow; either the person's name or role will be highlighted and linked if it is possible for you to proxy. Likewise, proxy operators are highlighted in yellow when looking at history.
There are two ways to Proxy on behalf of another user in EM, either from the Details screen of a submission, or from the Search People results page; both give the same end result.
- To proxy from the Search People - Search Results Page:
- Select the 'Search People' link in the Editor Main Menu.
- Enter the relevant search criterion (e.g. first/last name) and select the 'Search' button.
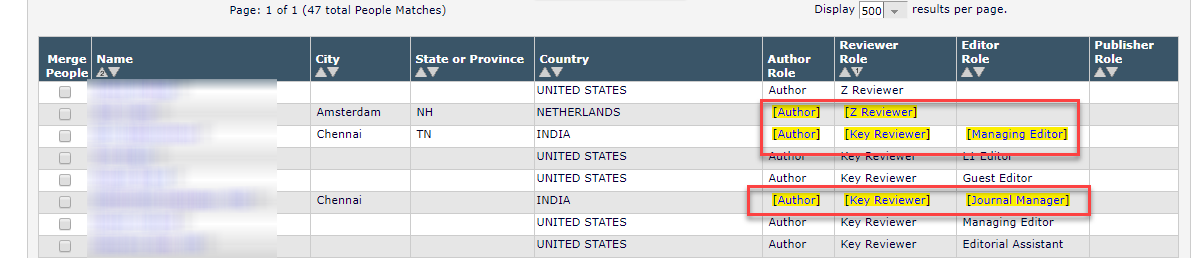
- Users are listed with those roles available for Proxy highlighted in yellow in the Search Results .
- Select the yellow highlighted role name to proxy as the user in that role.
- To Proxy from the Details page of any submission:
- Select on the 'Details' link and scroll down to the relevant section, for example Reviewers or Invited Authors.
- Users related to the submission will have a yellow highlighted [Proxy] link after their name if you are able to proxy for the role by which they are related. For example:
- If you have proxy permission for authors, then the corresponding author will have a [Proxy] link after their name.
- If you do not have proxy permissions for editors, then the editor names will not have [Proxy] links.
- Select the yellow highlighted [Proxy] link to proxy as the user.
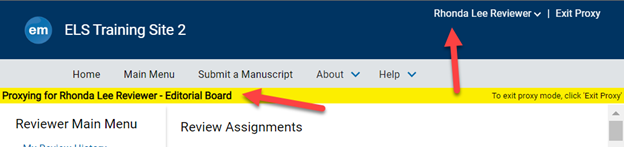
- The page reloads with the Main Menu of the proxied user
- A yellow banner appears under the top menu, with the name and role being proxied. The banner remains throughout the proxy session.
- At the right side of the top Navigation Bar, your name is now replaces by that of the person you have proxied for.
- You can now navigate through the menu and act on behalf of the user.
- If you attempt an action not available in proxy mode, such as 'Update my Information' a Security Warning message will appear. Select 'Main Menu' to continue in Proxy mode, or 'Log Out' to go back to your own account.
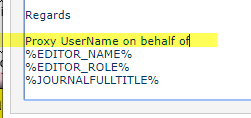
- If you send any emails while proxied, customize the email and add your own name above the signature, for example .
- If the user has multiple roles, and you have permission to proxy for those roles, then you can use the Role drop down in the top navigation bar to switch between roles, just as you would in your own account.
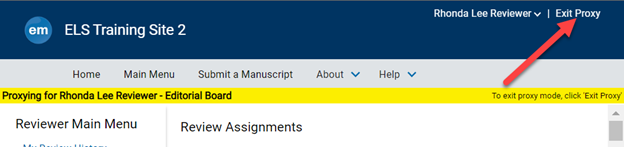
- When finished, select 'Exit Proxy' in the top navigation banner to return to your own account. You will be returned to the same screen from which you entered proxy mode.
![yellow highlighted [Proxy] link](https://supportcontent.elsevier.com/Support%20Hub/Journals/29893-image2.png)
Frequently Asked Questions
What limitations are there on proxy mode?
- You can only proxy for those roles for which you have permission.
- Only users who have completed registration, specifically accepted the Terms and Privacy Policy, are eligible to be proxied.
- When proxied for a user, you will not be able to:
- Edit the user's account details using "Update my Details"
- View the username or password
- Use any administrative functions that user may have access to.
- Proxy into a second user's account.
Why can't I proxy for a specific user or role?
- You may not have proxy permissions at all.
- You may not have proxy permissions for a certain role, the permissions are separate to proxy for authors, editors, and reviewers.
- If you are currently proxied as another user, you will never see any proxy links. Instead you must Exit Proxy which returns you to your own account. Then you would be able to proxy as someone else.
- If the user has not completed the full registration process, and in particular has NOT accepted the Privacy Policies, no one will be able to proxy. Because this person has not yet consented to the account, proxy cannot be allowed. This can occur when a user in proxy registered by an editor in order to be invited as a reviewer or author.
- The proxy links are not displayed in every place the name is shown. You can find the proxy links:
- In Search People results, as a highlight on the person's role(s).
- In the Details of a submission, as a highlighted [Proxy] text after the name of a related person such as an editor, reviewer, or the corresponding author.
How can I tell what actions were done under proxy?
In the history of a submission, each event and email is listed with an Operator, the person whose action was responsible for the event or email. When the action was done by proxy, the name of the proxy operator is shown in square brackets, highlighted in yellow.
Did we answer your question?
Recently viewed answers
Functionality disabled due to your cookie preferences