View by category
How do I add a figure from an image found in Image Finder into a chapter in a Figures List?
Last updated on December 18, 2025
After you have found an image using Image Finder, you can add the image to any of the figures lists to which you contribute.
Depending on the source of the found image, you need to do one of the following:
- If the image comes from a journal or curated collection, the status of the resulting figure is yellow in the figures list, you can download the image at any time in order to make it available (green) in your project.
- If the image comes from a book, you need to request a copy of the original artwork from the Global Book Archive before you can make the image available in your project.
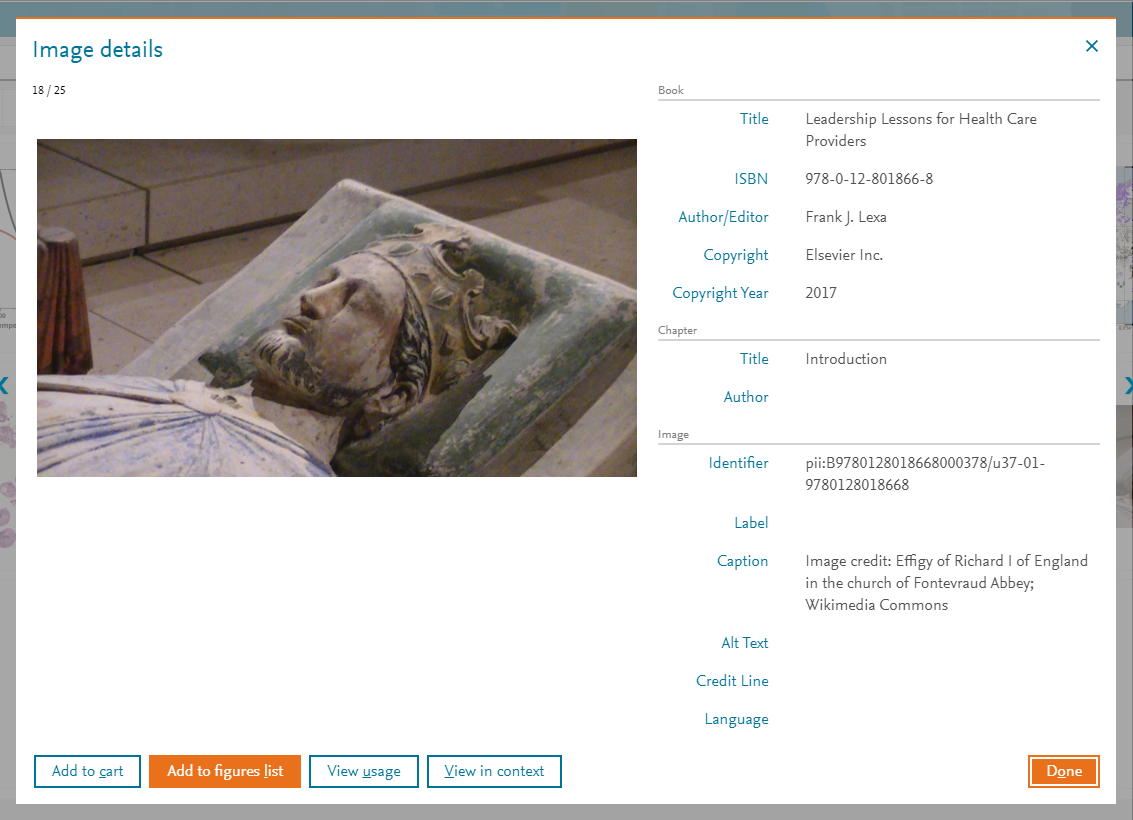
After viewing the image details, to add an image from the search results, click on the 'Add to figures list' button. The 'Add figure' pop-up window is displayed.
See also: How do I manage a figure in a Figures List?
How
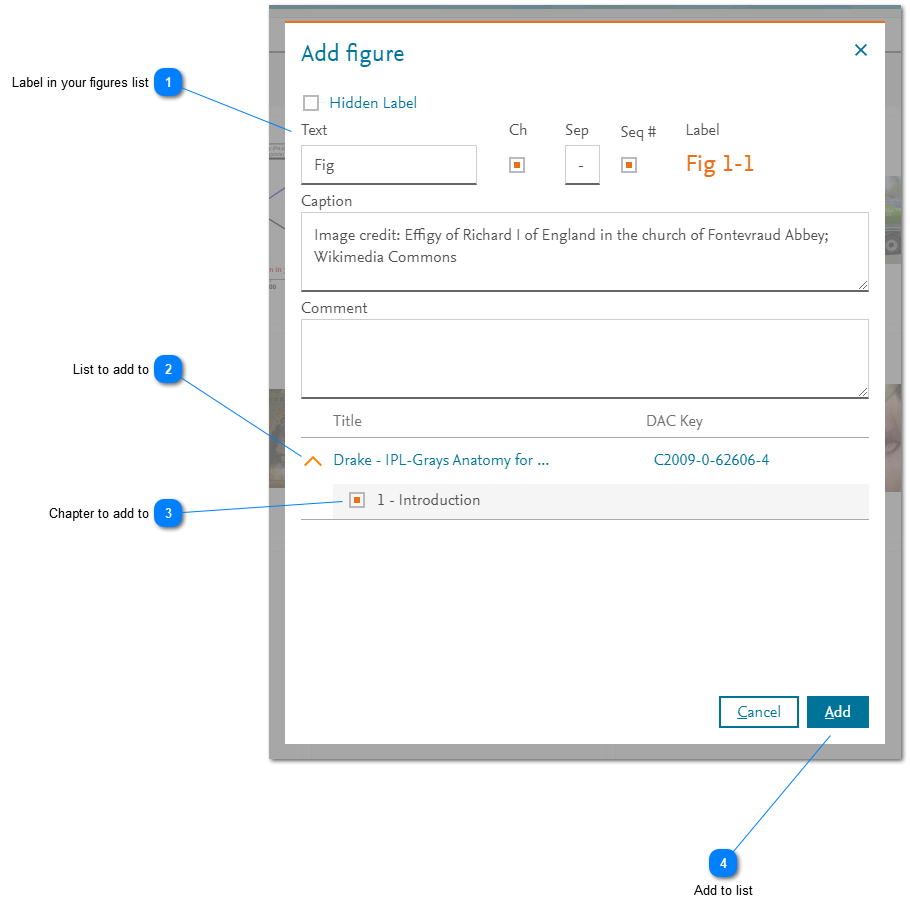
- Label in your figures list: Enter the information about how the image is annotated in the figures list that you will select in step 2 below.
- List to add to: The figures lists to which you contribute are listed here. Expand the figures list to which you want to add the image by clicking on the row.
- Chapter to add to: The chapters to which you contribute are listed here. Select the chapter to which you want to add the image by clicking in the selection box to the left of the chapter title.
- Add to list: Click 'Add' to add the image to the selected chapter in the selected figures list.
Did we answer your question?
Related answers
Recently viewed answers
Functionality disabled due to your cookie preferences