View by category
How do I link my RELX work e-mail (elsevier.com) to an institution when logging into Image Finder?
Last updated on February 13, 2024
Image Finder is one of the products that uses ID+ as the login mechanism. When RELX internal users log into any ID+ products, they should log in via an institution instead of using an e-mail to begin with.
For ID+ to let a RELX internal user to log into Image Finder properly, it needs to link an RELX work e-mail ID (such as [email protected]) to an institution in their user profiles.
When a new Image Finder RELX internal user logs into Image Finder for the first time, do the following:
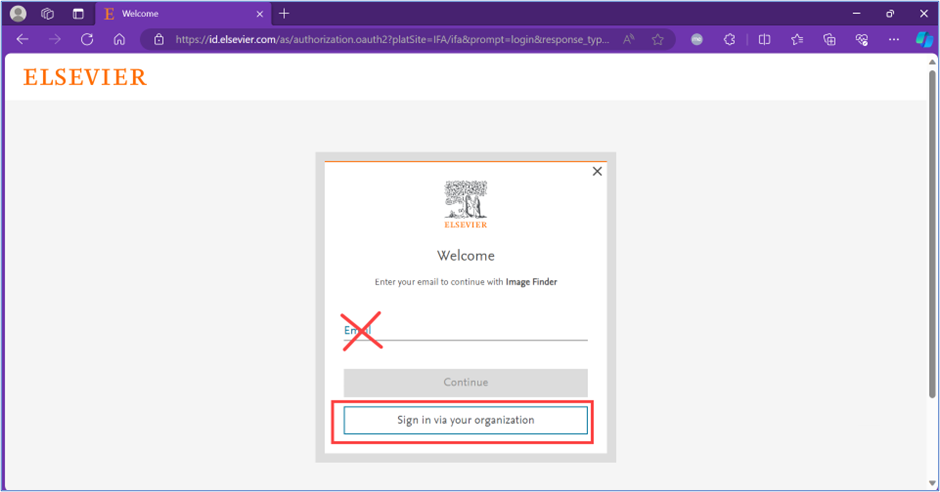
- On the Welcome pop-up window, click the 'Sign in via your organization' button. The 'Find your organization' pop-up window is displayed.
Note: Do not enter any e-mail ID.
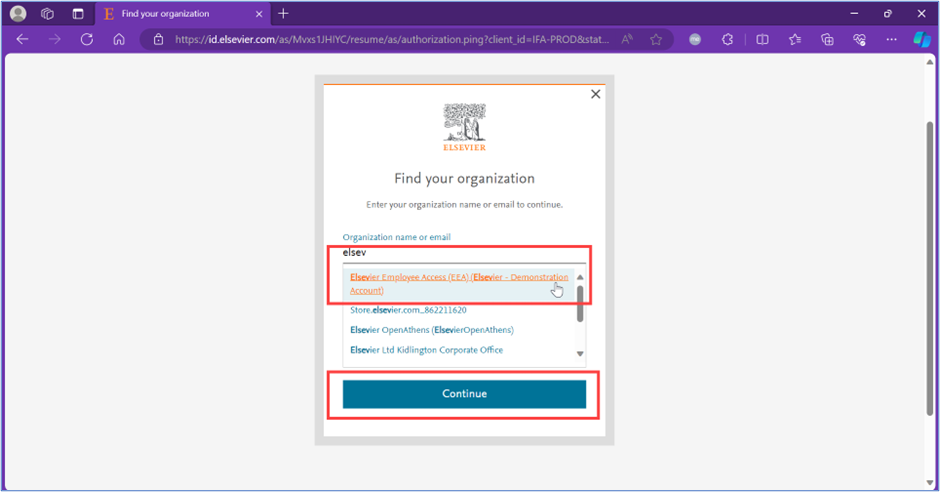
- On the 'Find your organization' pop-up window, do the following:
- In the 'Organization name or email' field, start typing "elsev". The 'Elsevier Employee Access (EEA) (Elsevier – Demonstration Account)' option is displayed in the list.
- Select that option.
- Click 'Continue'. The 'RELX Sign in' pop-up window is displayed.
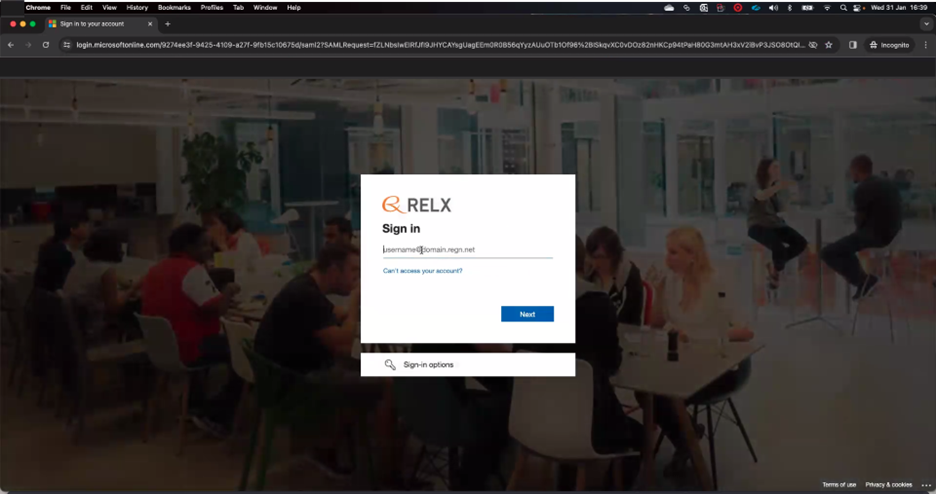
- On the 'RELX Sign in' pop-up window, do the following:
- Enter your network e-mail ID ([email protected]), which is the user ID that you use to log into your computer every day.
Note: It is not your work e-mail ([email protected]). For example, it should be [email protected] and not [email protected]. - Click 'Next'. The 'RELX Enter Password' pop-up window is displayed.
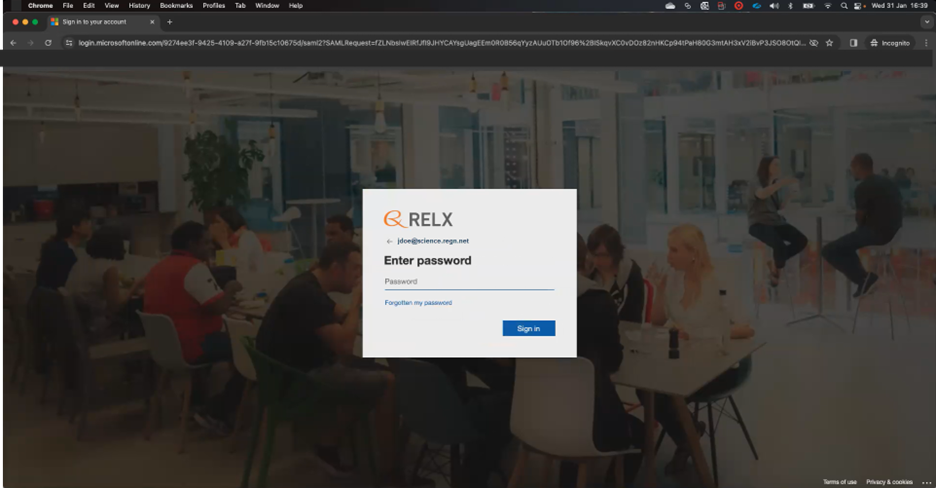
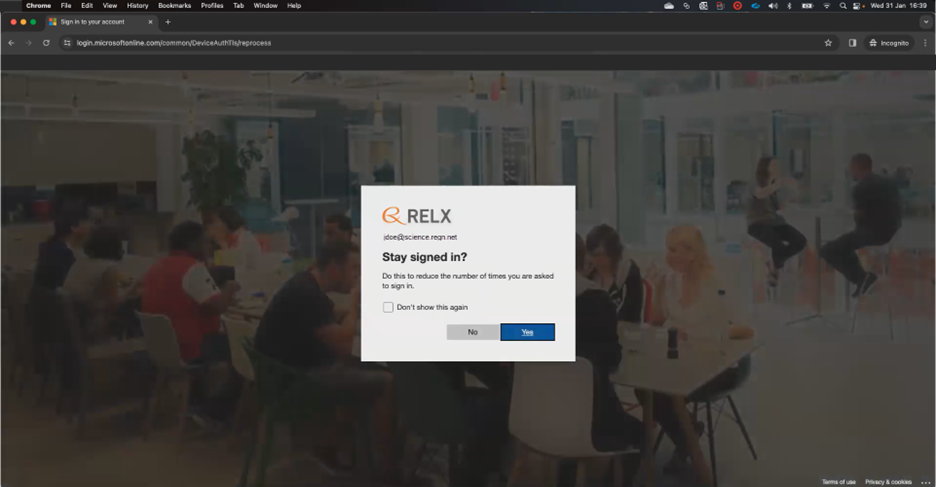
- On the 'RELX Enter Password' pop-up window, enter the password for your network e-mail ID and click 'Sign in'. It may or may not be the same password as your work e-mail. The 'RELX Stay signed in?' pop-up window is displayed.
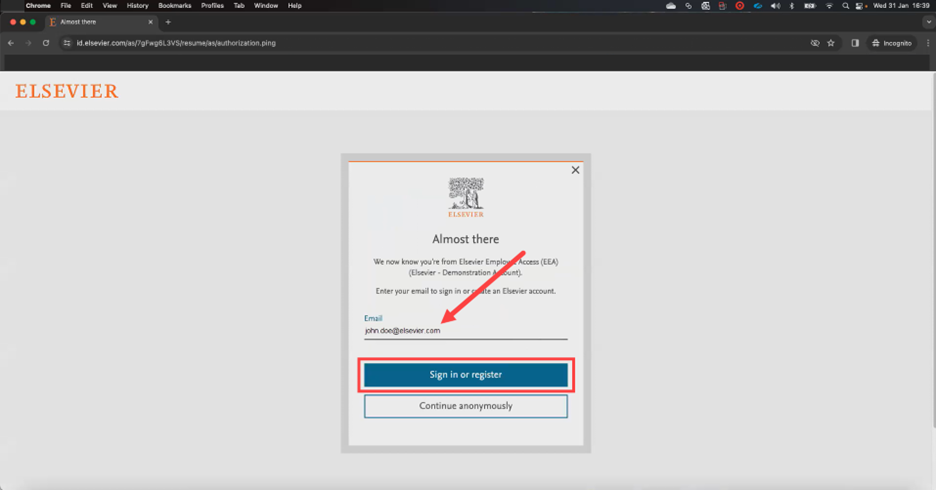
- On the 'RELX Stay signed in?' pop-up window, select the checkbox for 'Don’t show this again' and click 'Yes'. The 'Almost there' pop-up window is displayed.
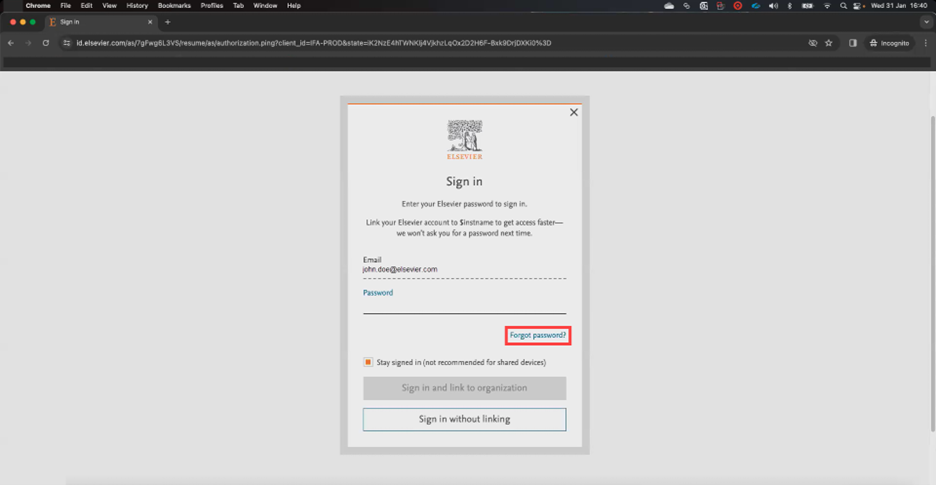
- On the 'Almost there' pop-up window, if your work e-mail ([email protected]) is not displayed in the 'Email' field, enter it there. Click the 'Sign in or register' button. The 'Sign in' pop-up window is displayed with your work e-mail grayed out.
- On the 'Sign in' pop-up window, click the 'Forgot password?' link. The 'Check your inbox' pop-up window is displayed.
Note: This action doesn't change your password. It just gives you the option to link your work e-mail address to the Elsevier Employee Access (EEA) (Elsevier – Demonstration Account) institution.
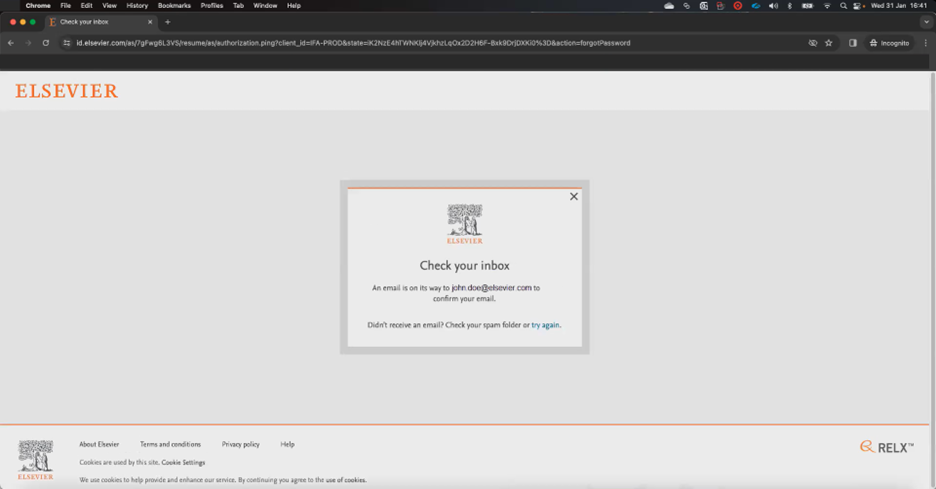
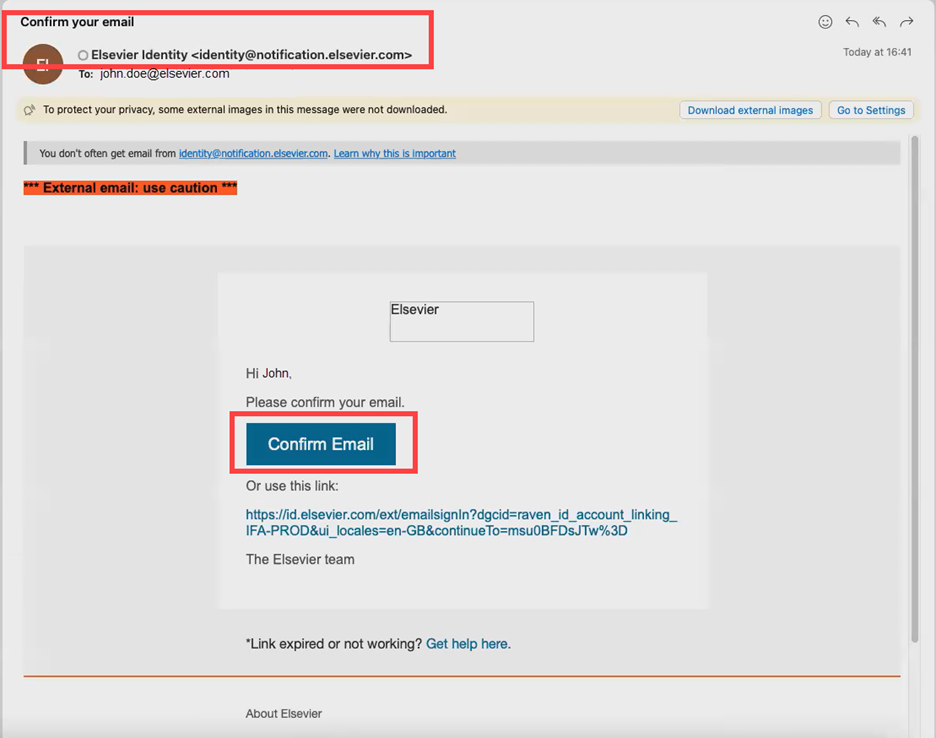
- In your Outlook inbox, you will receive an e-mail from Elsevier Identity ([email protected]) with the Subject line: Confirm your email.
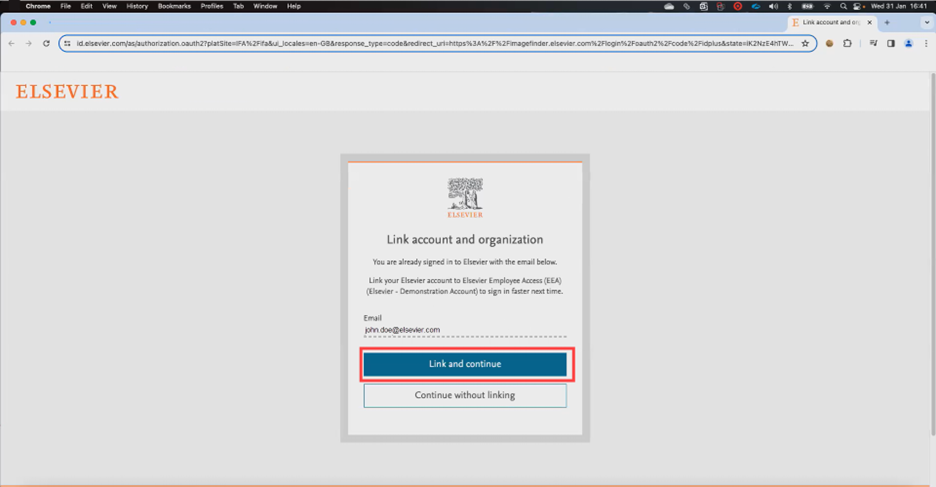
Click the 'Confirm Email' button inside that e-mail. The 'Link account and organization' pop-up window is displayed.
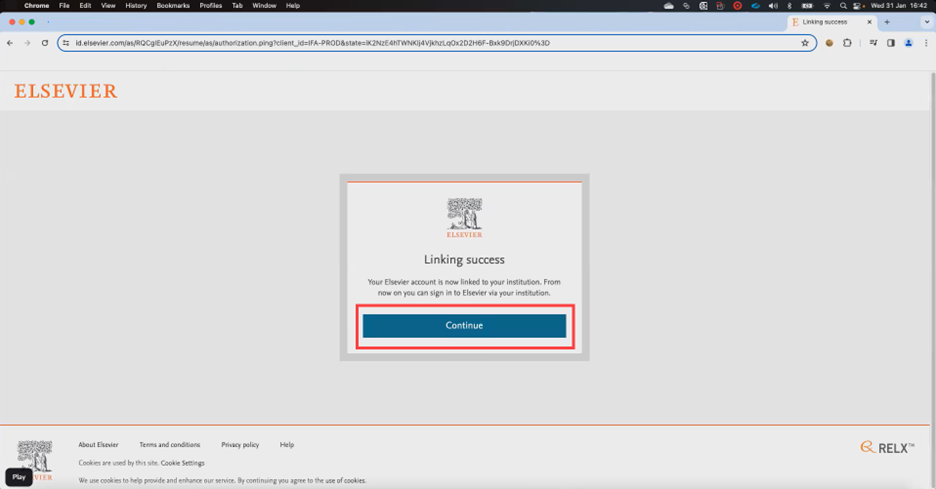
- On the 'Link account and organization' pop-up window, click the 'Link and continue' button. The 'Linking Success' pop-up window is displayed.
Note: Your work e-mail ID ([email protected]) should be displayed in the Email field.
- On the 'Linking success' pop-up window, click the 'Continue' button. The Image Finder Home page is displayed as in Step 1.
- Repeat Steps 1 – 3. The 'Confirm your organization' pop-up window is displayed. Then continue on with the steps below.
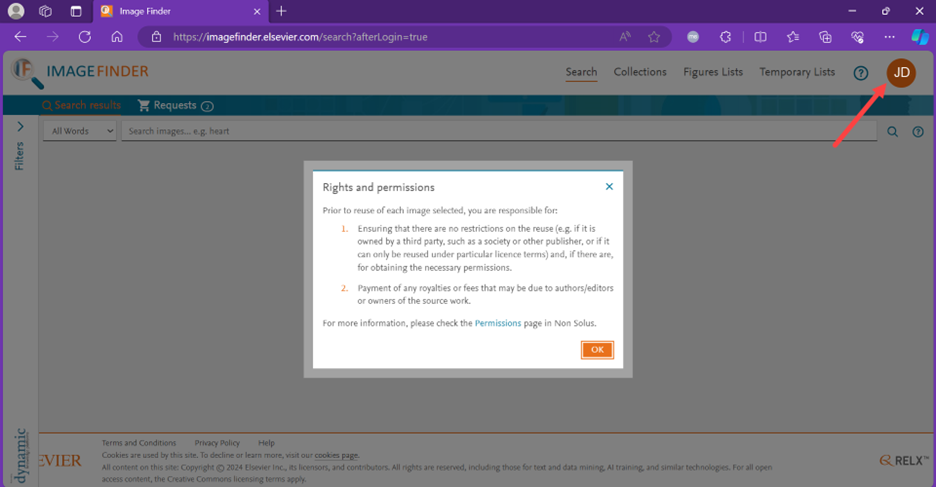
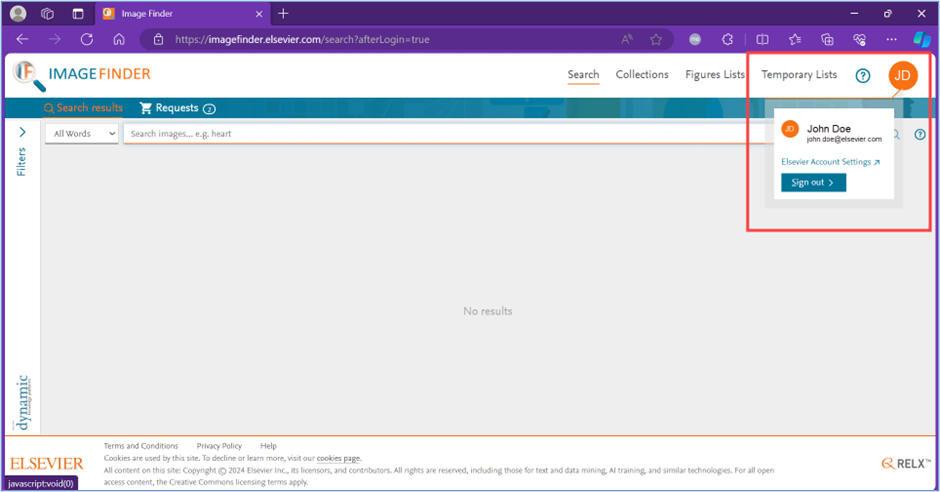
- On the 'Confirm your organization' pop-up window, click the 'Confirm your institution' button. The Image Finder copyright disclaimer and the search page are displayed. You are logged into Image Finder with your initials in an orange avatar on the upper-right corner.

- To verify your primary e-mail ID in ID+, after acknowledging the 'Rights and permissions' disclaimer, mouse-over the orange avatar with your initials on the upper-right corner to verify your work e-mail ([email protected]) is displayed.
You can now sign into multiple Elsevier products that use ID+ with your primary e-mail ID and via institutions.
Did we answer your question?
Related answers
Recently viewed answers
Functionality disabled due to your cookie preferences