How can I add users of my organization and provide access to Clinical Key AI?
Last updated on July 15, 2024
There exists two methods to add users of your organization and provide access to a specific product:
- Adding users individually.
- Adding users by CSV.
How
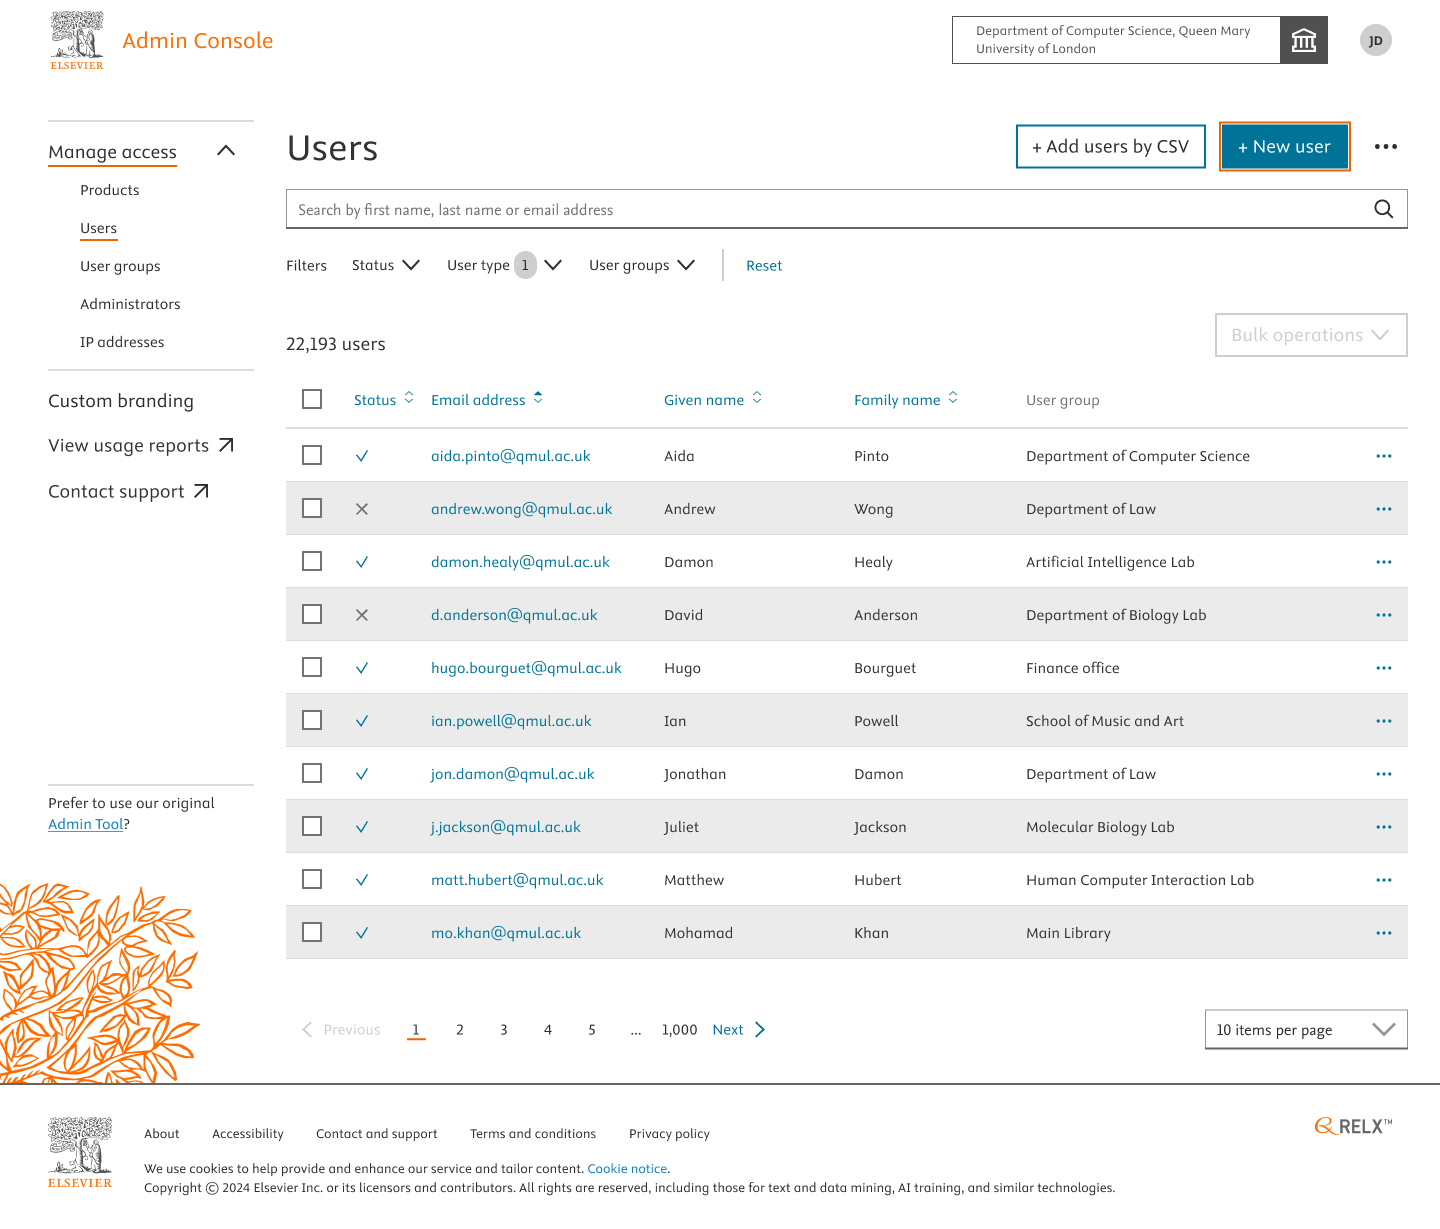
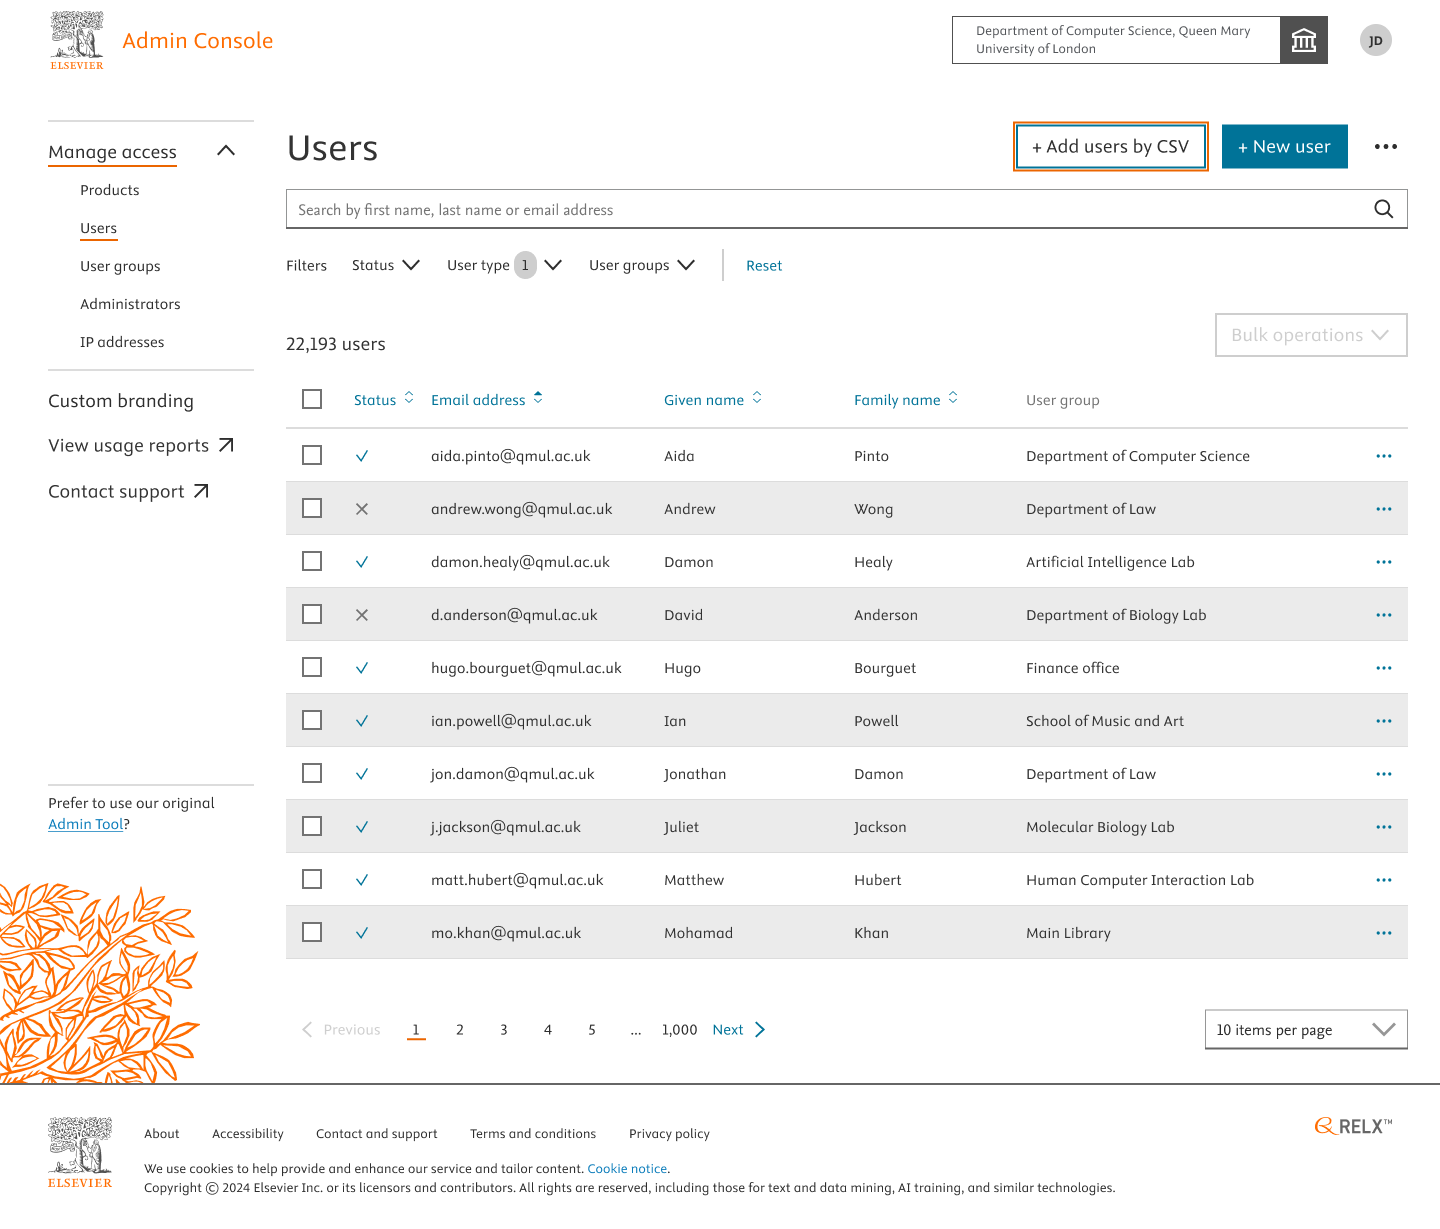
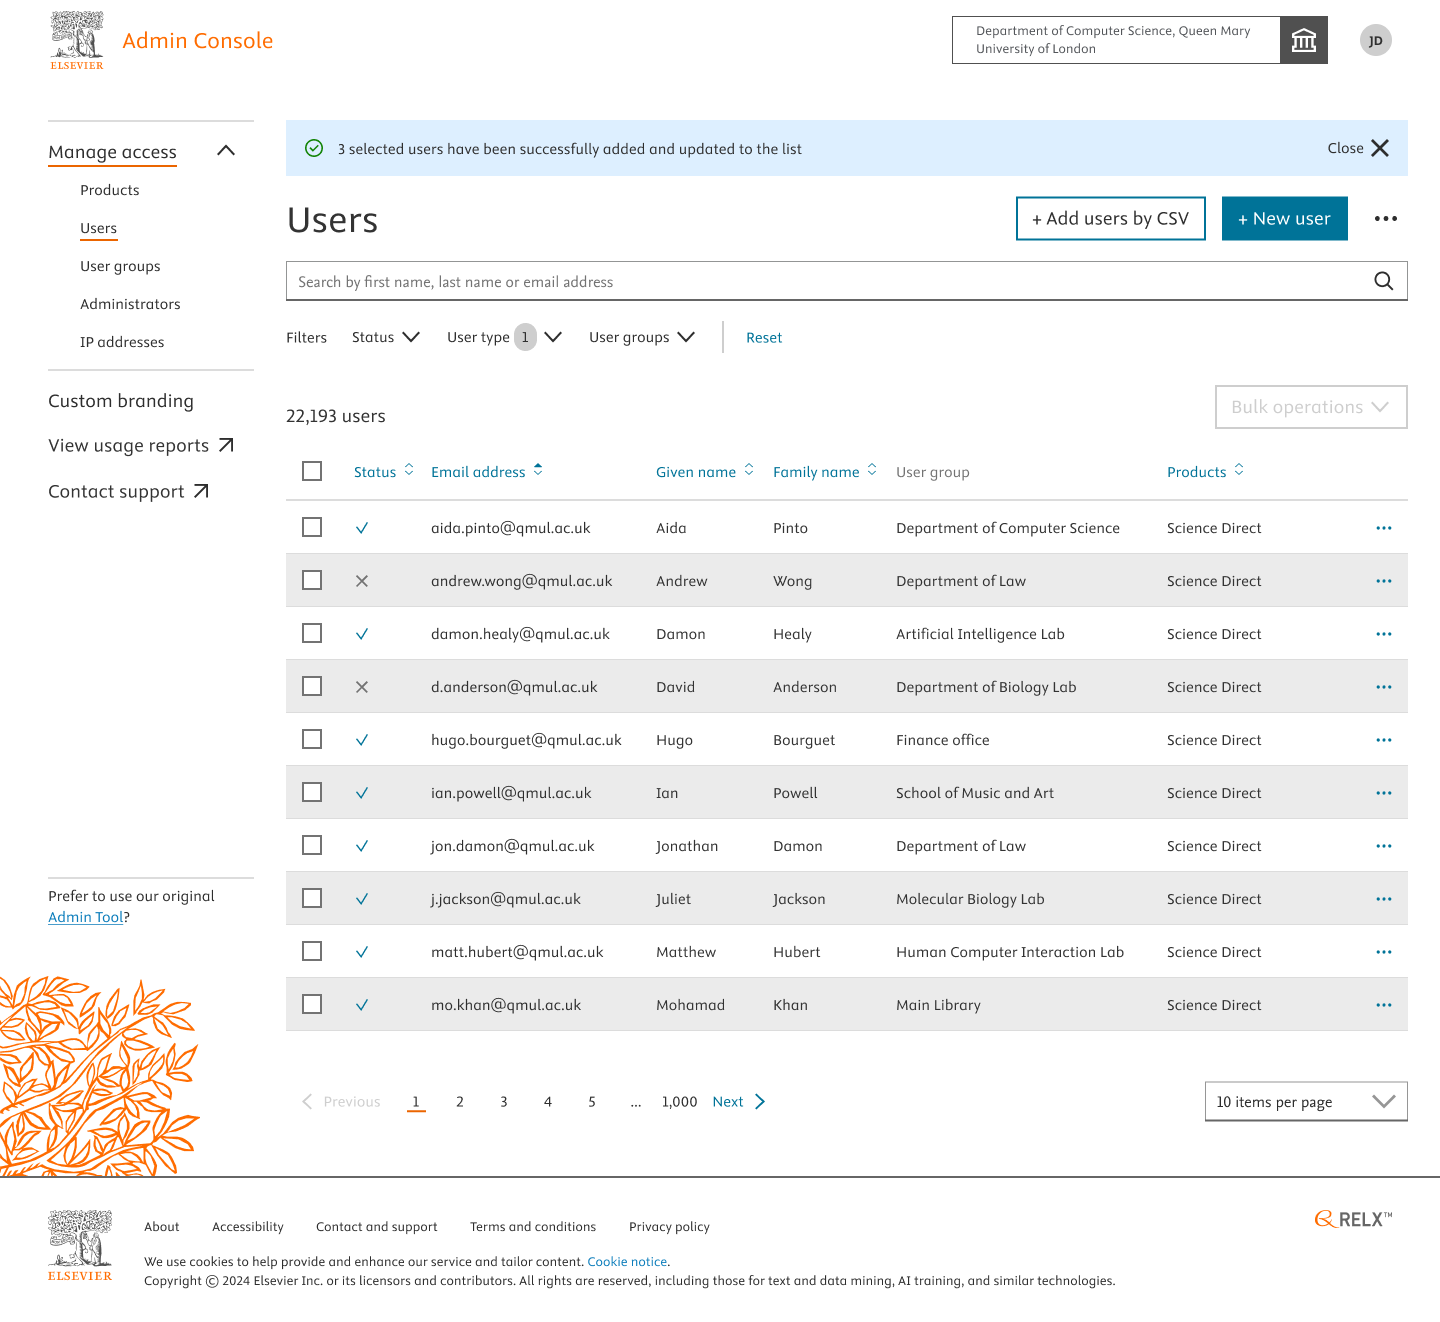
- Navigate to the Users section in Admin Console and click on “+ New User”.
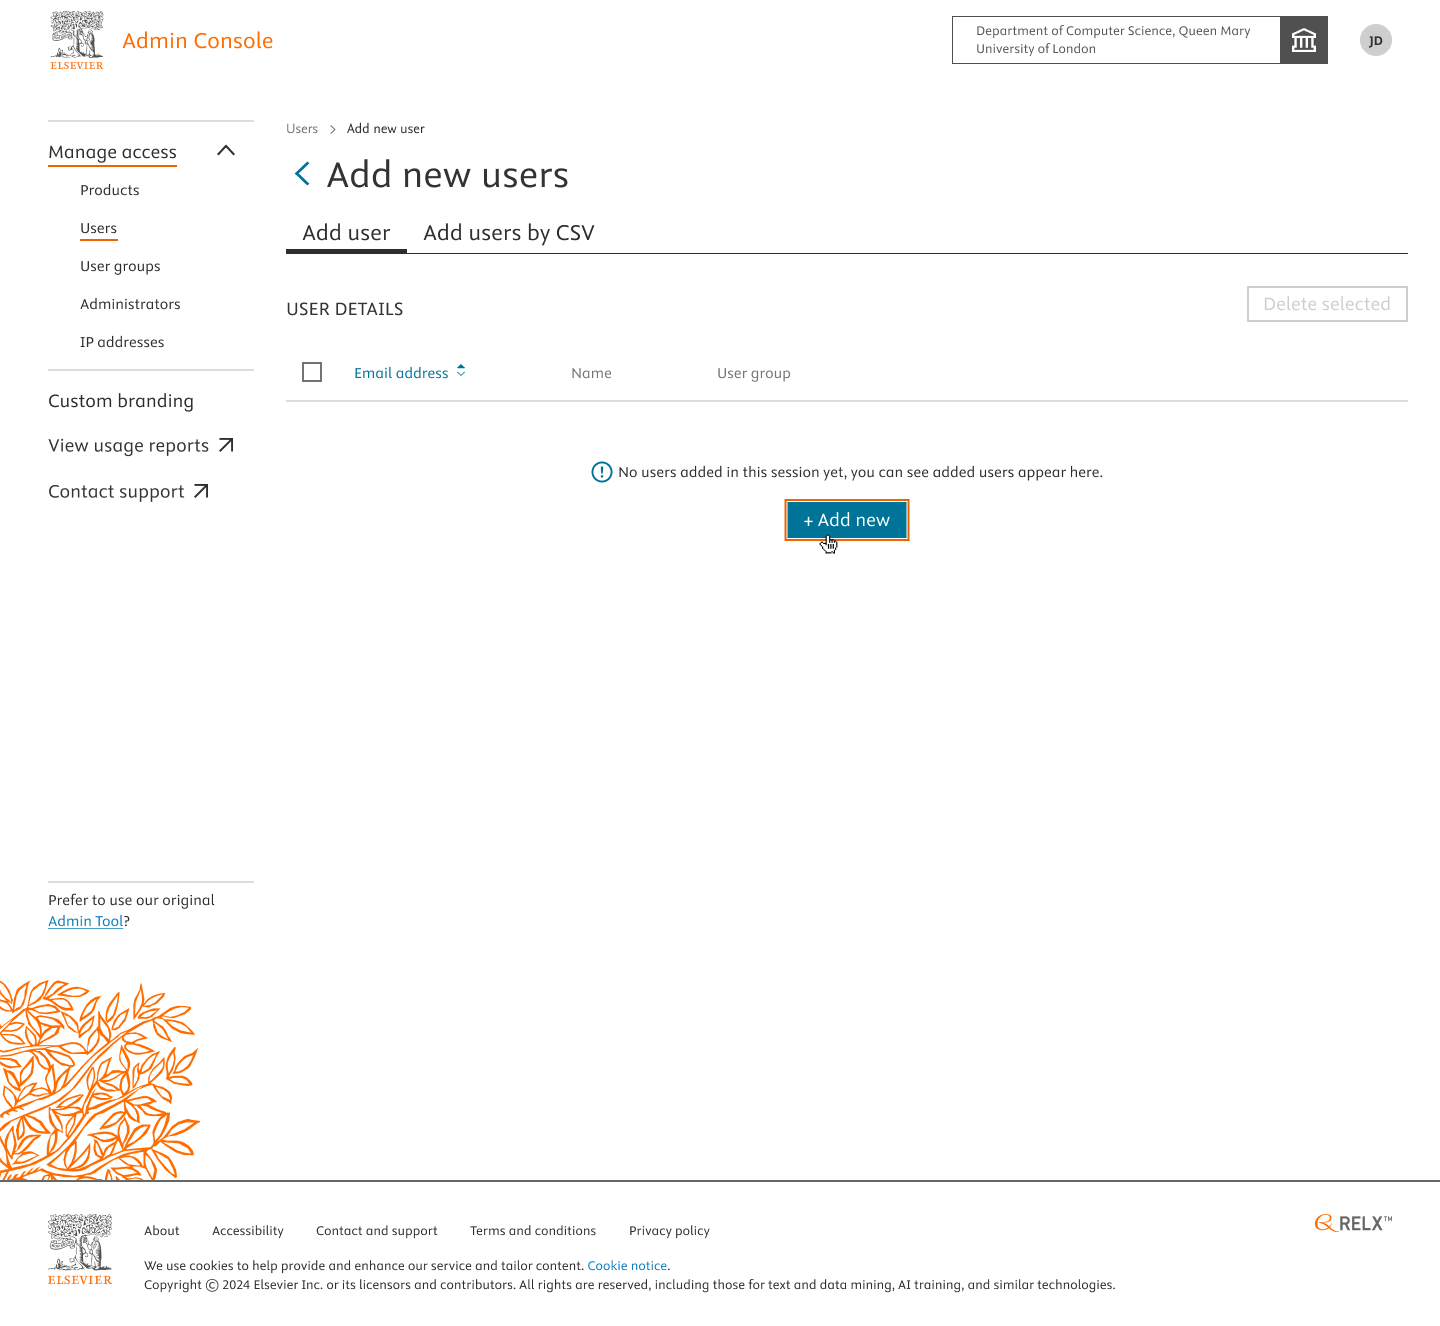
- You’ll be redirected to a tab wherein you’ll be asked to add users. Click on “+Add New”.
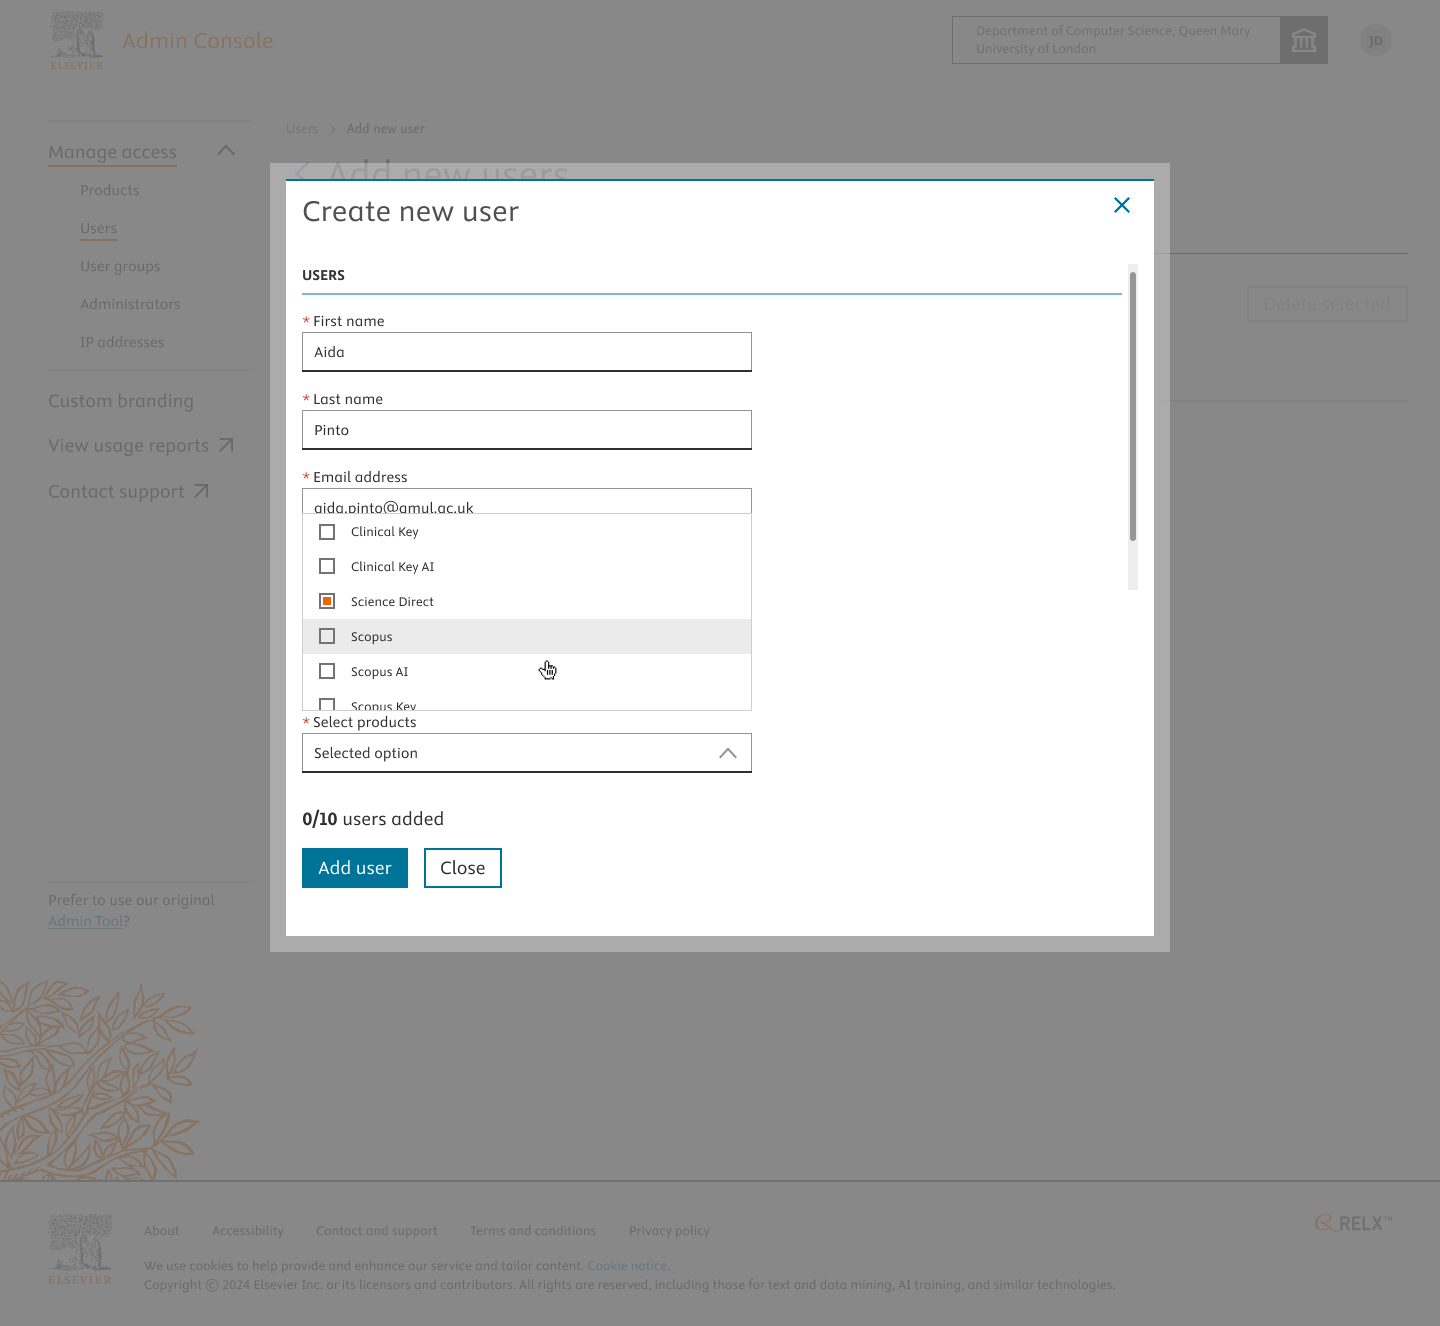
- Create New User Modal appears asking you to input the details of the user, the user group and the product. Note: If users are being added to provide access to CK AI, Select “CK AI Access Group” in the Assign to user group field and “CK AI” product in the product field.
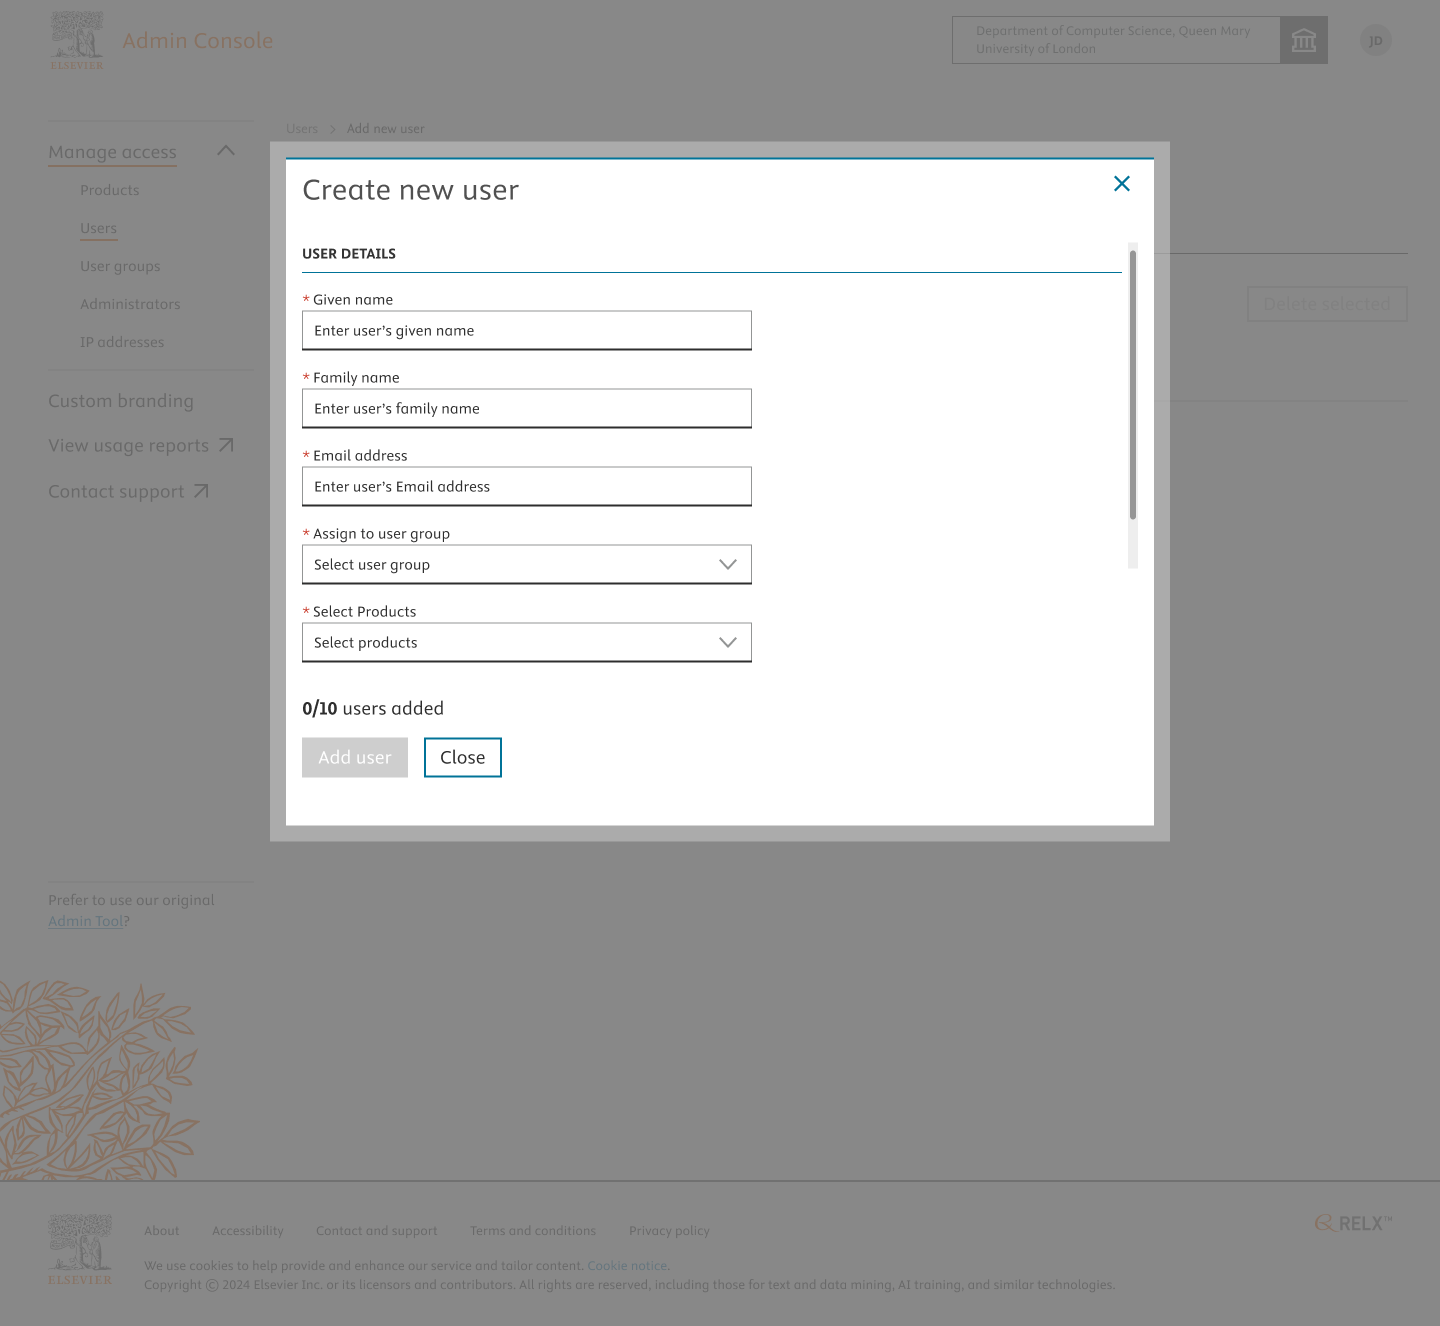
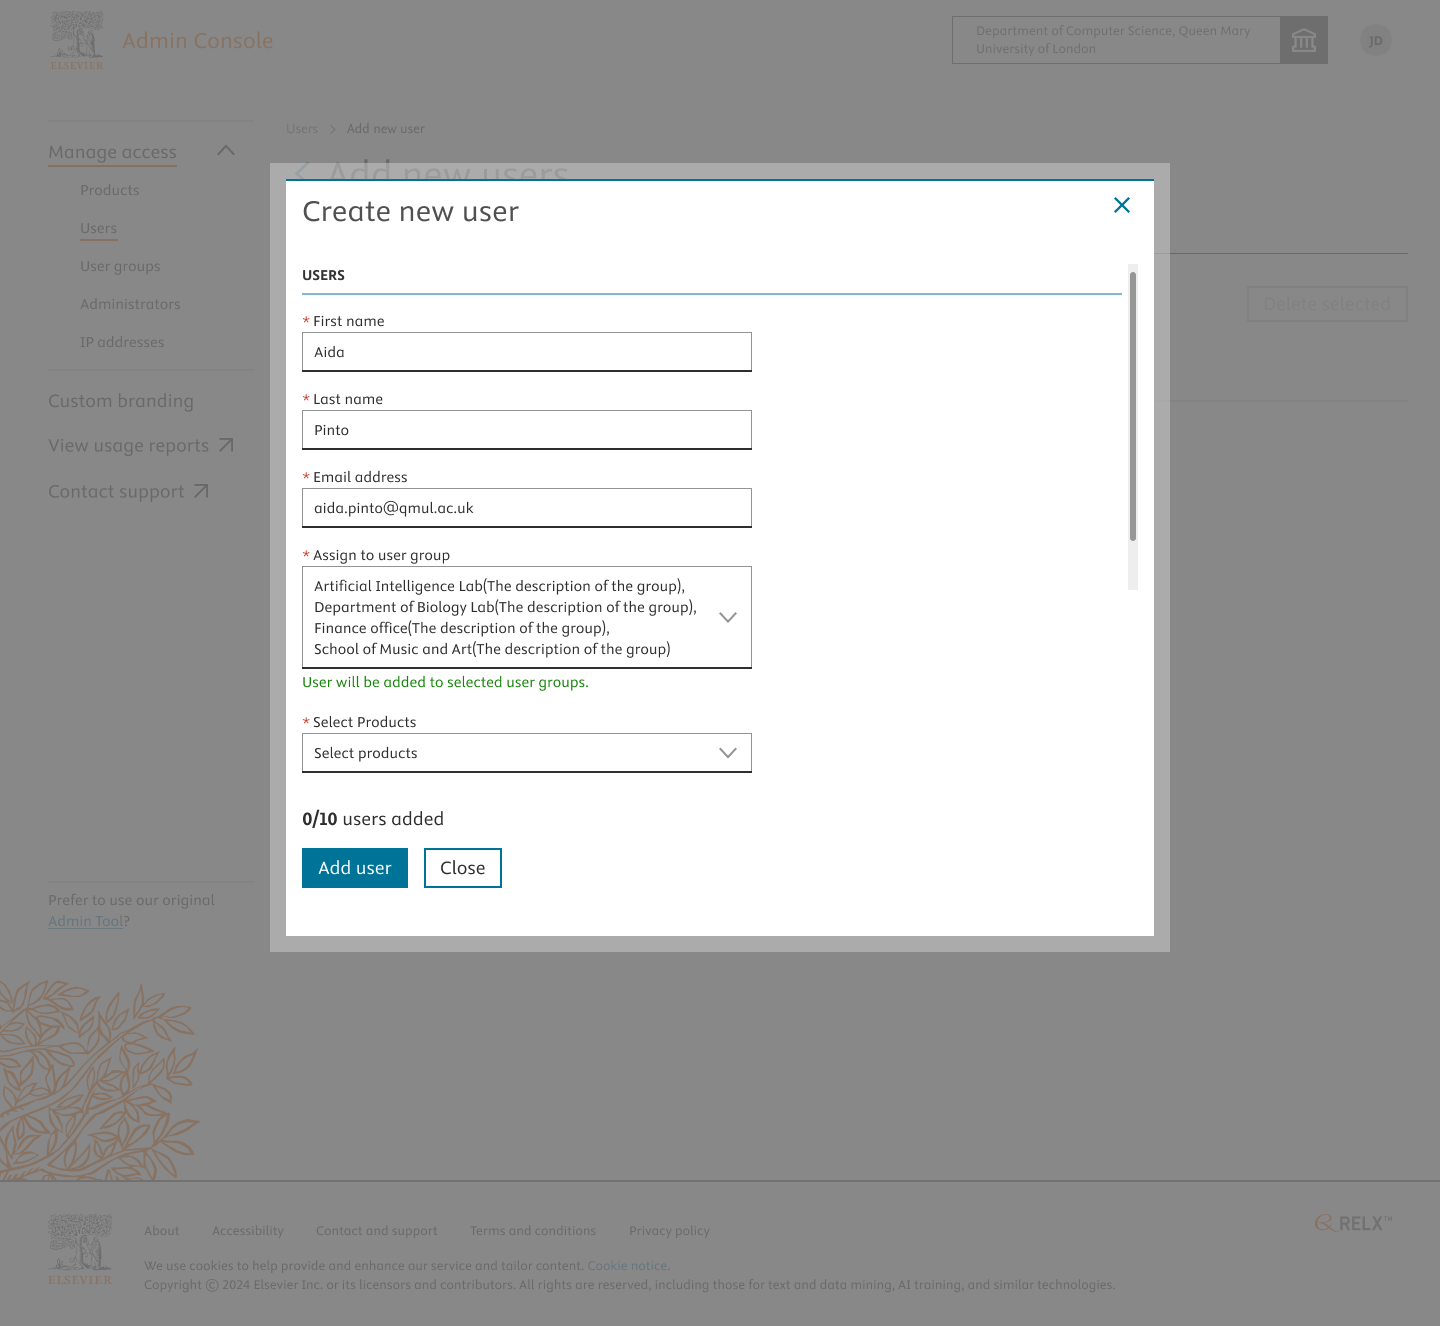
- Input the details of the user(Given Name, Family Name and Email Address) and select the user group and product in the modal. Click on “Add User” to proceed.
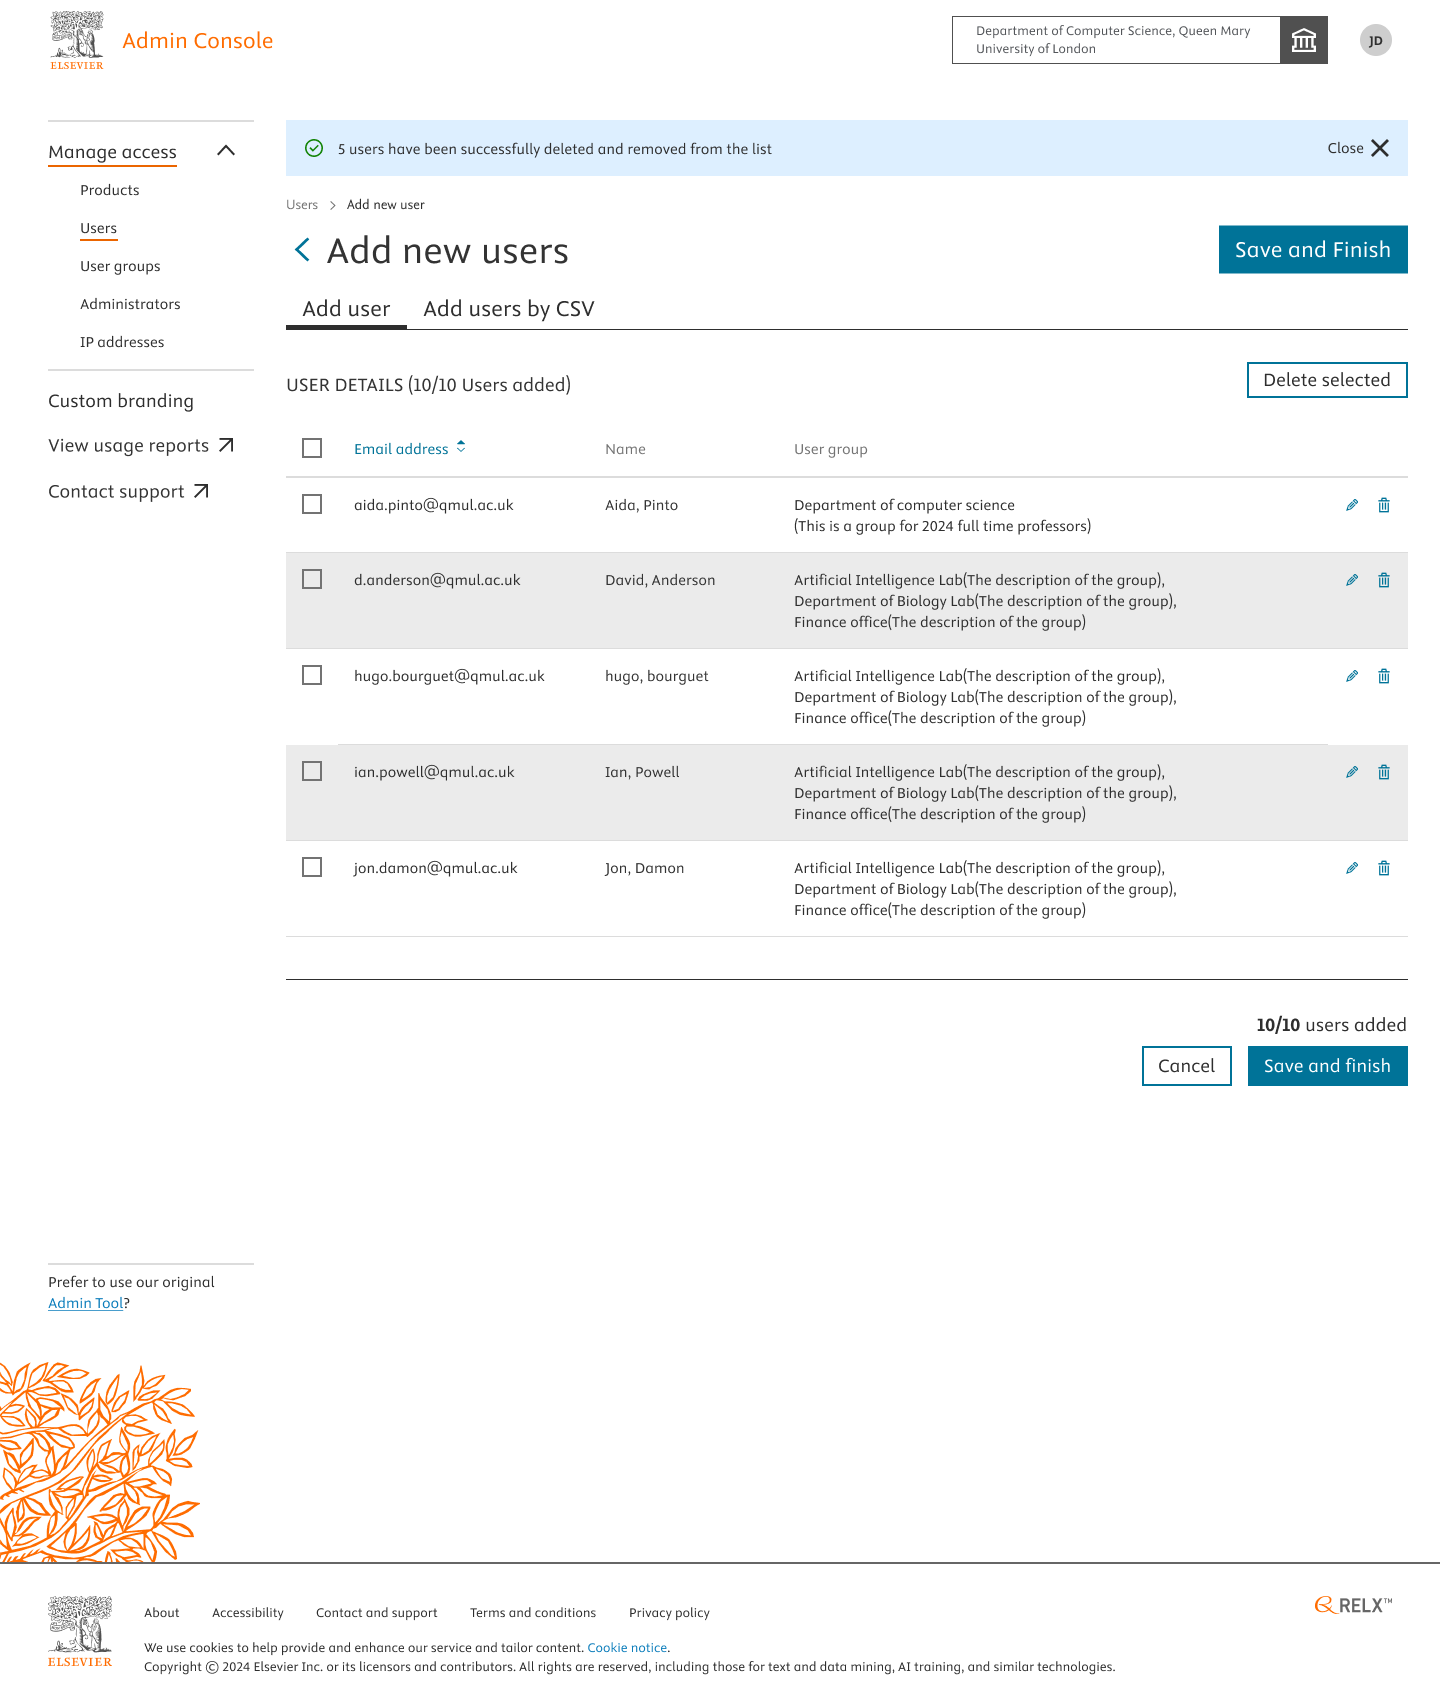
- The user added will be saved and previewed in the below screen. To add more users, click on “+Add new” to repeat the process of adding more users.
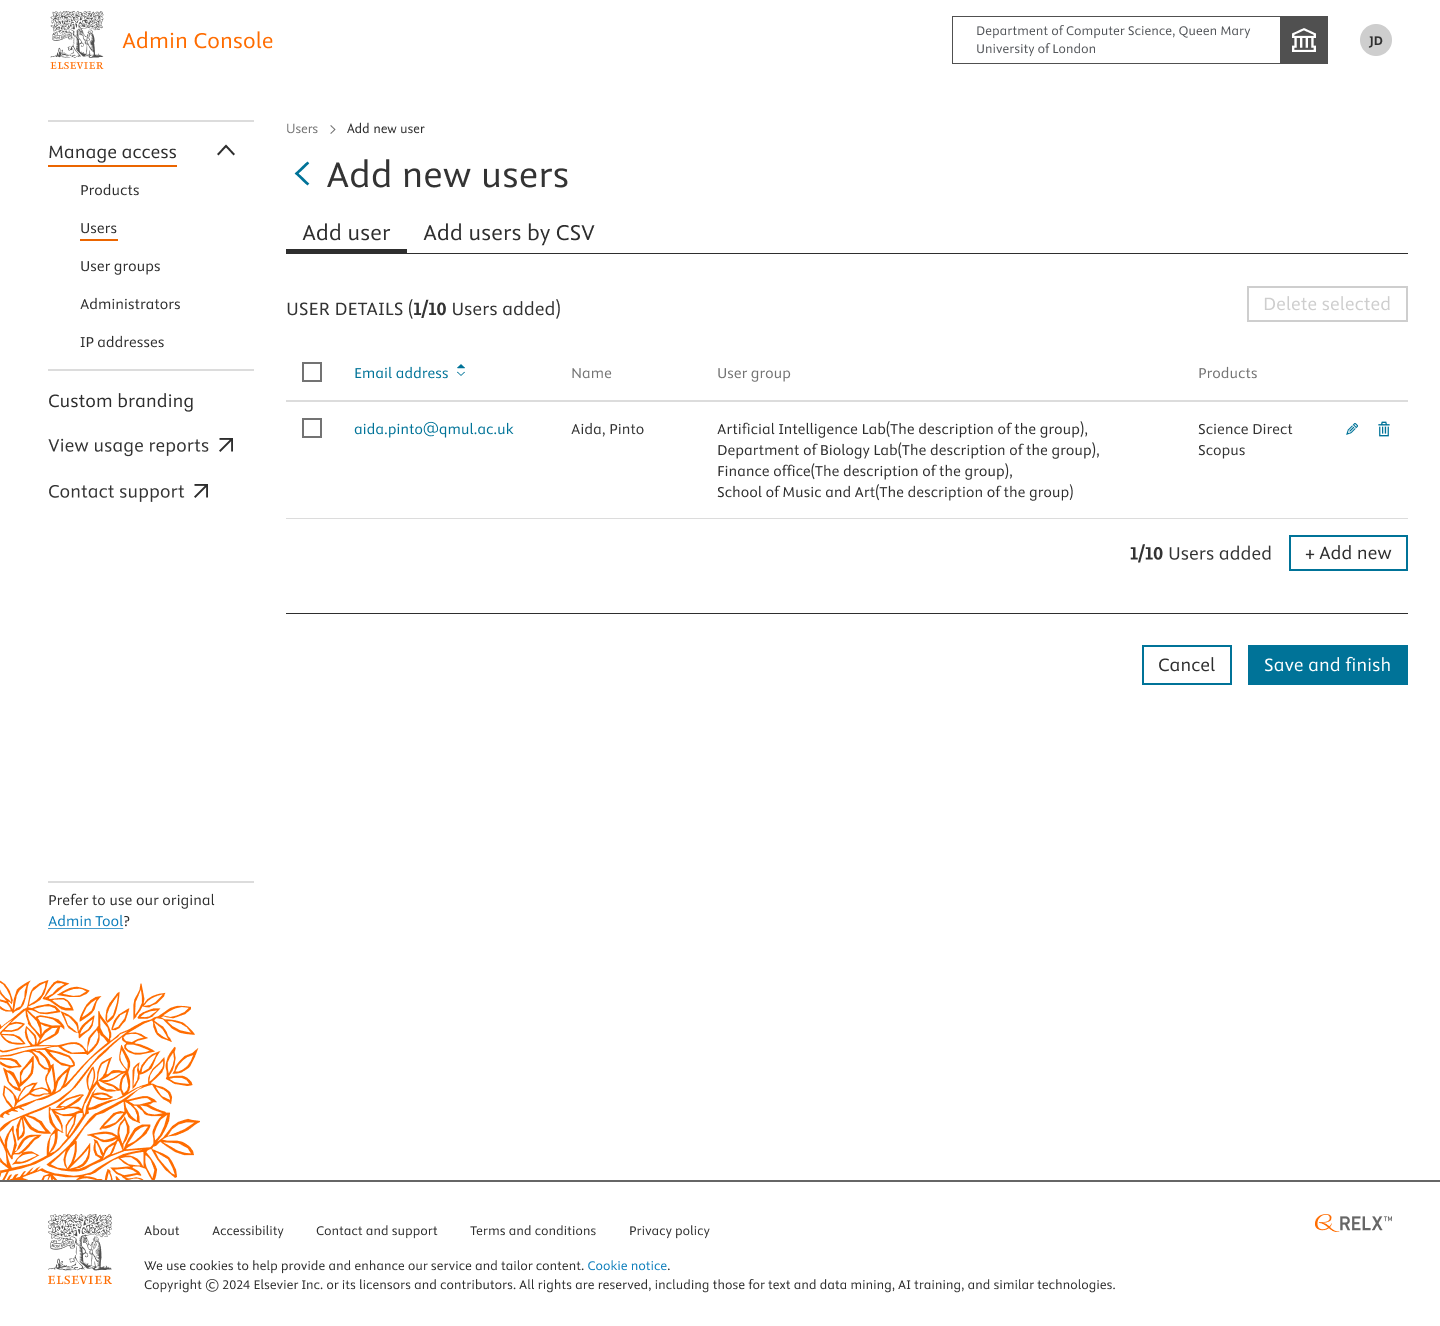
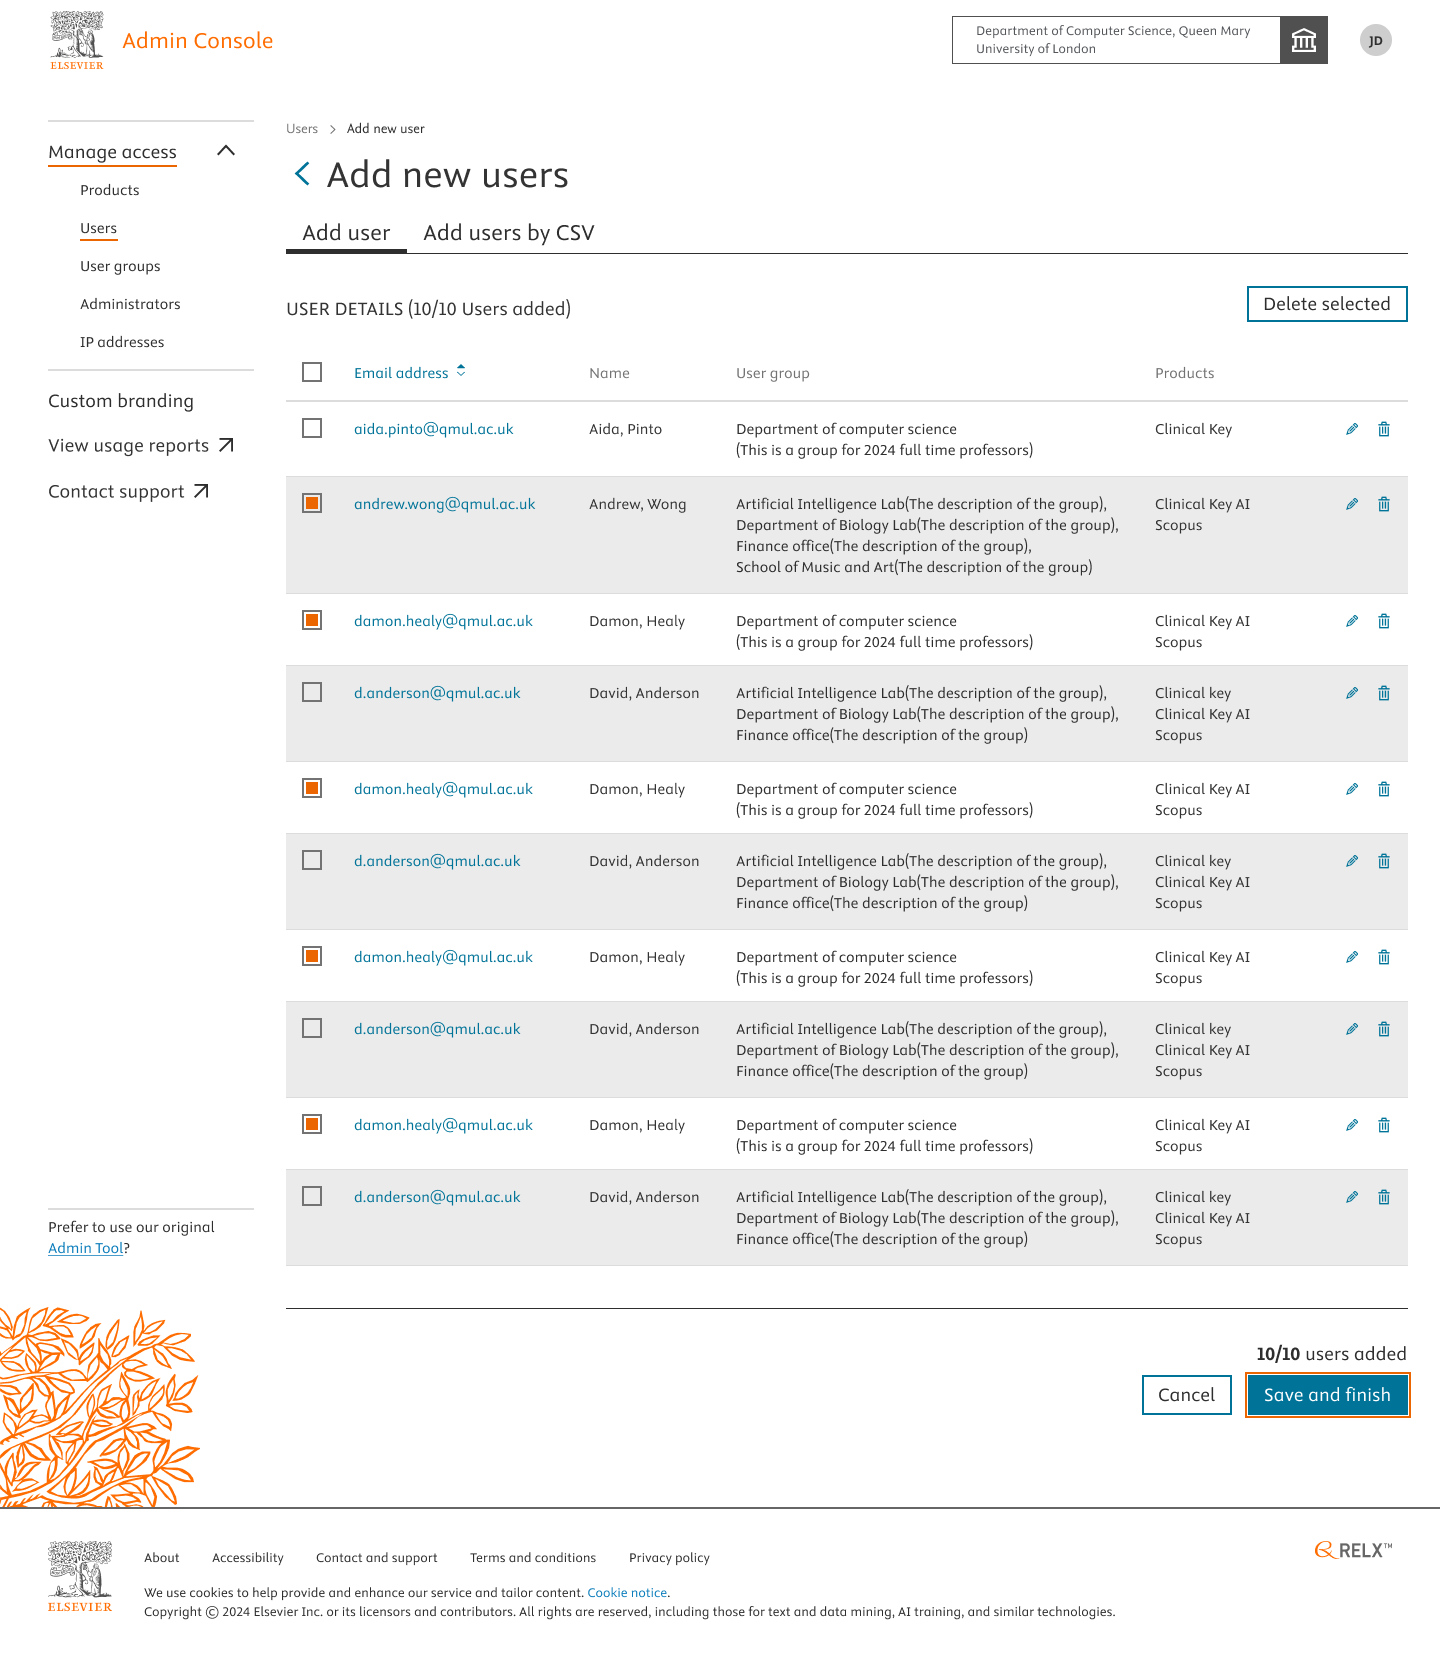
- After adding more users, you can view them before submitting to “Save and Finish”. Please note that a maximum of only 10 users can be added individually, if you wish to add more than 10 users at a time, bulk upload by csv is the best approach.
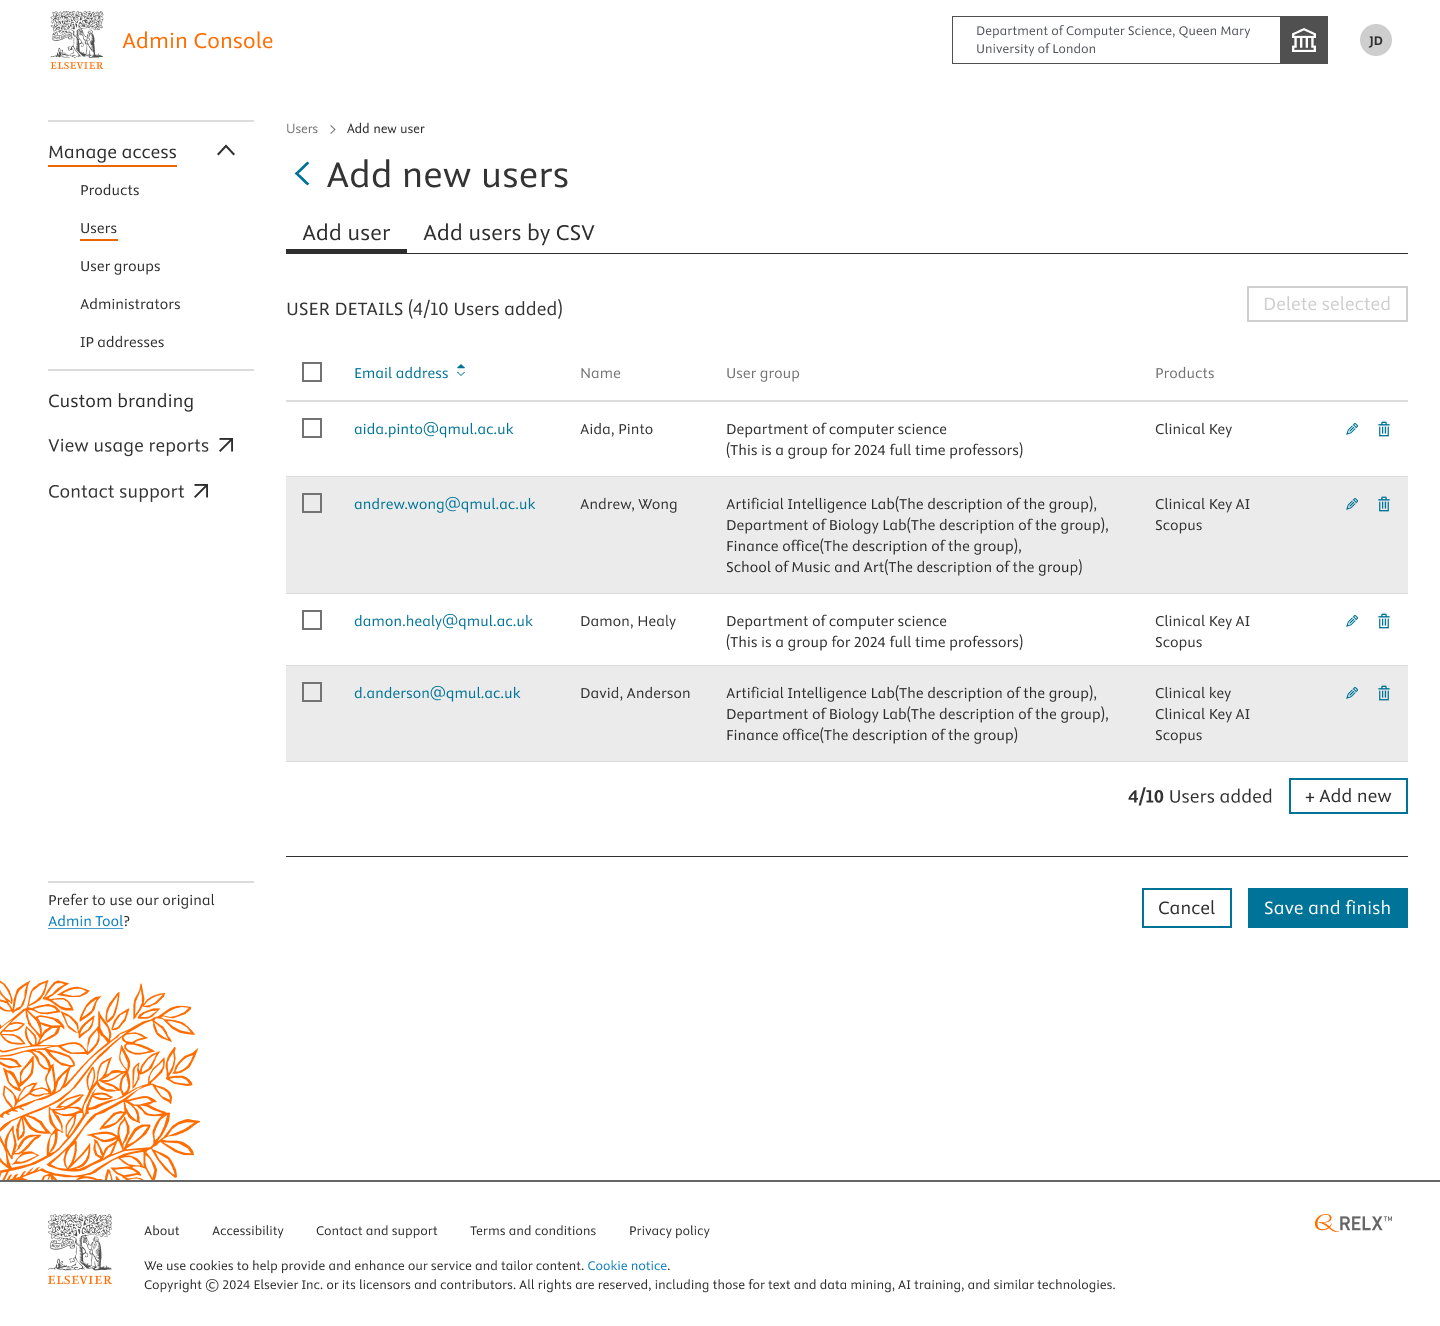
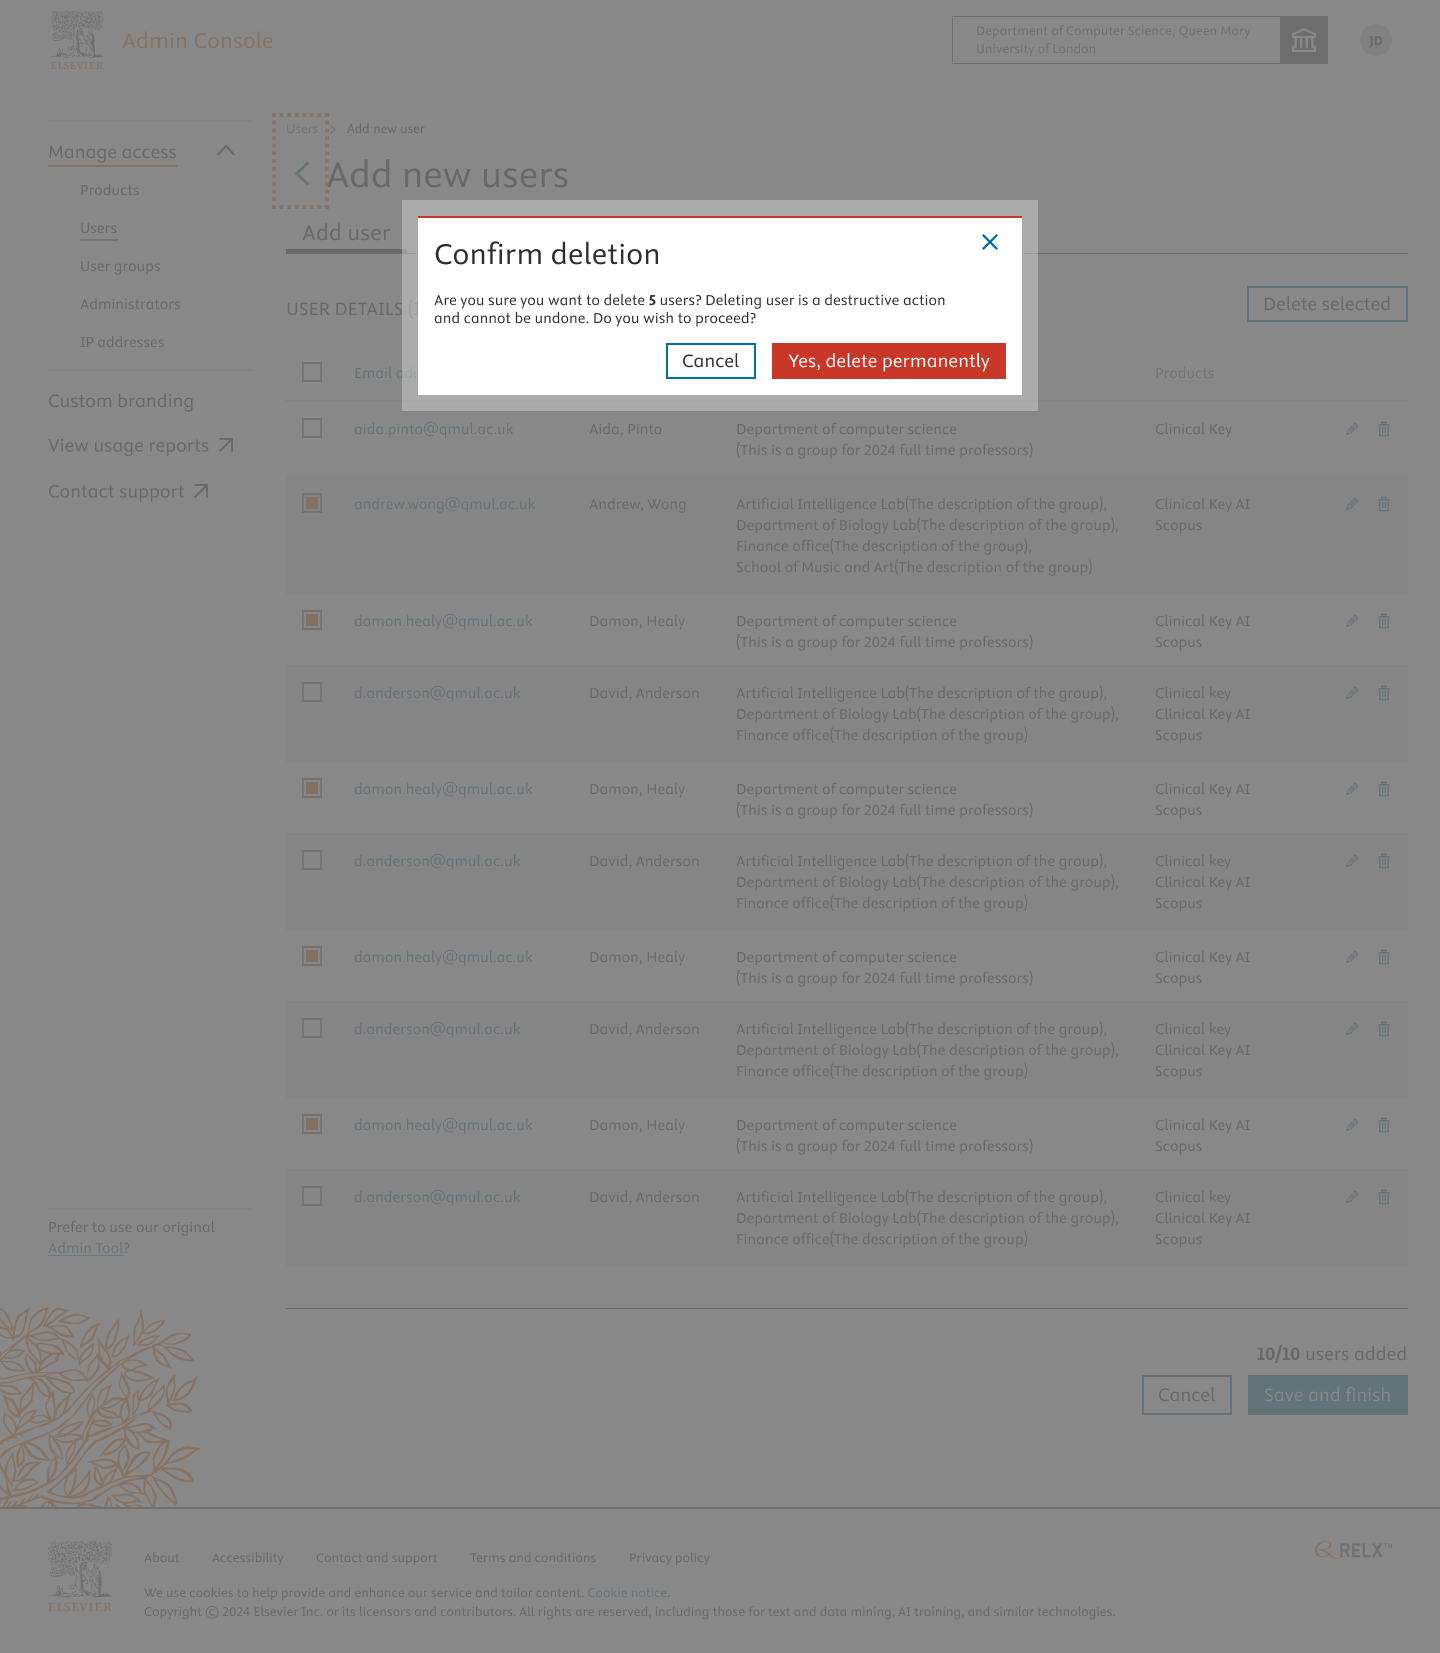
- Before “Save and Finish”, if you wish to delete couple of users whose details are incorrect or you wish to make some changes. You have the option to select the checkboxes and click on the “Delete Selected”

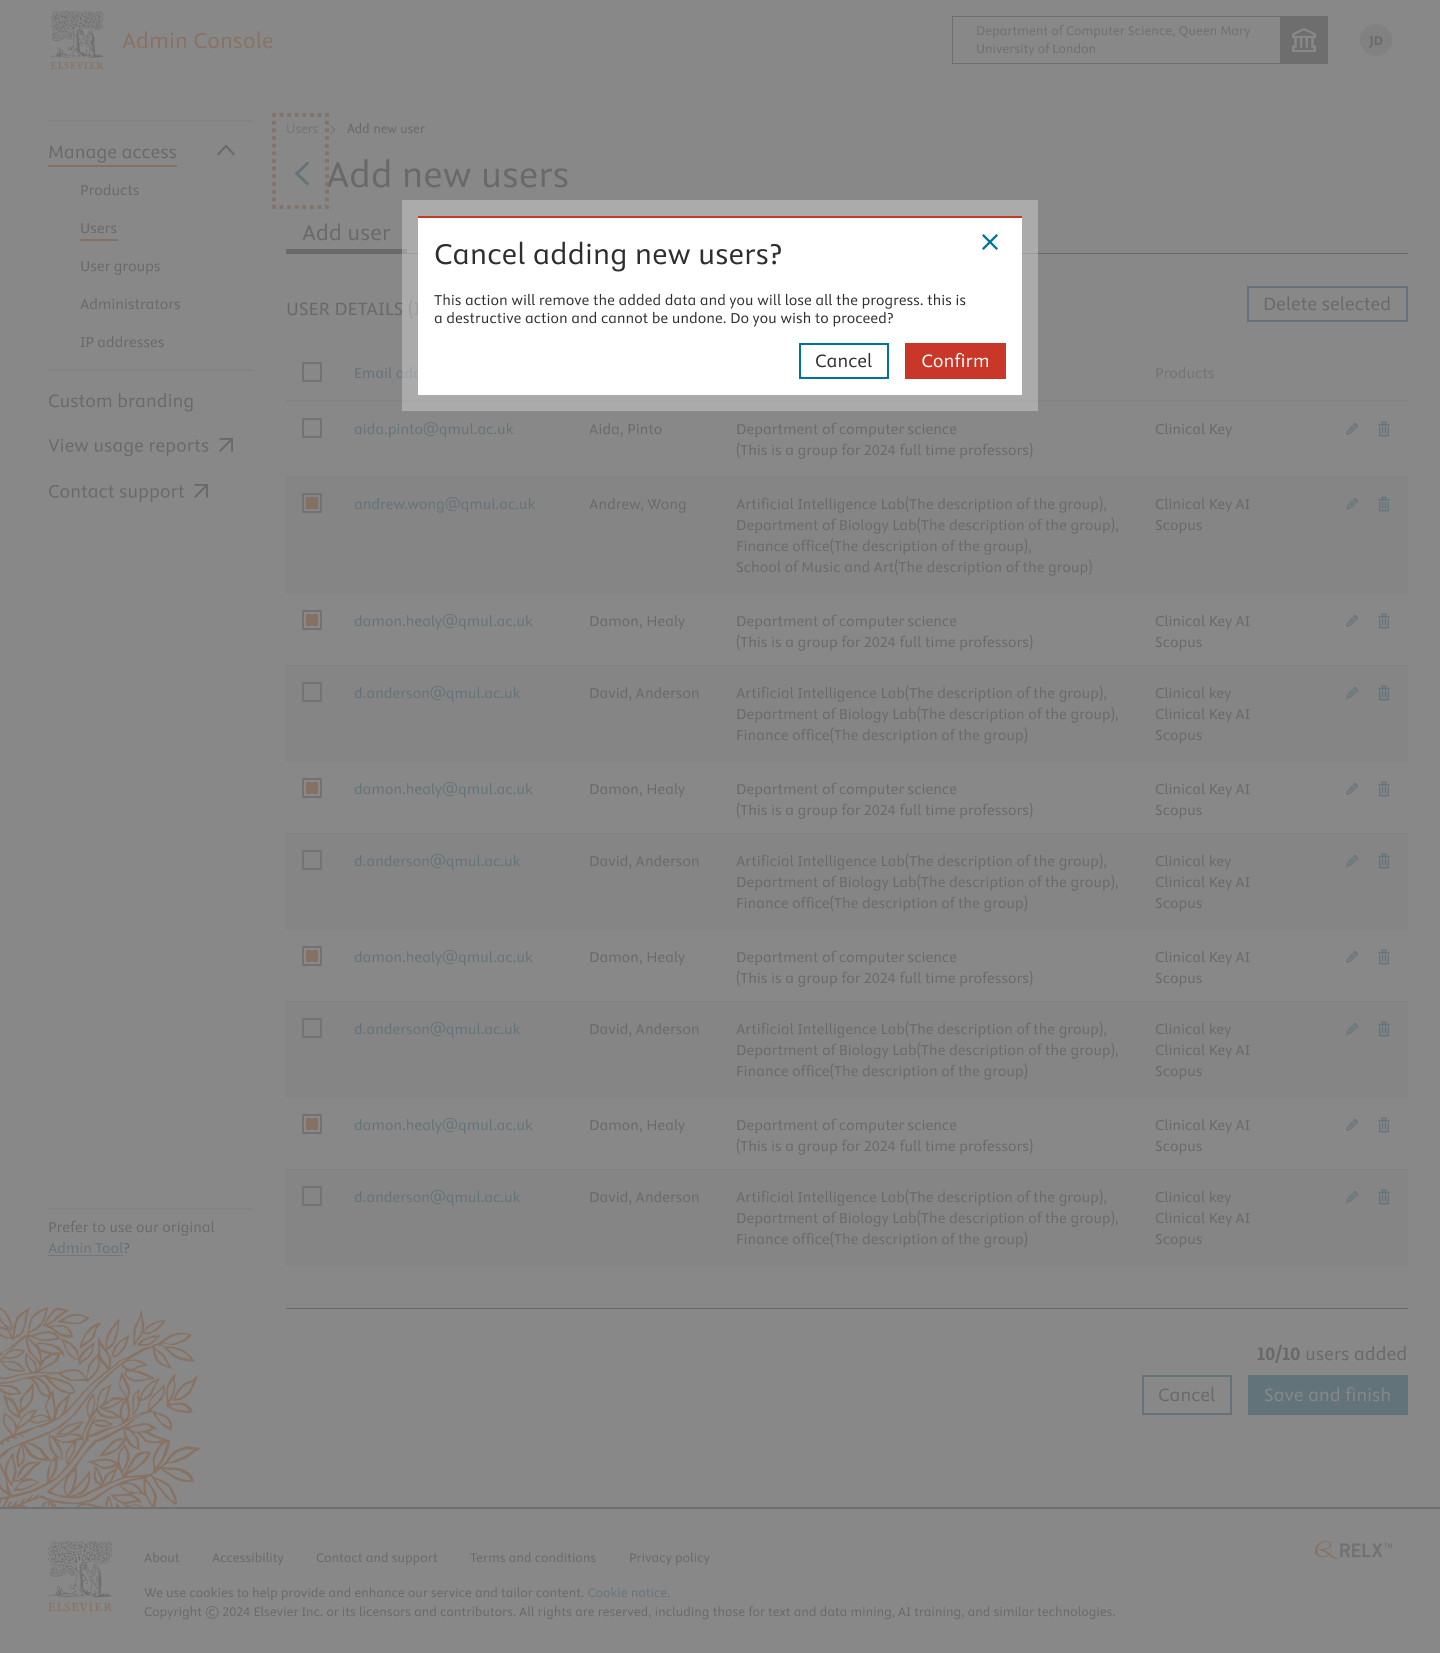
You’ll asked to confirm the deletion. If you wish to:- Cancel: It navigates back to the previous screen
- Delete: To proceed further removing the selected list of users
- At any given point of time, if you click on cancel or go back to the previous page, you’ll be prompted to click the cancel confirmation which takes you to the previous page of your navigation.
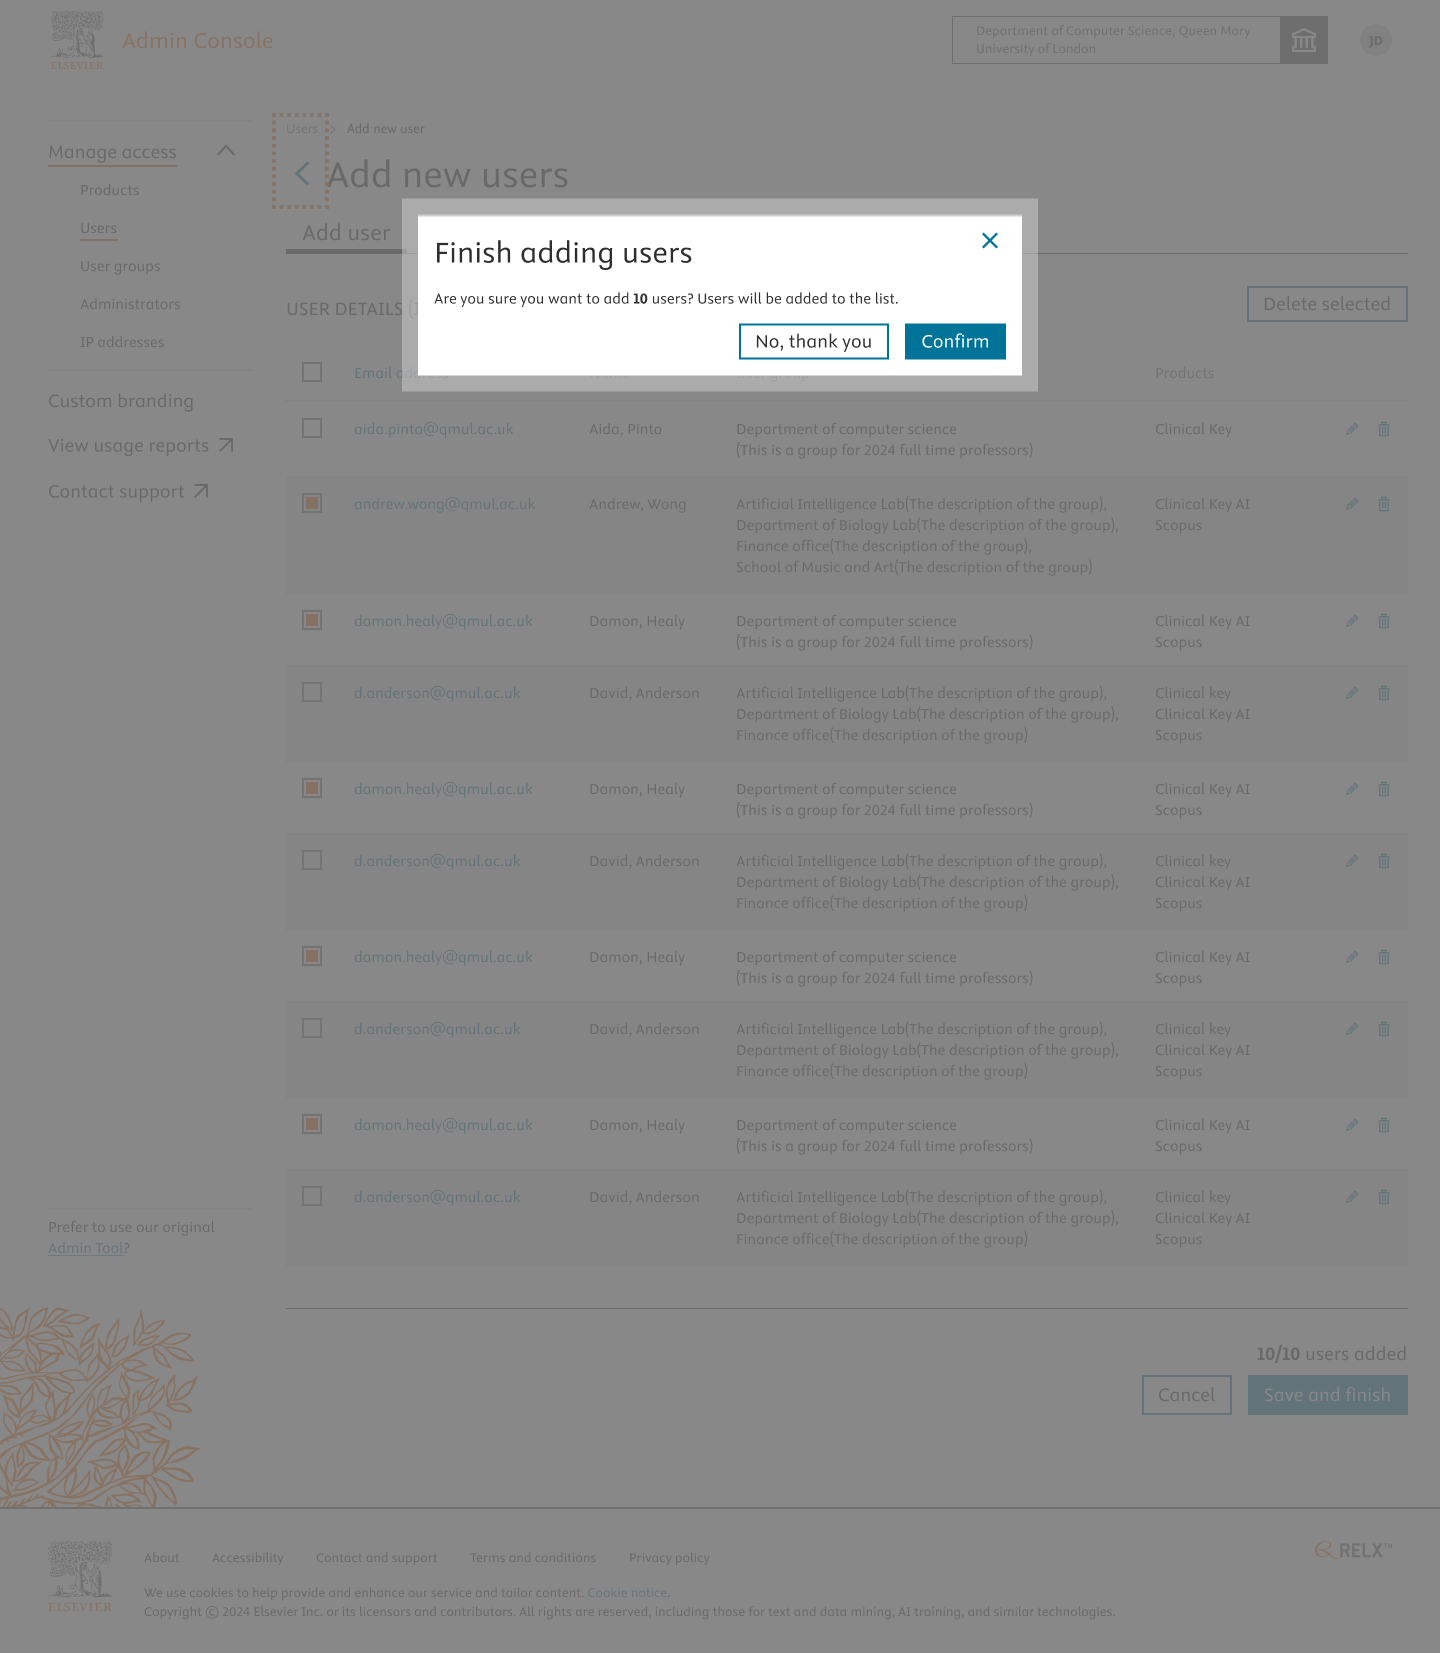
- If you do not wish to either delete or cancel the users added and wish to proceed further, Click on “ Save and Finish”.
- Click Confirm on the pop-up.
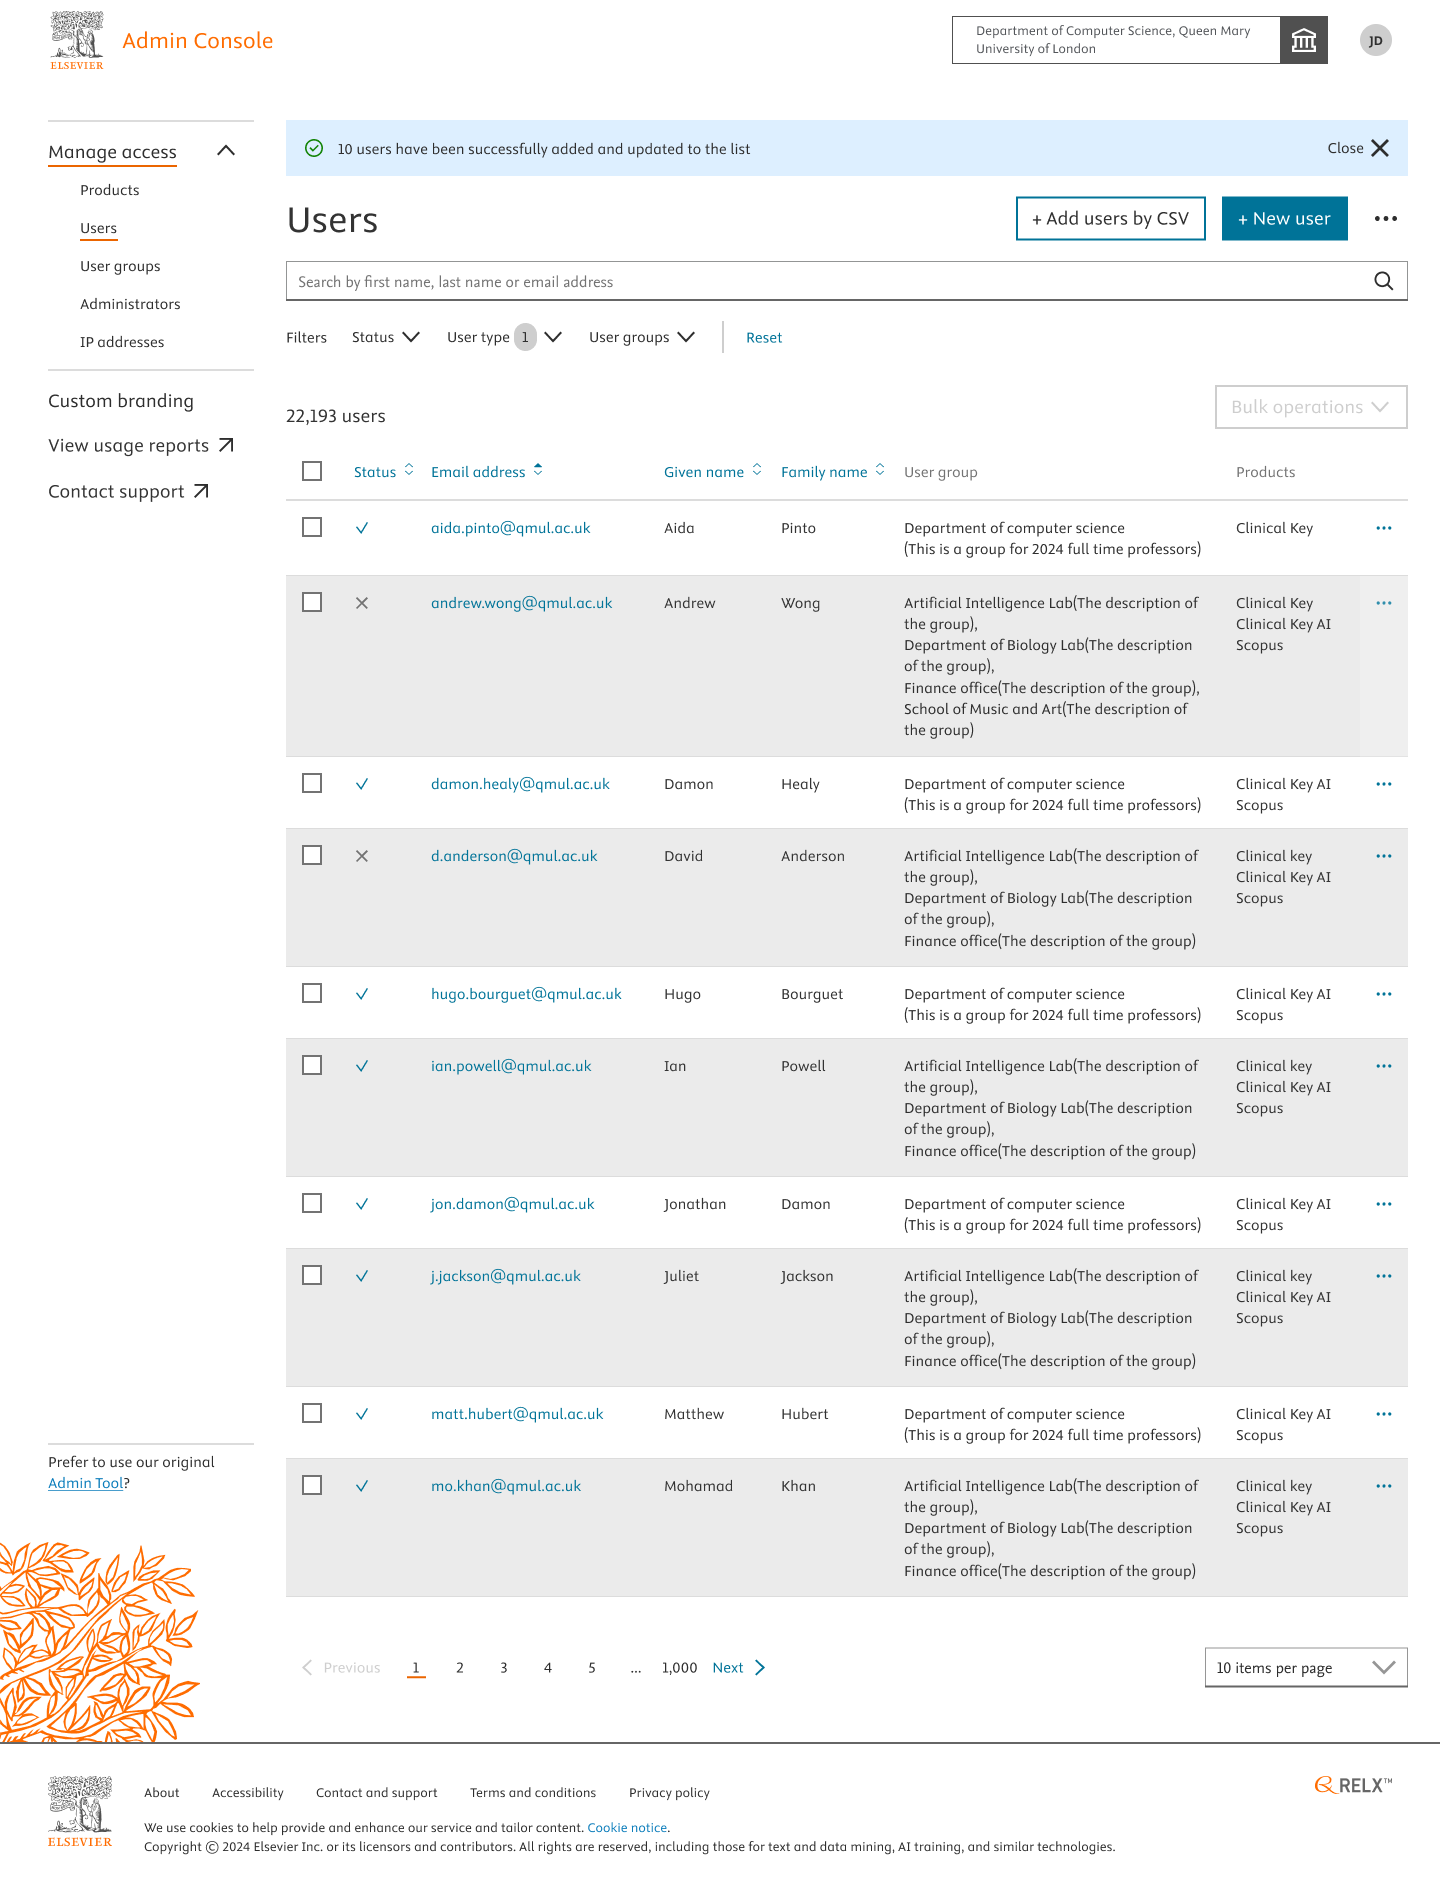
You’ll be notified on the Home Page with a success banner message mentioning that the group of users are added to your organisation and given access to the product. Invitation Emails will be sent to the User’s Email Address Inbox with a sign-in link to start using the product(e.g. CK AI).
These steps below inform adding users by CSV.
How
- Navigate to the Users section in Admin Console and click on “+Add users by CSV”.
- You’ll be redirected to the “Add users by CSV” tab which includes 4 steps to finish the user creation by CSV process.
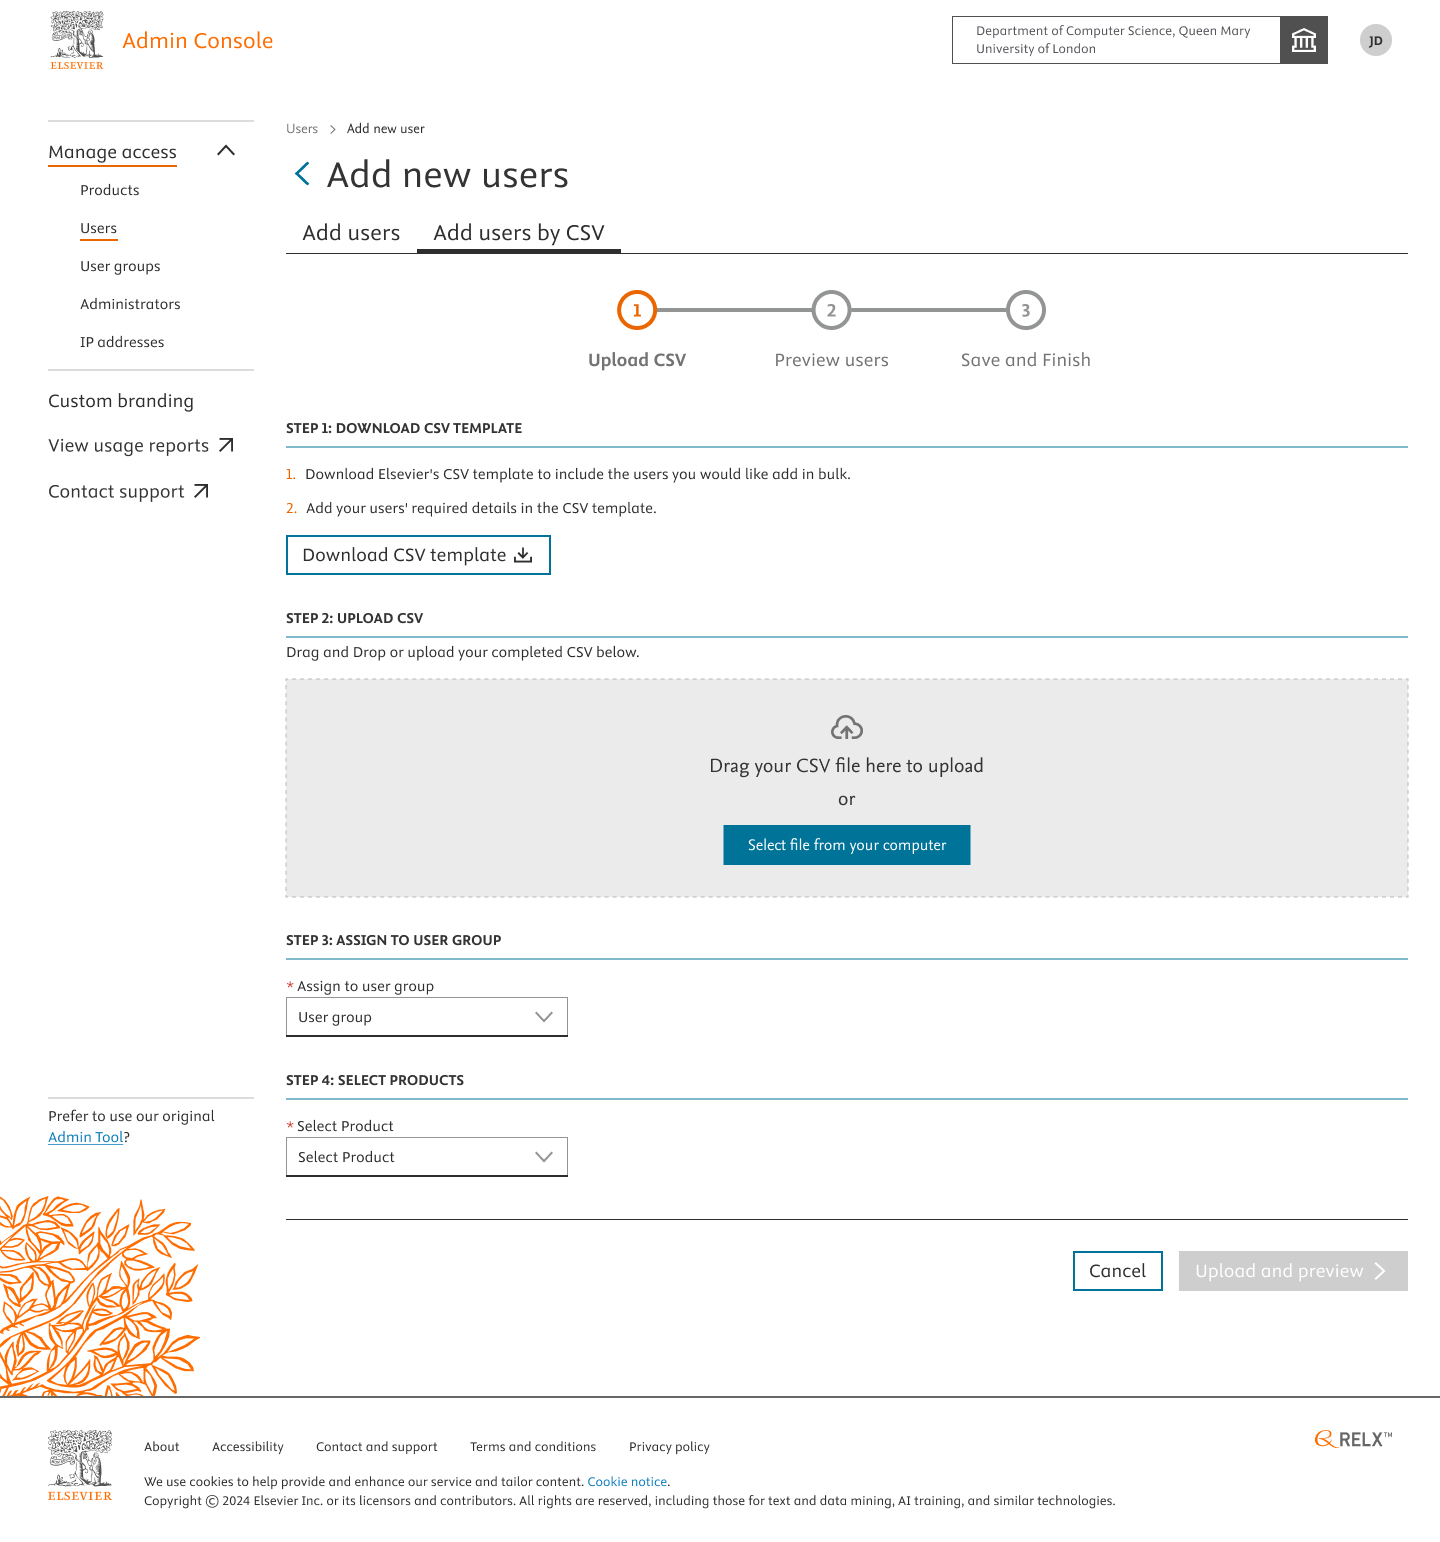
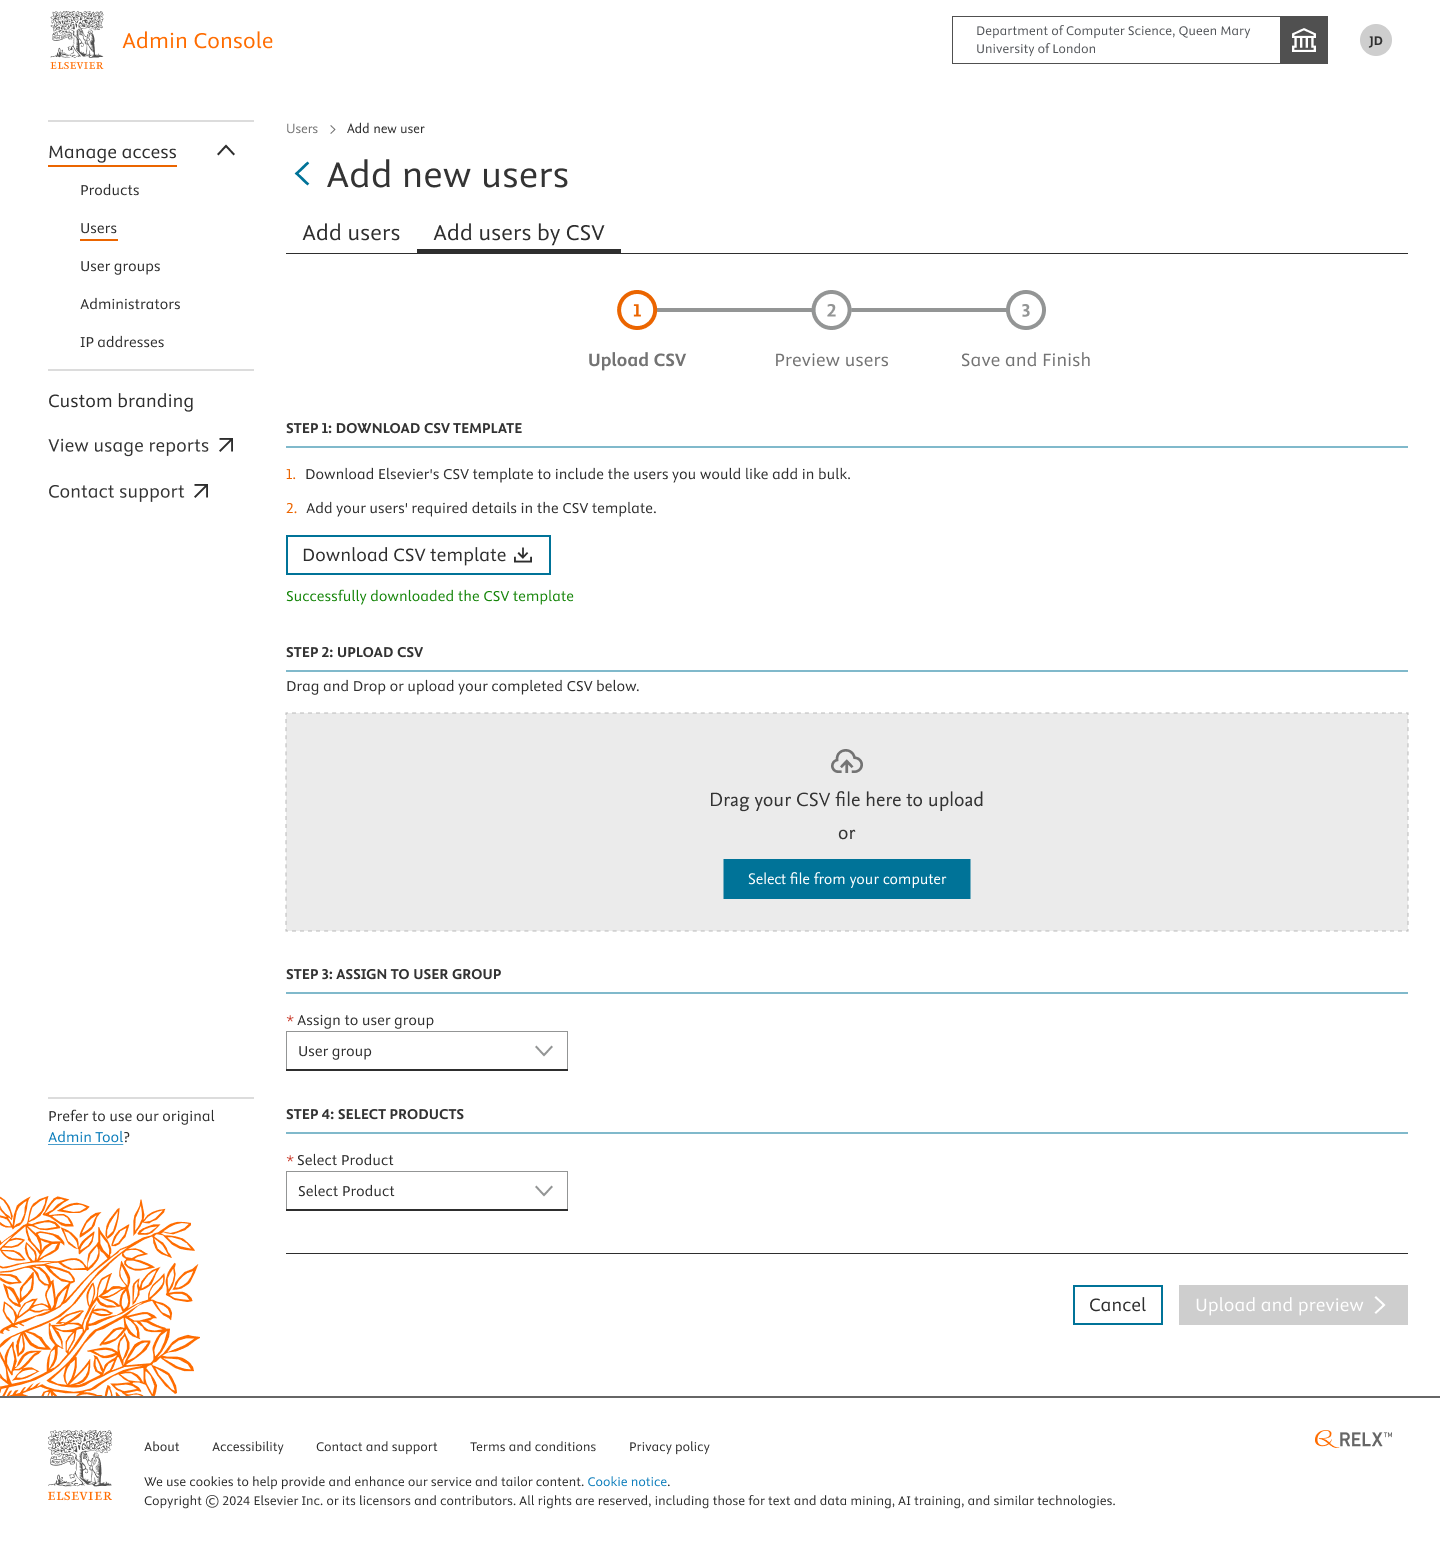
Step 1: Download the CSV template and add the user details(Given Name, Family Name, Email Address). You’ll be informed with a text message in green after you finish a certain step.
Step 2: Upload the CSV with the user details populated. Again you’ll be informed with a green colored text message after the step is done.
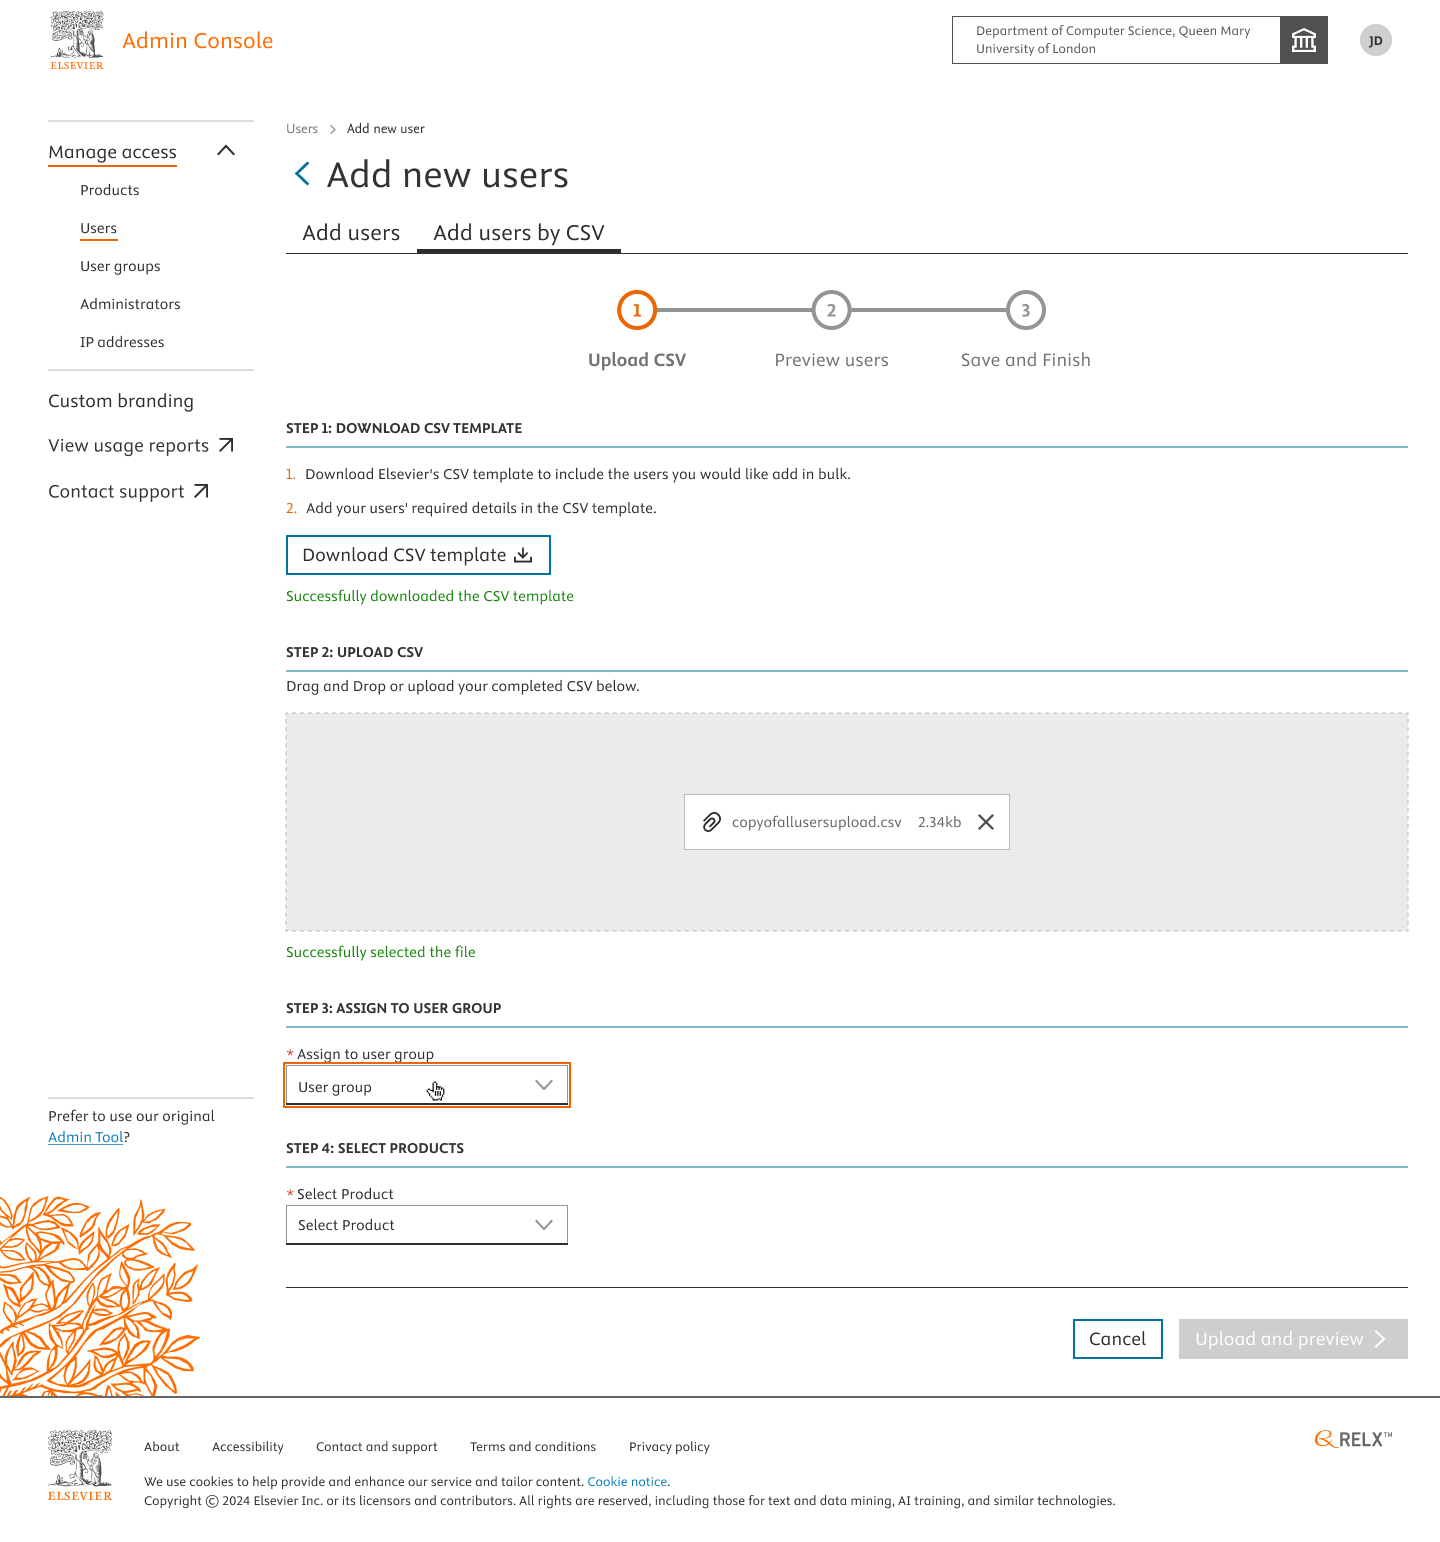
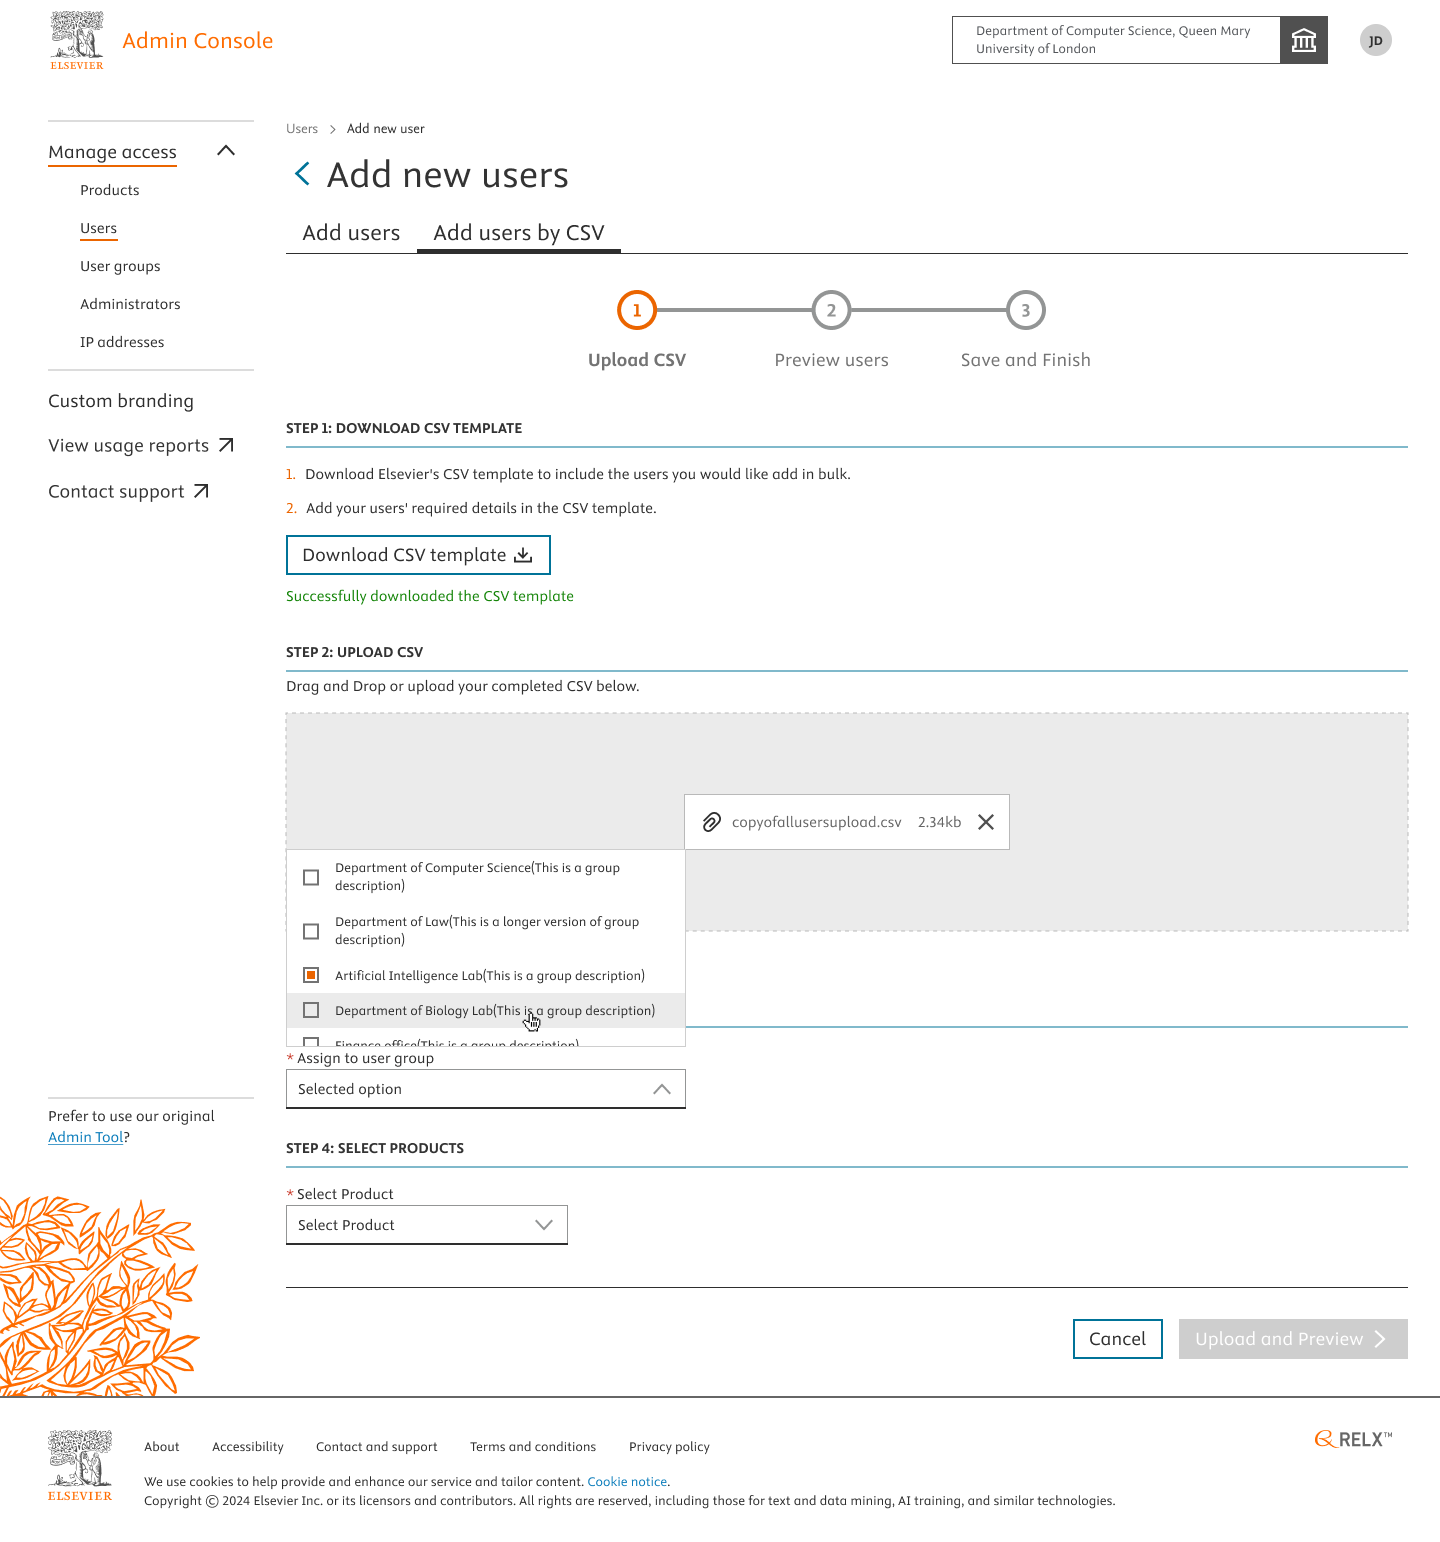
Step 3: Assign a user group.
If you are adding users to give access to CK AI, please select the “CK AI Access group” in the user group drop-down.
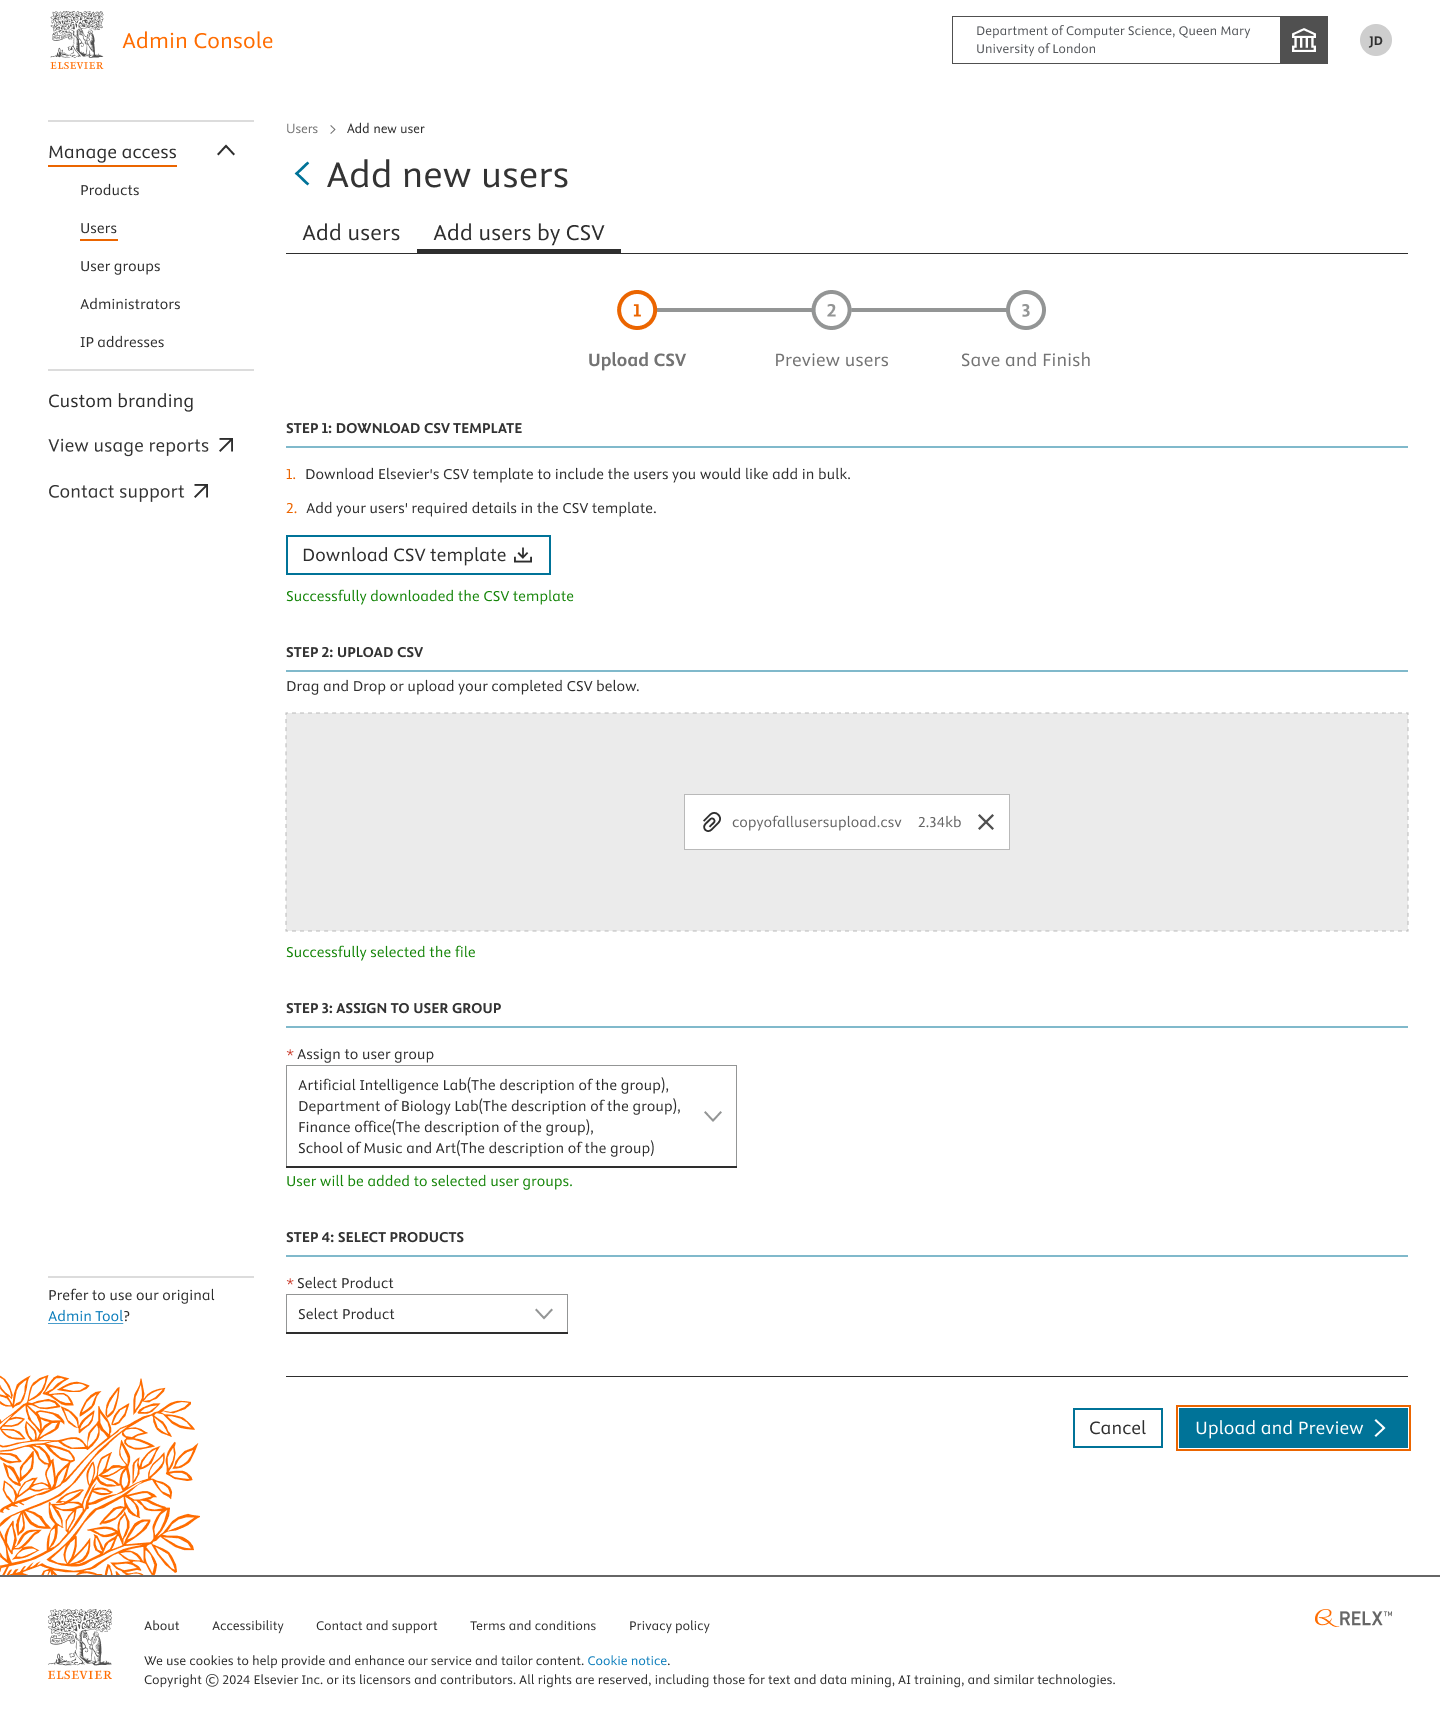
Step 4: Select a product. For Ex: Clinical key AI.
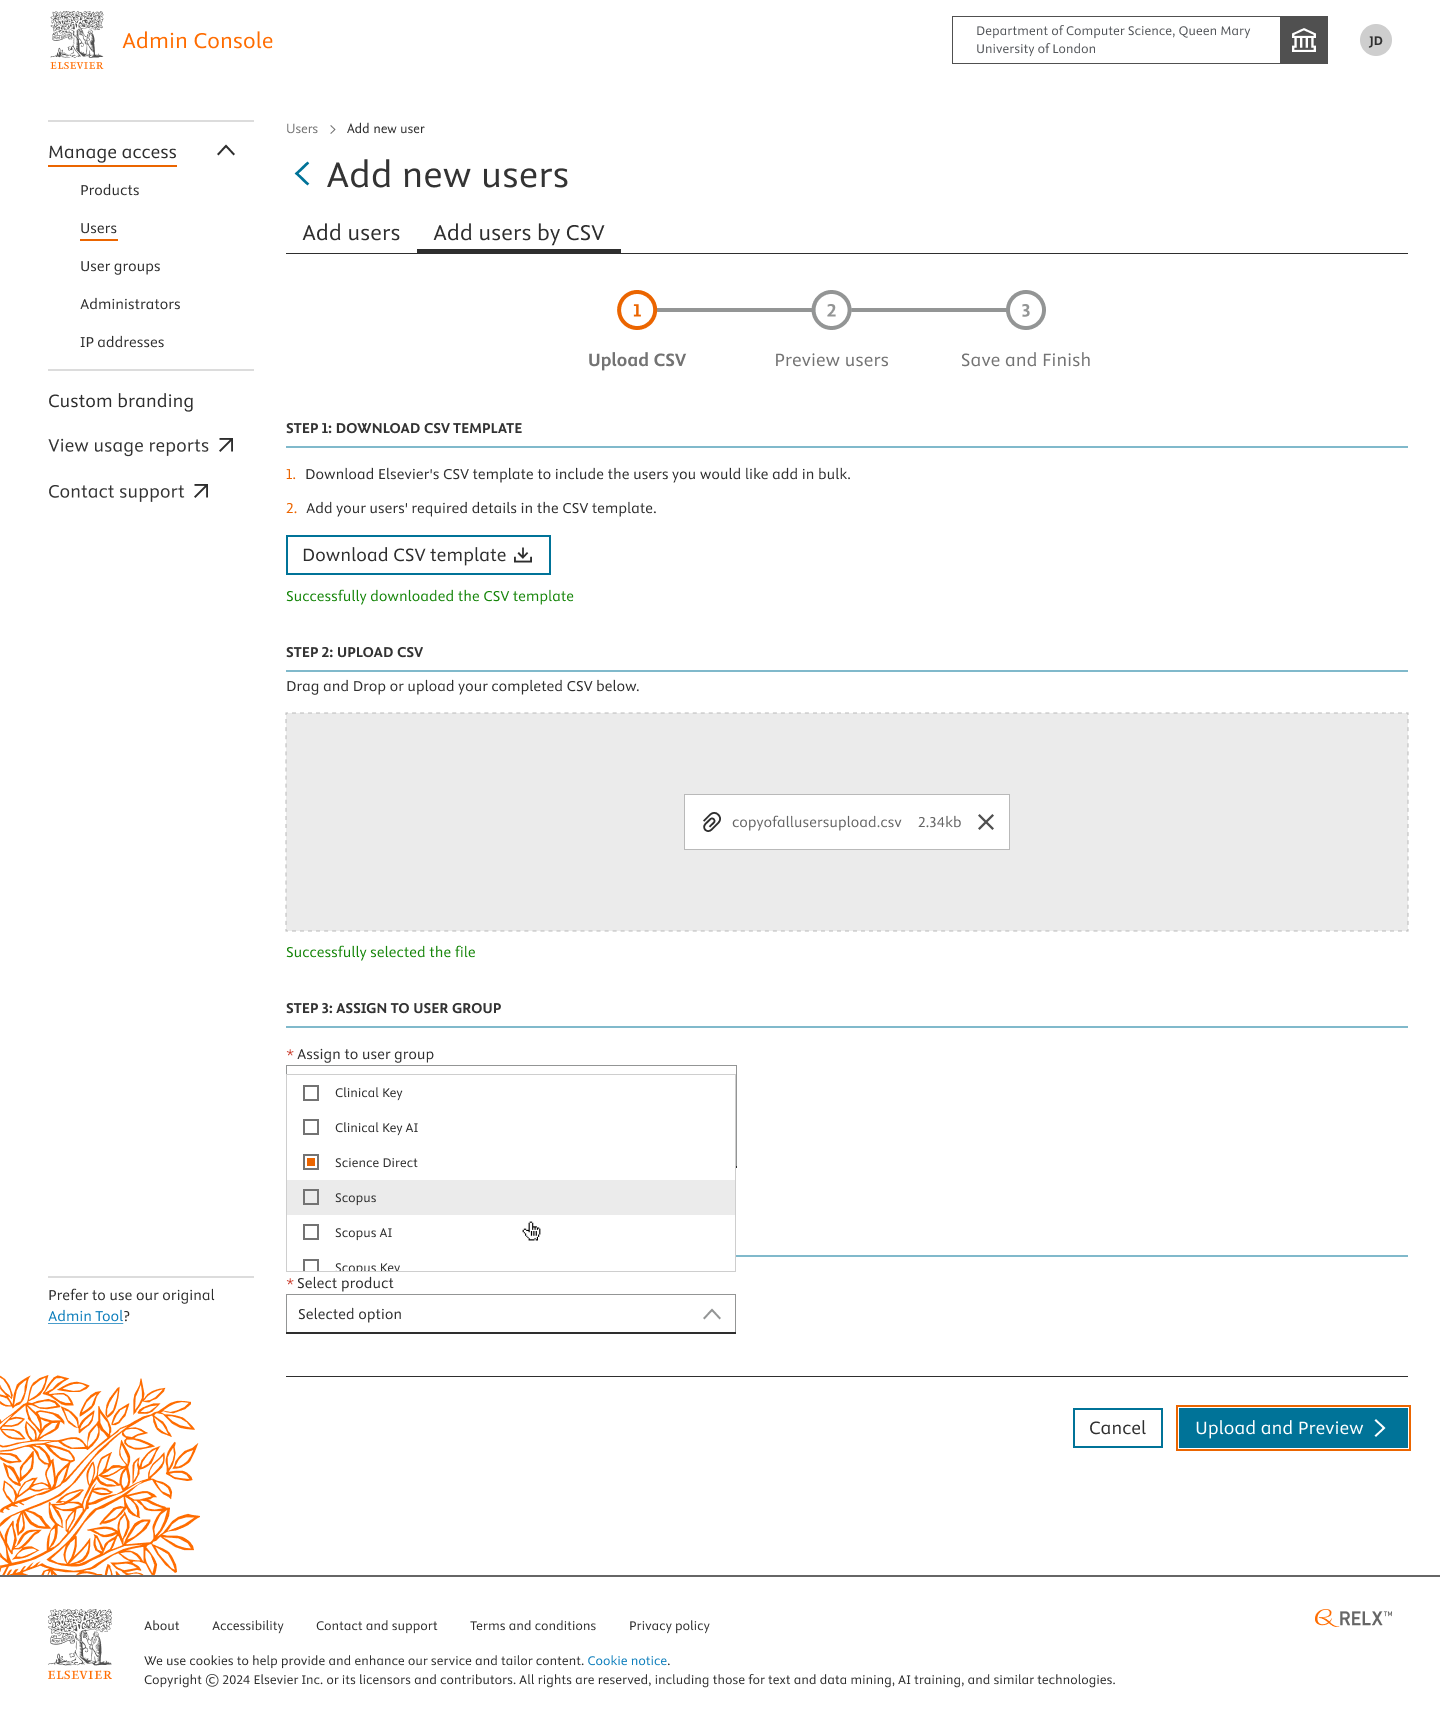
Click on “Upload and Preview” to see the list of users added, the group and product selections before final confirmation to “Save and Finish”.
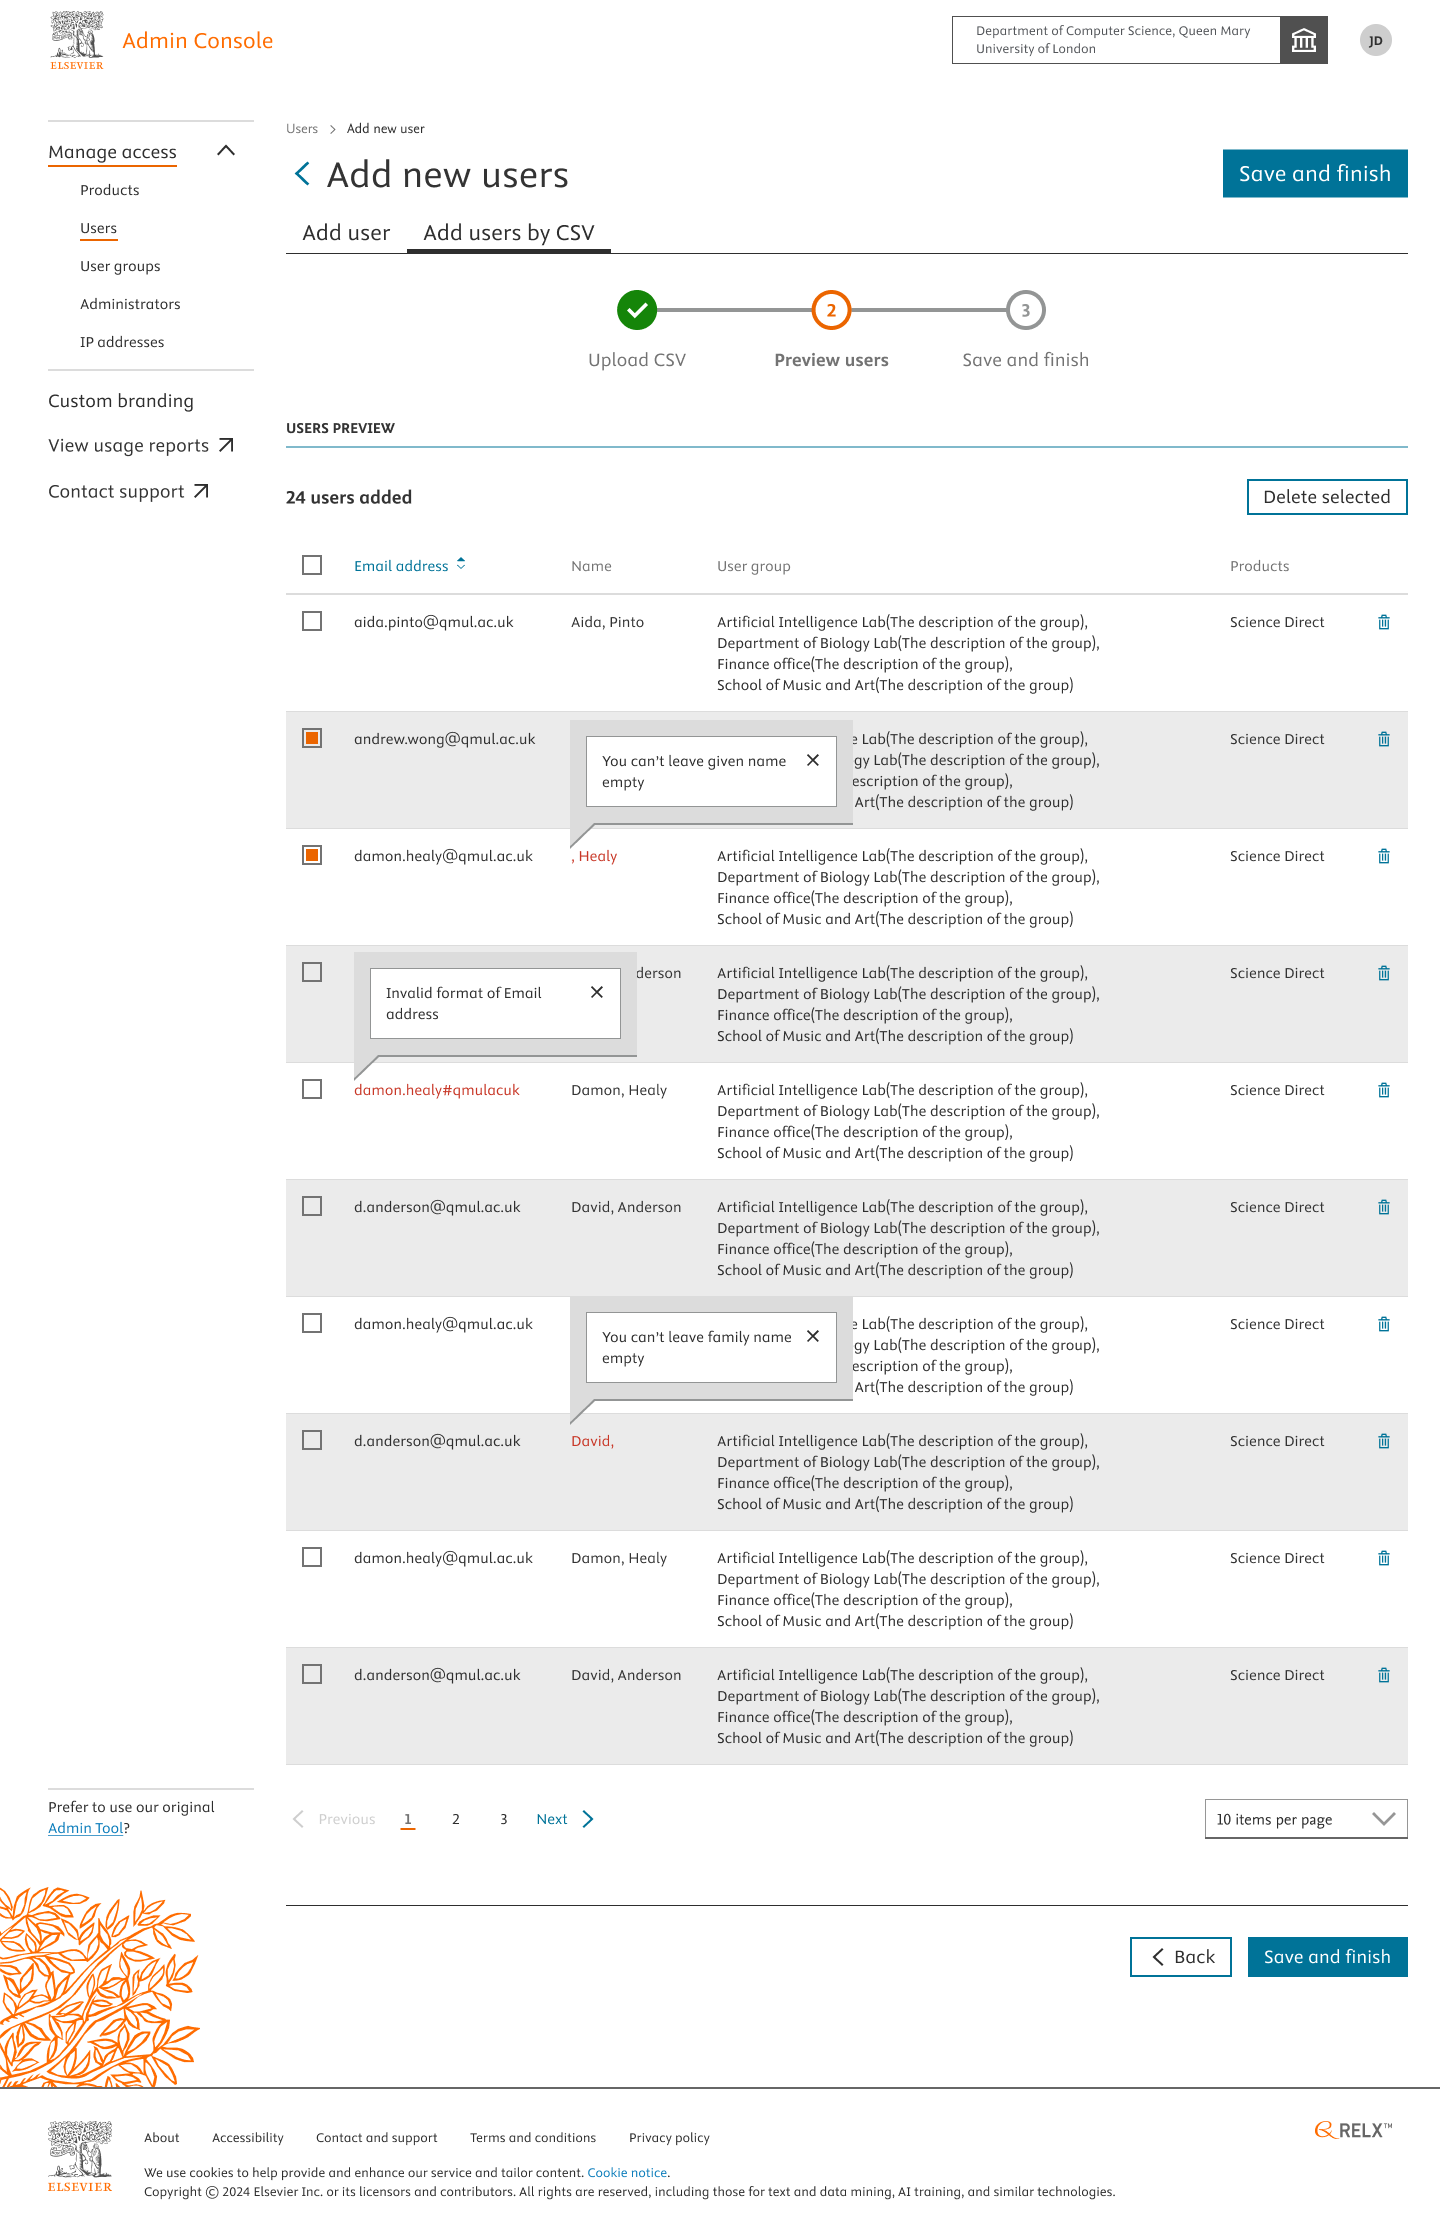
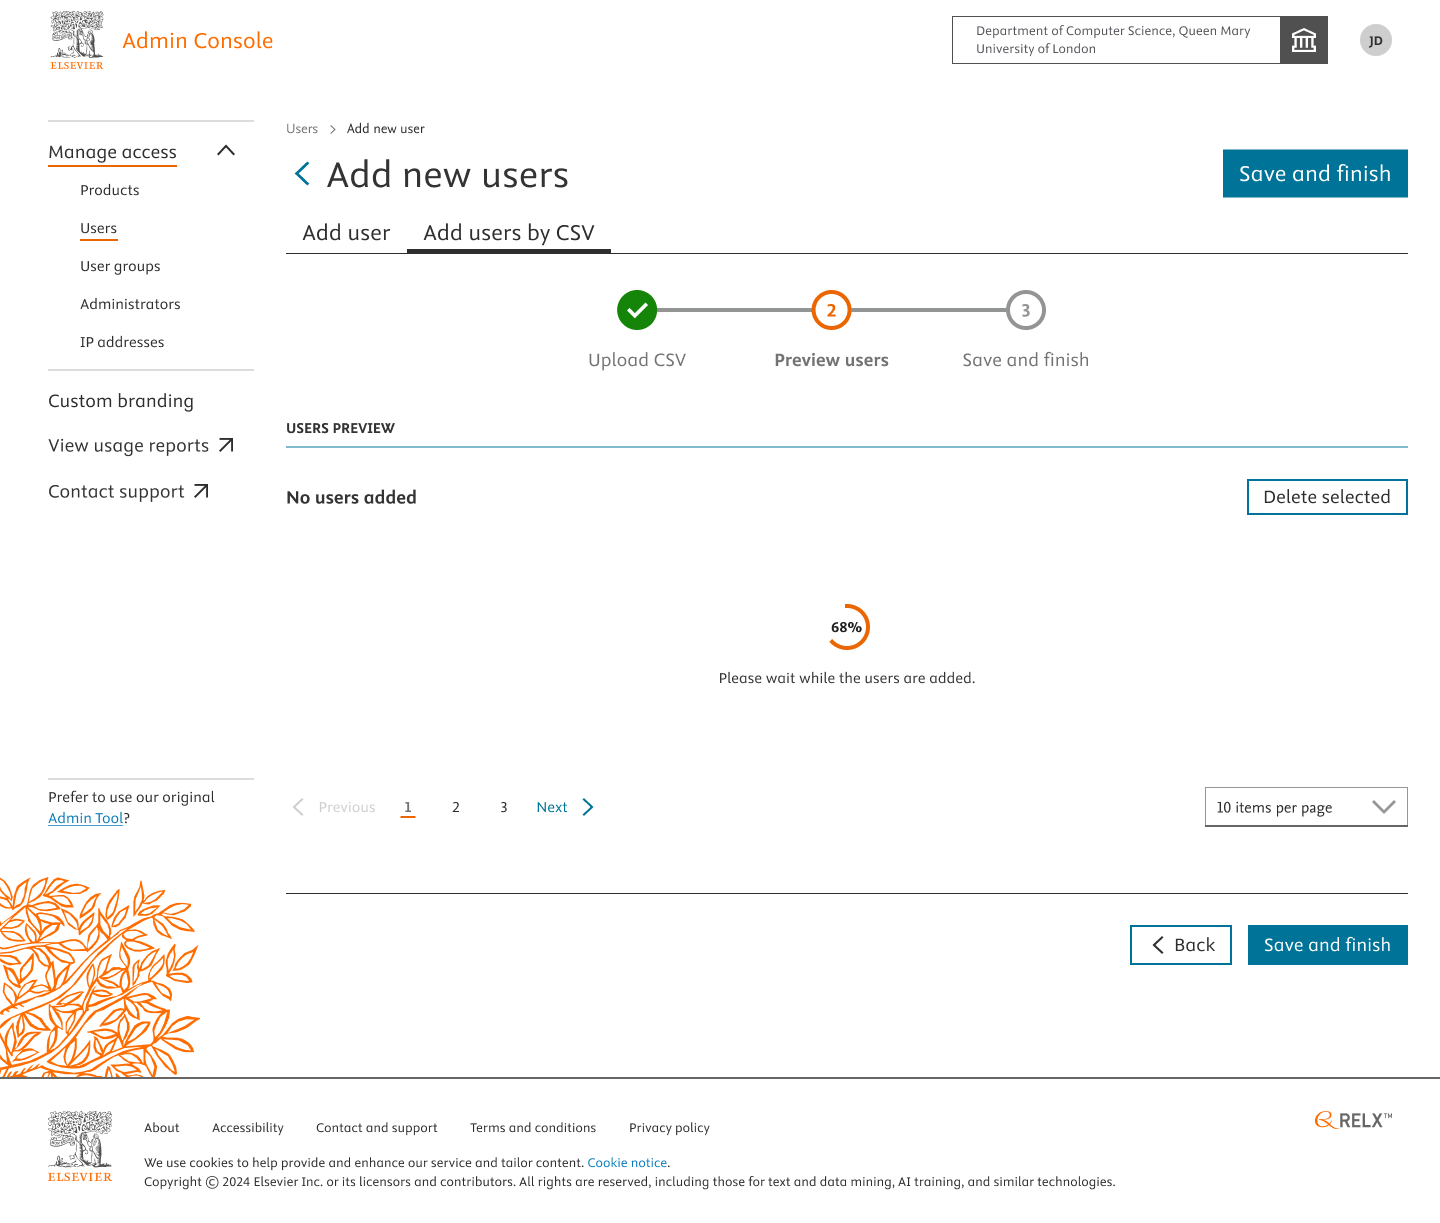
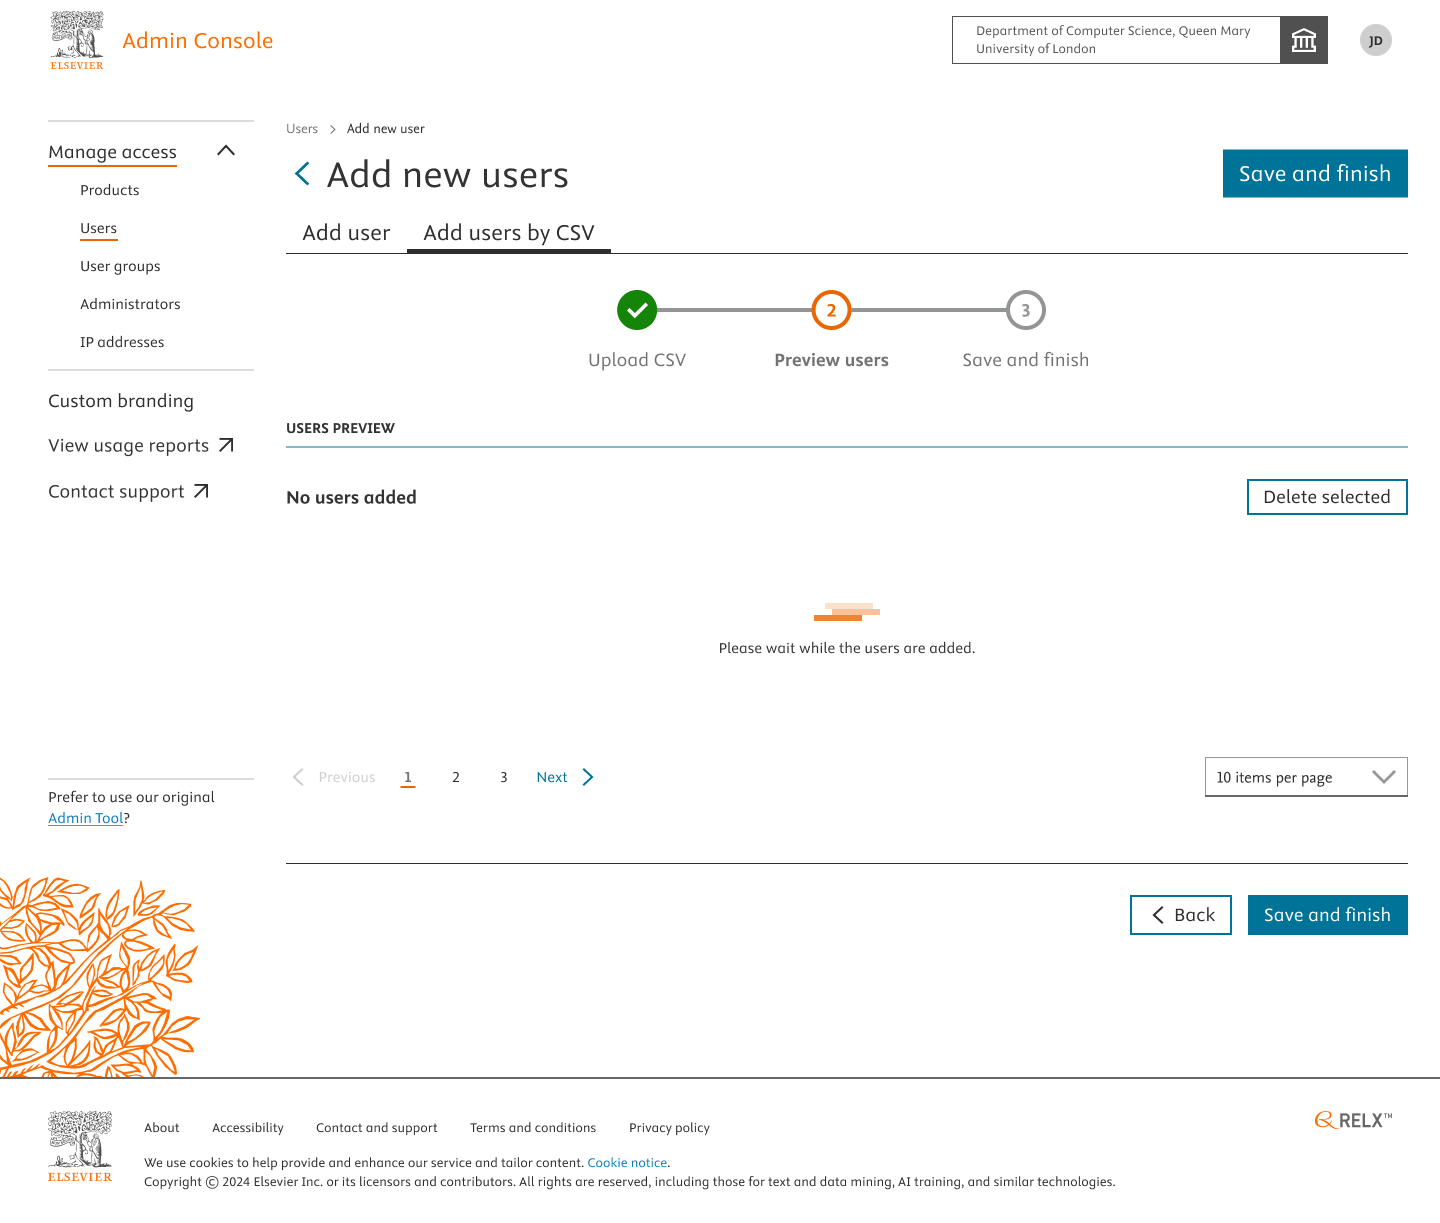
If the csv uploaded has a large number of users(>100). Please expect a delay in loading, parsing and previewing the users on the screen. You’ll be displayed with the loading screen during this.
At any given point of time, if you wish to go back or delete few users added, you have the option to do so by clicking on “< Back” and selecting the checkboxes and deleting them.
But if you wish to proceed to add the users successfully to provide them access to the product(e.g. Clinical Key AI). Click on “ Save and Finish”.
You’ll be asked to confirm adding the users. Click Confirm.
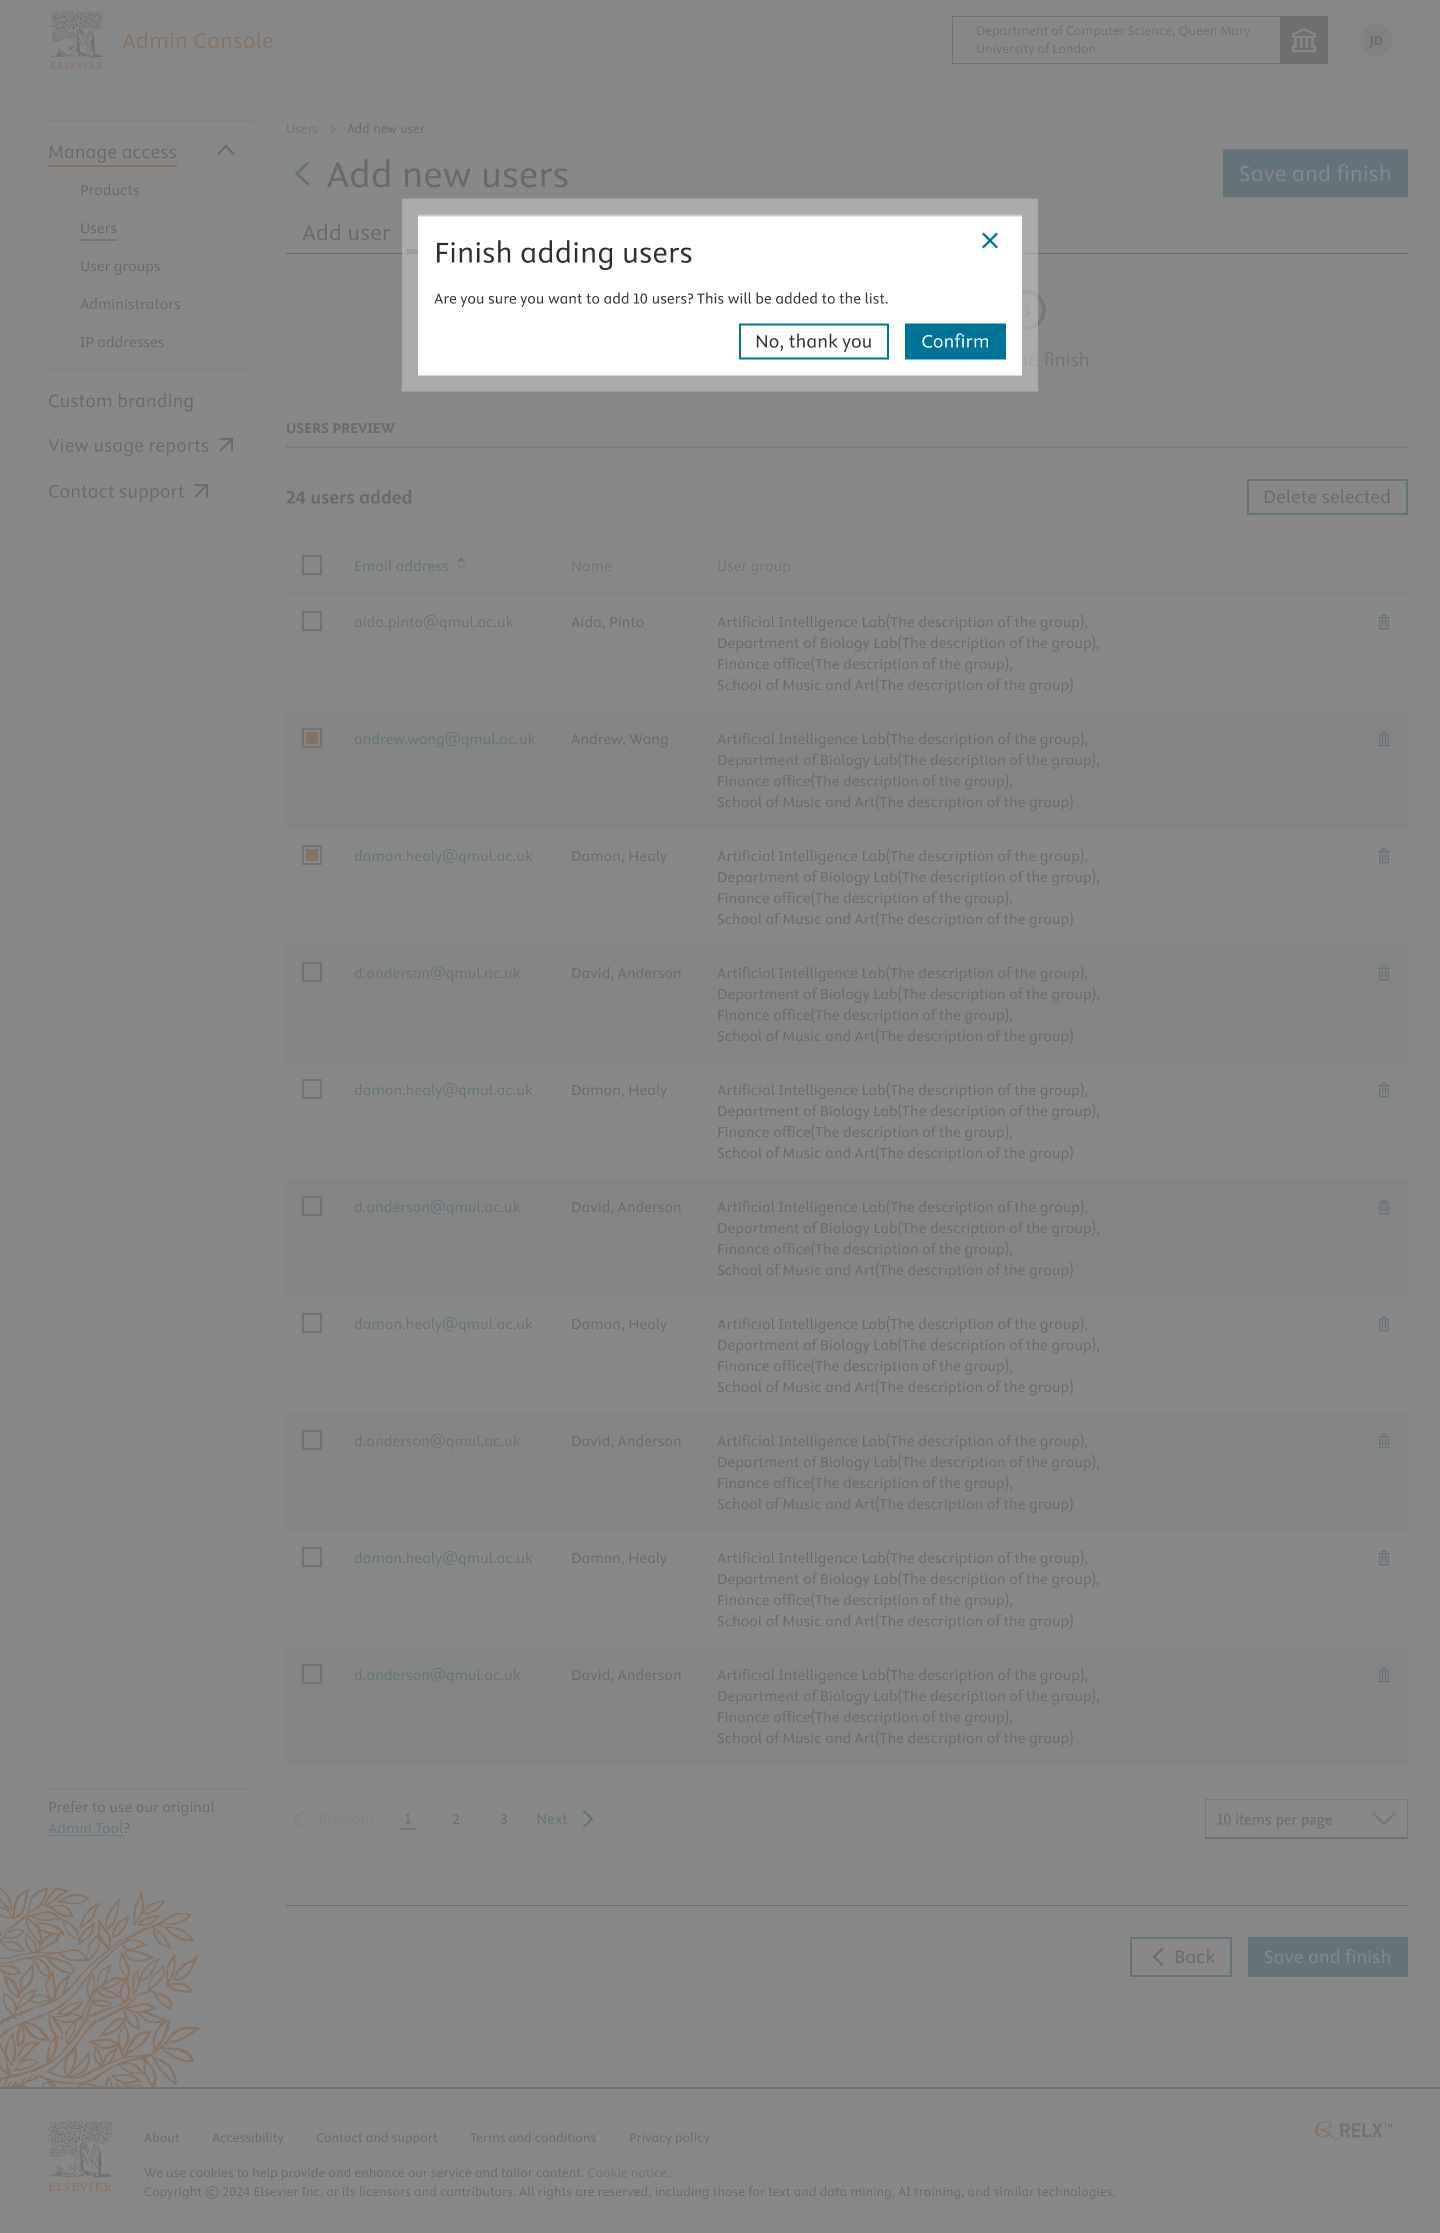
Upon Successfully adding users by CSV, you’ll be notified with a message banner on the top of the Home Page.
Did we answer your question?
Related answers
Recently viewed answers
Functionality disabled due to your cookie preferences