View by category
How can I share notes and highlights within Bookshelf?
Last updated on December 16, 2024
Learning is a social experience, and often, so is studying. The ClinicalKey Student Bookshelf feature facilitates communication through Sharing. This feature allows students to collaborate with peers on a study guide, helps teachers to guide students by selecting key passages, and enables faculty to share insights with fellow instructors. Please note that Sharing is not available in the mobile app.
How
Follow the instructions in the sections below to share notes and highlights.
Illustrated guides are also available here:
To share your notes or highlights with another user, follow the steps below:
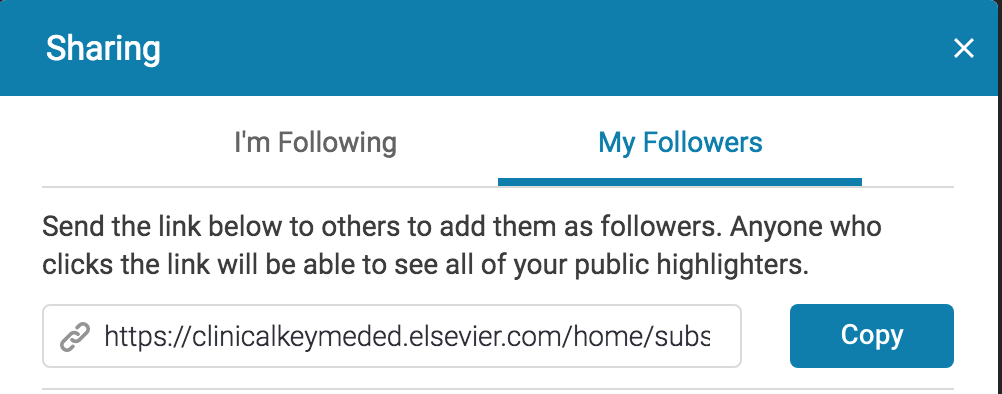
- From the Tools menu in the upper-right corner of My Library, select ‘Sharing’.
- Choose ‘My Followers’.

- Click the ‘Copy’ button.
- Paste the link into an email, and send it to any friends with whom you wish to share public notes and highlights.
Please Note: For sharing to work, both friends must be ClinicalKey Student users and have the same titles in their account. Shared notes will then show up in the Workbook Annotations tab of your book.
To follow another user:
- Make sure you are registered and (ideally) logged in.
- You will have received a link from the friend you wish to follow. Click the link to view that person’s highlights/notes in your book.
- If you have any problems with the link, try copying it to a tab beside your logged-in account.
- See the ‘Share your notes/highlights’ section for instructions on how to generate one of these links.
- You can remove followers at any time, and they will not be notified you have blocked them. (Please Note: Blocking is permanent and non-reversible.)
Follow the steps below to create public notes/highlights on the online platform. (The Public feature is not available on the mobile app.)
- By default, all your notes and highlights are private. You will need to create new ‘public’ highlighters that anyone following you can see.
- To create a new public highlighter, go to the Tools menu, and select ‘Highlighters’.
- In the Manage Highlighters window, name the highlighter, and select the ‘public’ option. Click ‘Save’.
Please Note: Notes and highlights are connected and are saved together.
- Highlighters can be renamed, deleted, or added.
- You can decide whether they are public or not.
- Notes are added via clicking on content.
- The Workbook Annotations tab inside a book allows you to go back through all your notes and highlights in that book.
Did we answer your question?
Related answers
Recently viewed answers
Functionality disabled due to your cookie preferences